
Month: July 2015
Homemade Nachos
Last night at 5:15 pm, I had to come up with dinner. So as I browsed the pantry, I saw some leftover tortilla chips and thought – Nachos! I happened to have most of what I needed to make them, but usually this takes some planning so you can put on exactly what you like. When I do plan to make these, I like to use Tostitos Garlic and Black Bean chips as the base. They are packed with flavor and taste so good with the toppings I use. The toppings are also up to you and your preference. I have used salsa, black beans, ground beef…you can use chicken, chili, jalapeños, other types of beans, the possibilities are endless. Last night’s recipe I used regular tortilla chips, blue corn tortilla chips, chopped tomato, fresh scallion, Mexican blend cheese and chopped black olives.


I hate it when you order nachos and after you get through the top layer, its just a pile of chips so I make mine in layers. First I place a layer of chips. and then repeat.

Then I put a layer of cheese and some toppings.

Repeat with chips, cheese and toppings.
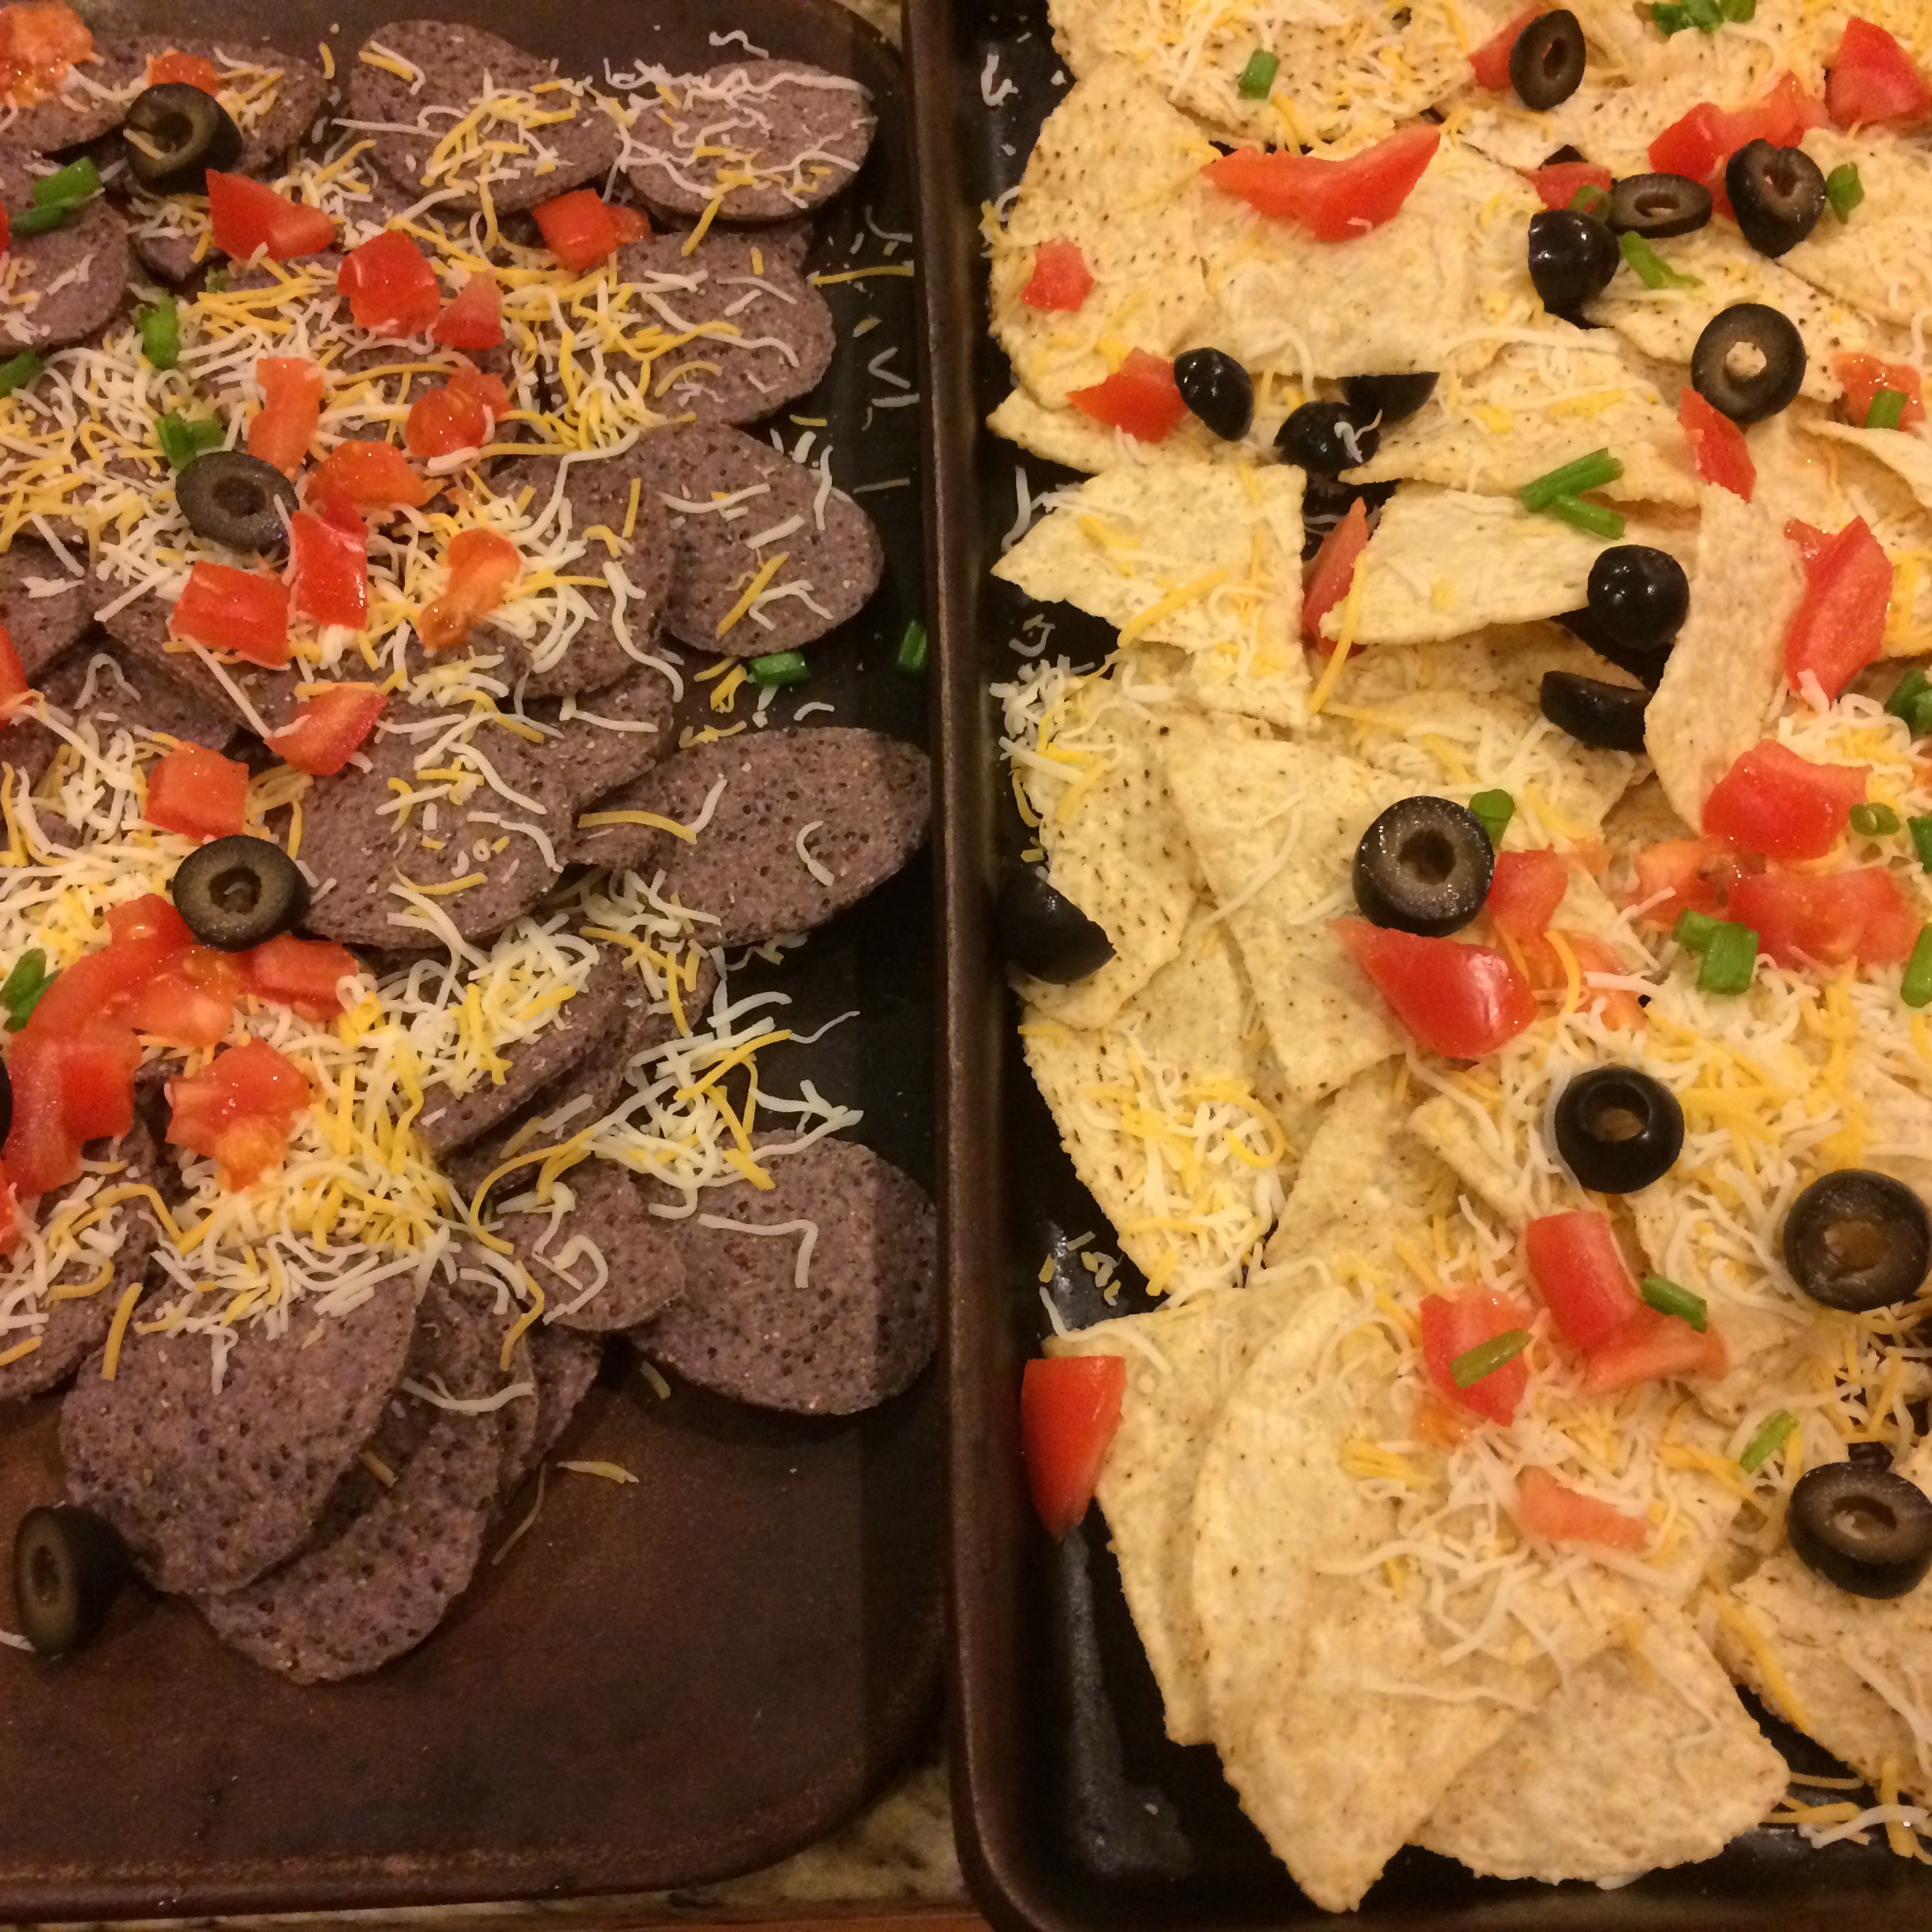 I bake them on 350 degrees for about 10 minutes or until cheese is melted. I serve them with a side of sour cream, but you can also do a side of salsa and/or guacamole. We place the trays on the counter and stand around eating them family style. Yum!

Fighting the “Boredom” of Summer
It is the end of July and the kids are bored with summer. I don’t know why…after the winter we had here in the Northeast, I can’t get enough of being outside and doing “summer things”. It seems as though every summer by this time they are ready to get back to the routine of school, although no kid will ever admit that! I limit the time on electronics and it’s fairly easy to get them in the pool once per day so at least I know they aren’t stuck inside glued to a device, video game or television. My son is particularly into Legos and can spend hours in his room building. Although this is a great activity, I don’t like the idea of him being alone most of the day in his room. Other parents I have spoken with this summer are experiencing the same thing. Kids just don’t want to go outside. We wonder what happened to the days when we were younger and we were pushed out the door in the morning, called in for meals and then stayed out until dark or until we had a jar full of lightning bugs, whichever came first. We had a bike and nature. You certainly know you are getting older when you start a sentence with, “When I was a kid…”! Whether or not it’s the way we parent, the distraction of the electronic or physical environment we live or that kids are evolving differently, I wasn’t ready to give up hope. Here are some of the things that we have tried to bust the boredom.
30-Minute Family Activity Time
I have a hard time working exercise into my schedule because I hate the traditional machines and videos. I thought it would be fun if we scheduled a 30-minute activity session as a family so we could spend time together while having fun exercising. It doesn’t happen every night, but usually a few times per week. It takes place after dinner when everyone is home and involves an active sport. We have played basketball, volleyball, badminton, ping pong, pickle, tag (regular and glow stick), biking, walking the dog, water gun fights and have gone swimming. I also had my son set up an decathlon involving different stations and sports.
Daytime Activities
This summer there were quite a few birthday parties we attended/hosted (kids and adults), had a house guest, and took a few local trips as well. My daughter had dance classes a few days per week, and, of course, we had some play dates with friends.
We played a lot of board games. We love Deer in the Headlights, Clue and Clue, Jr. and Trivial Pursuit Family Edition.


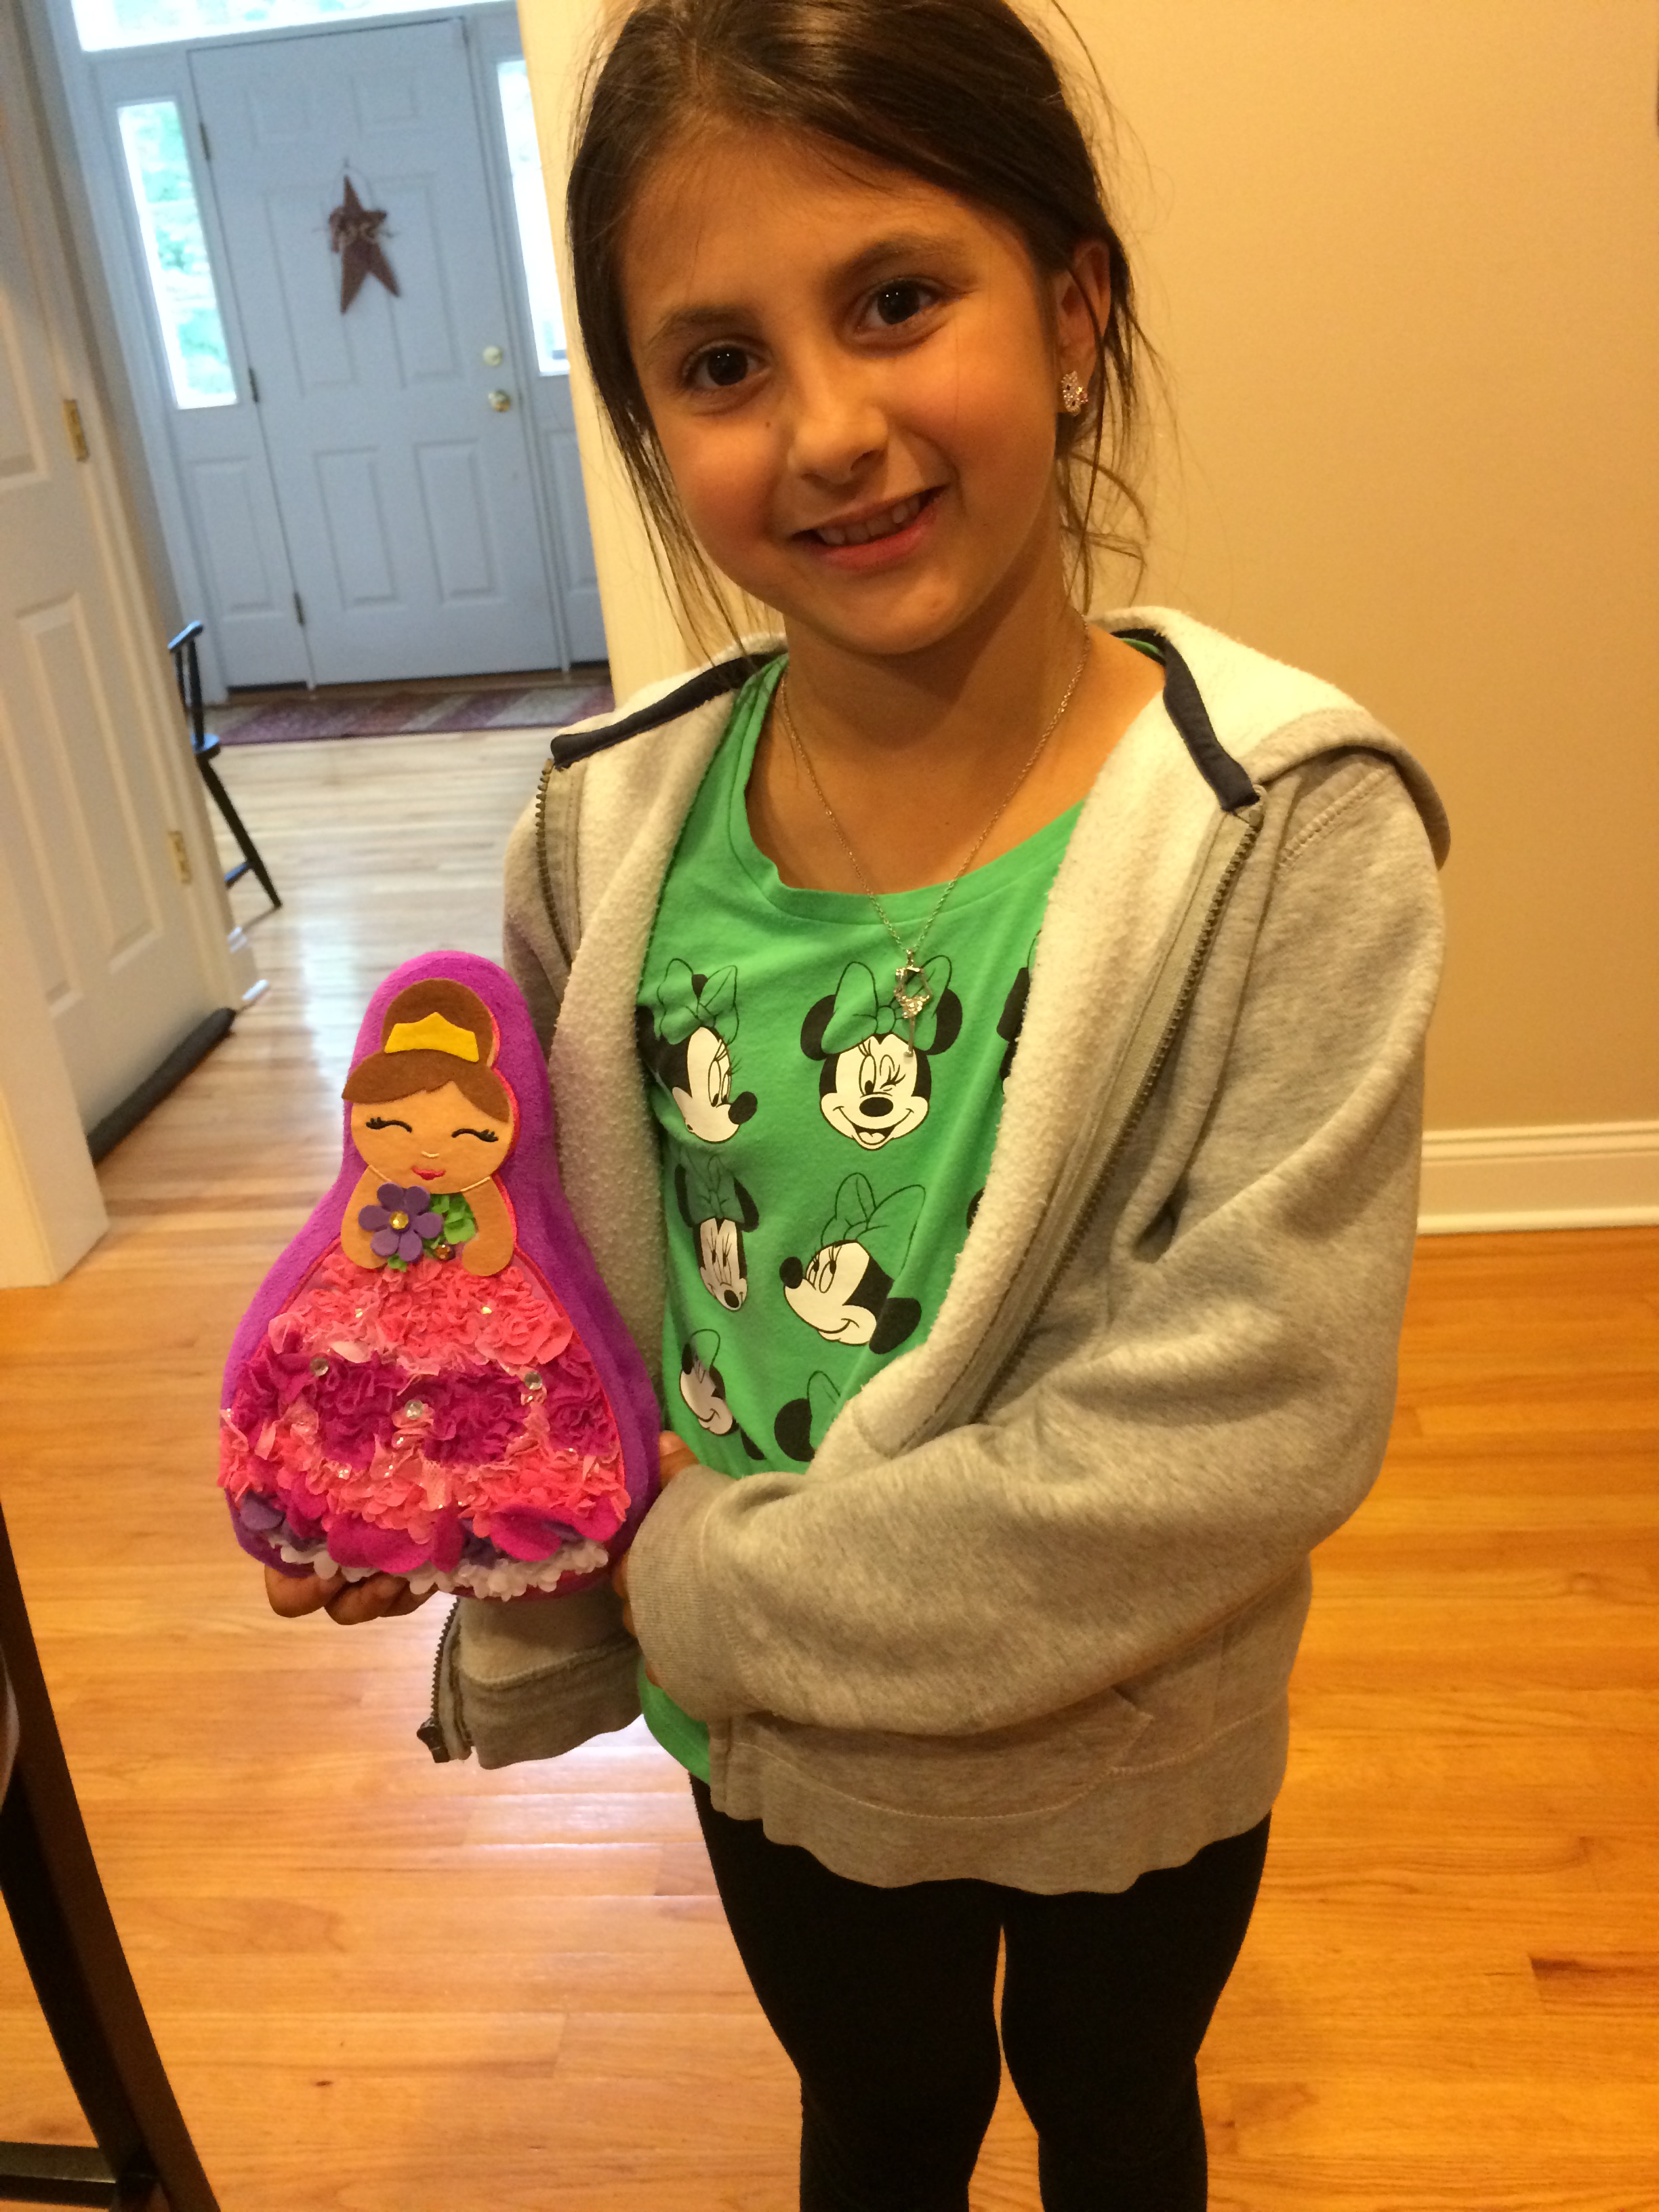
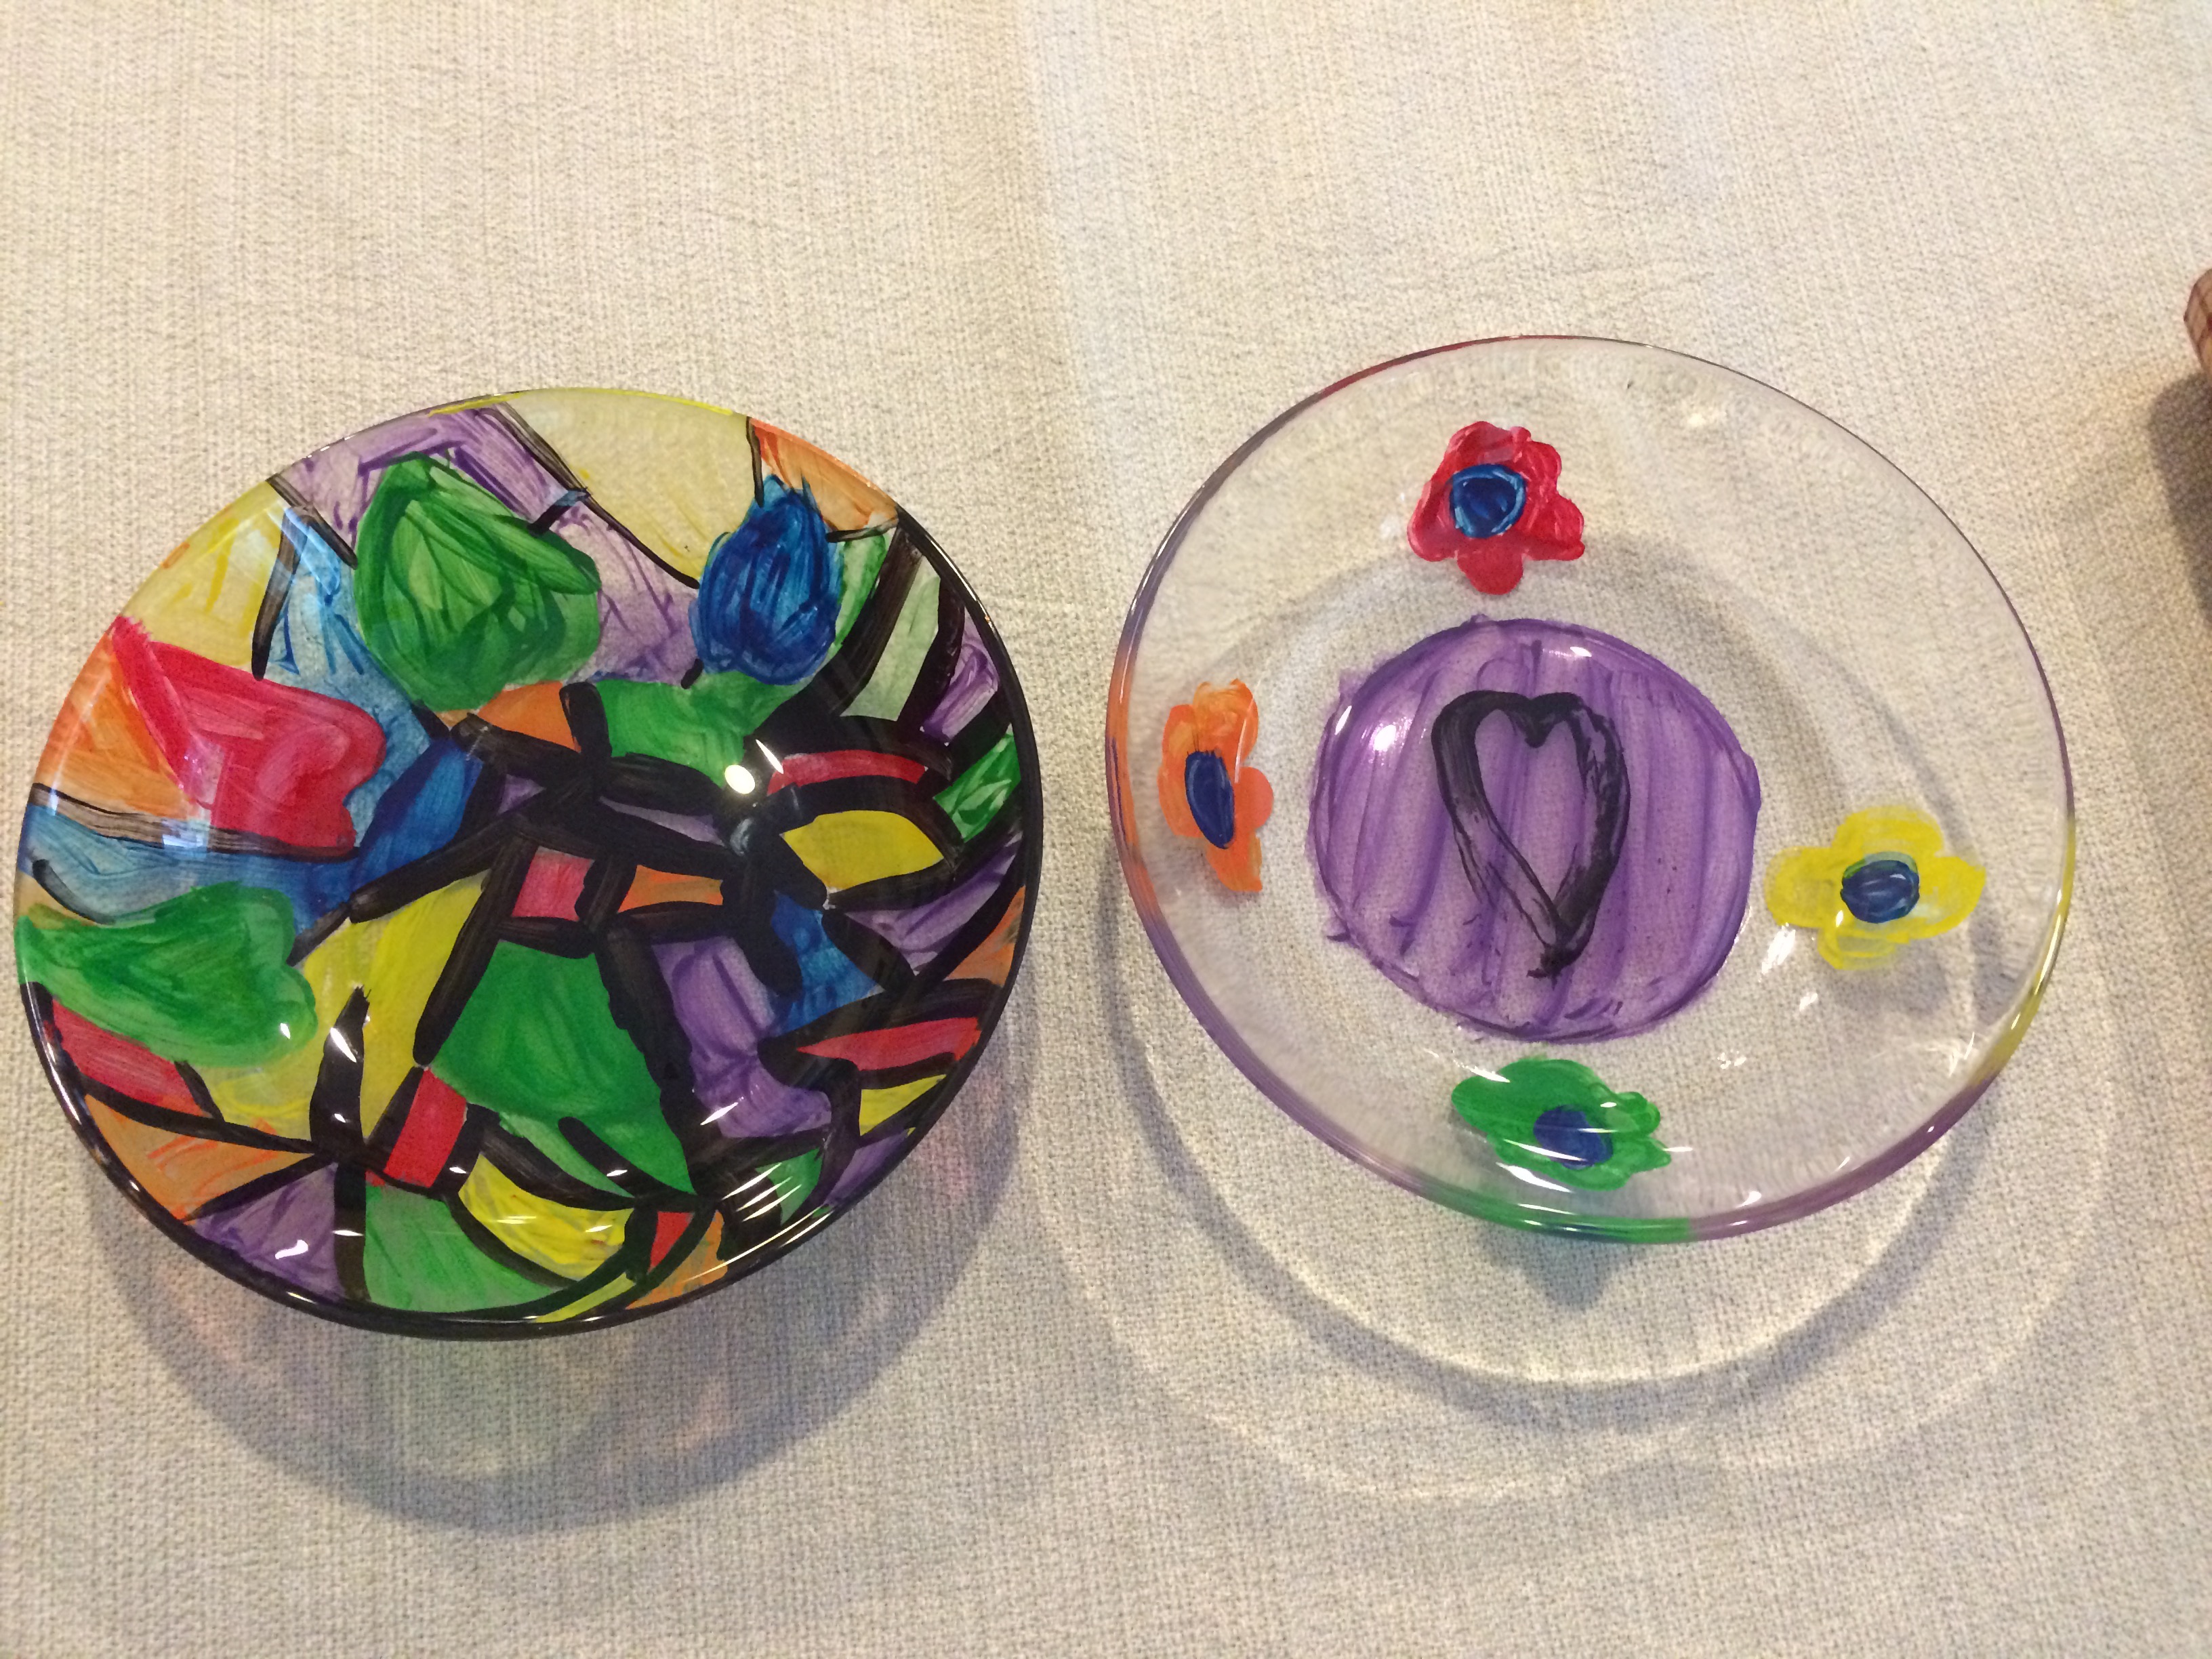
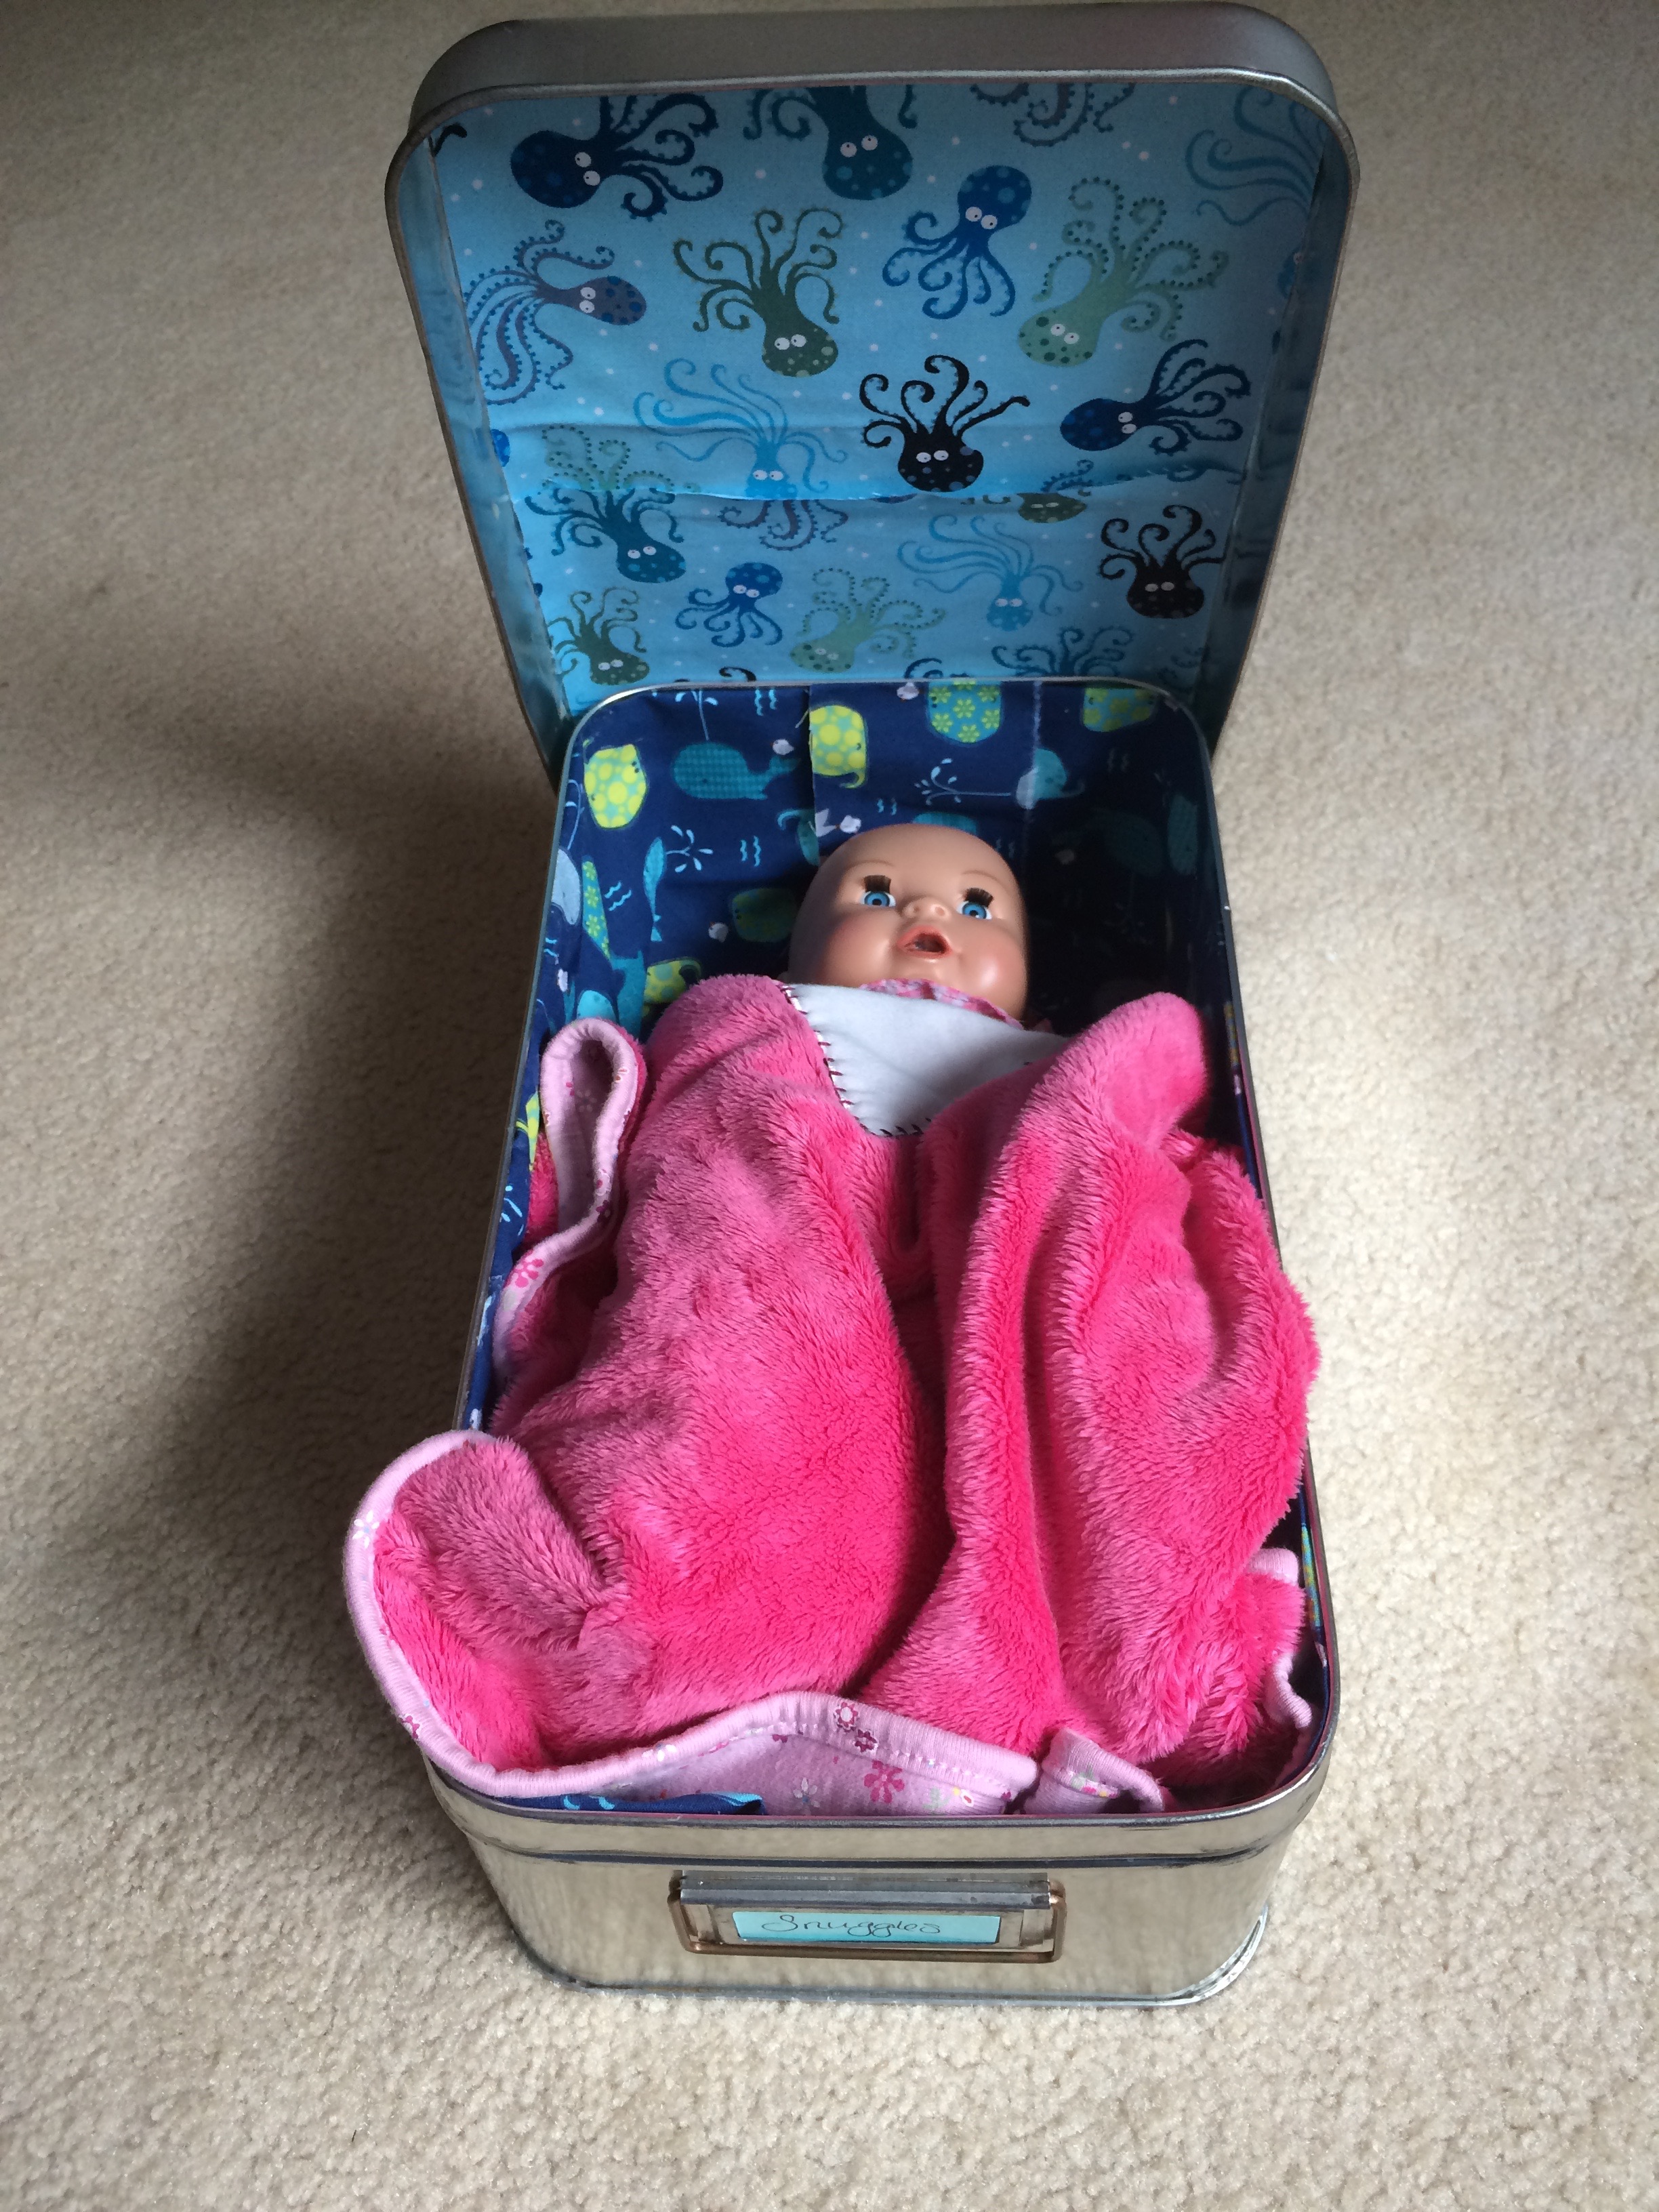
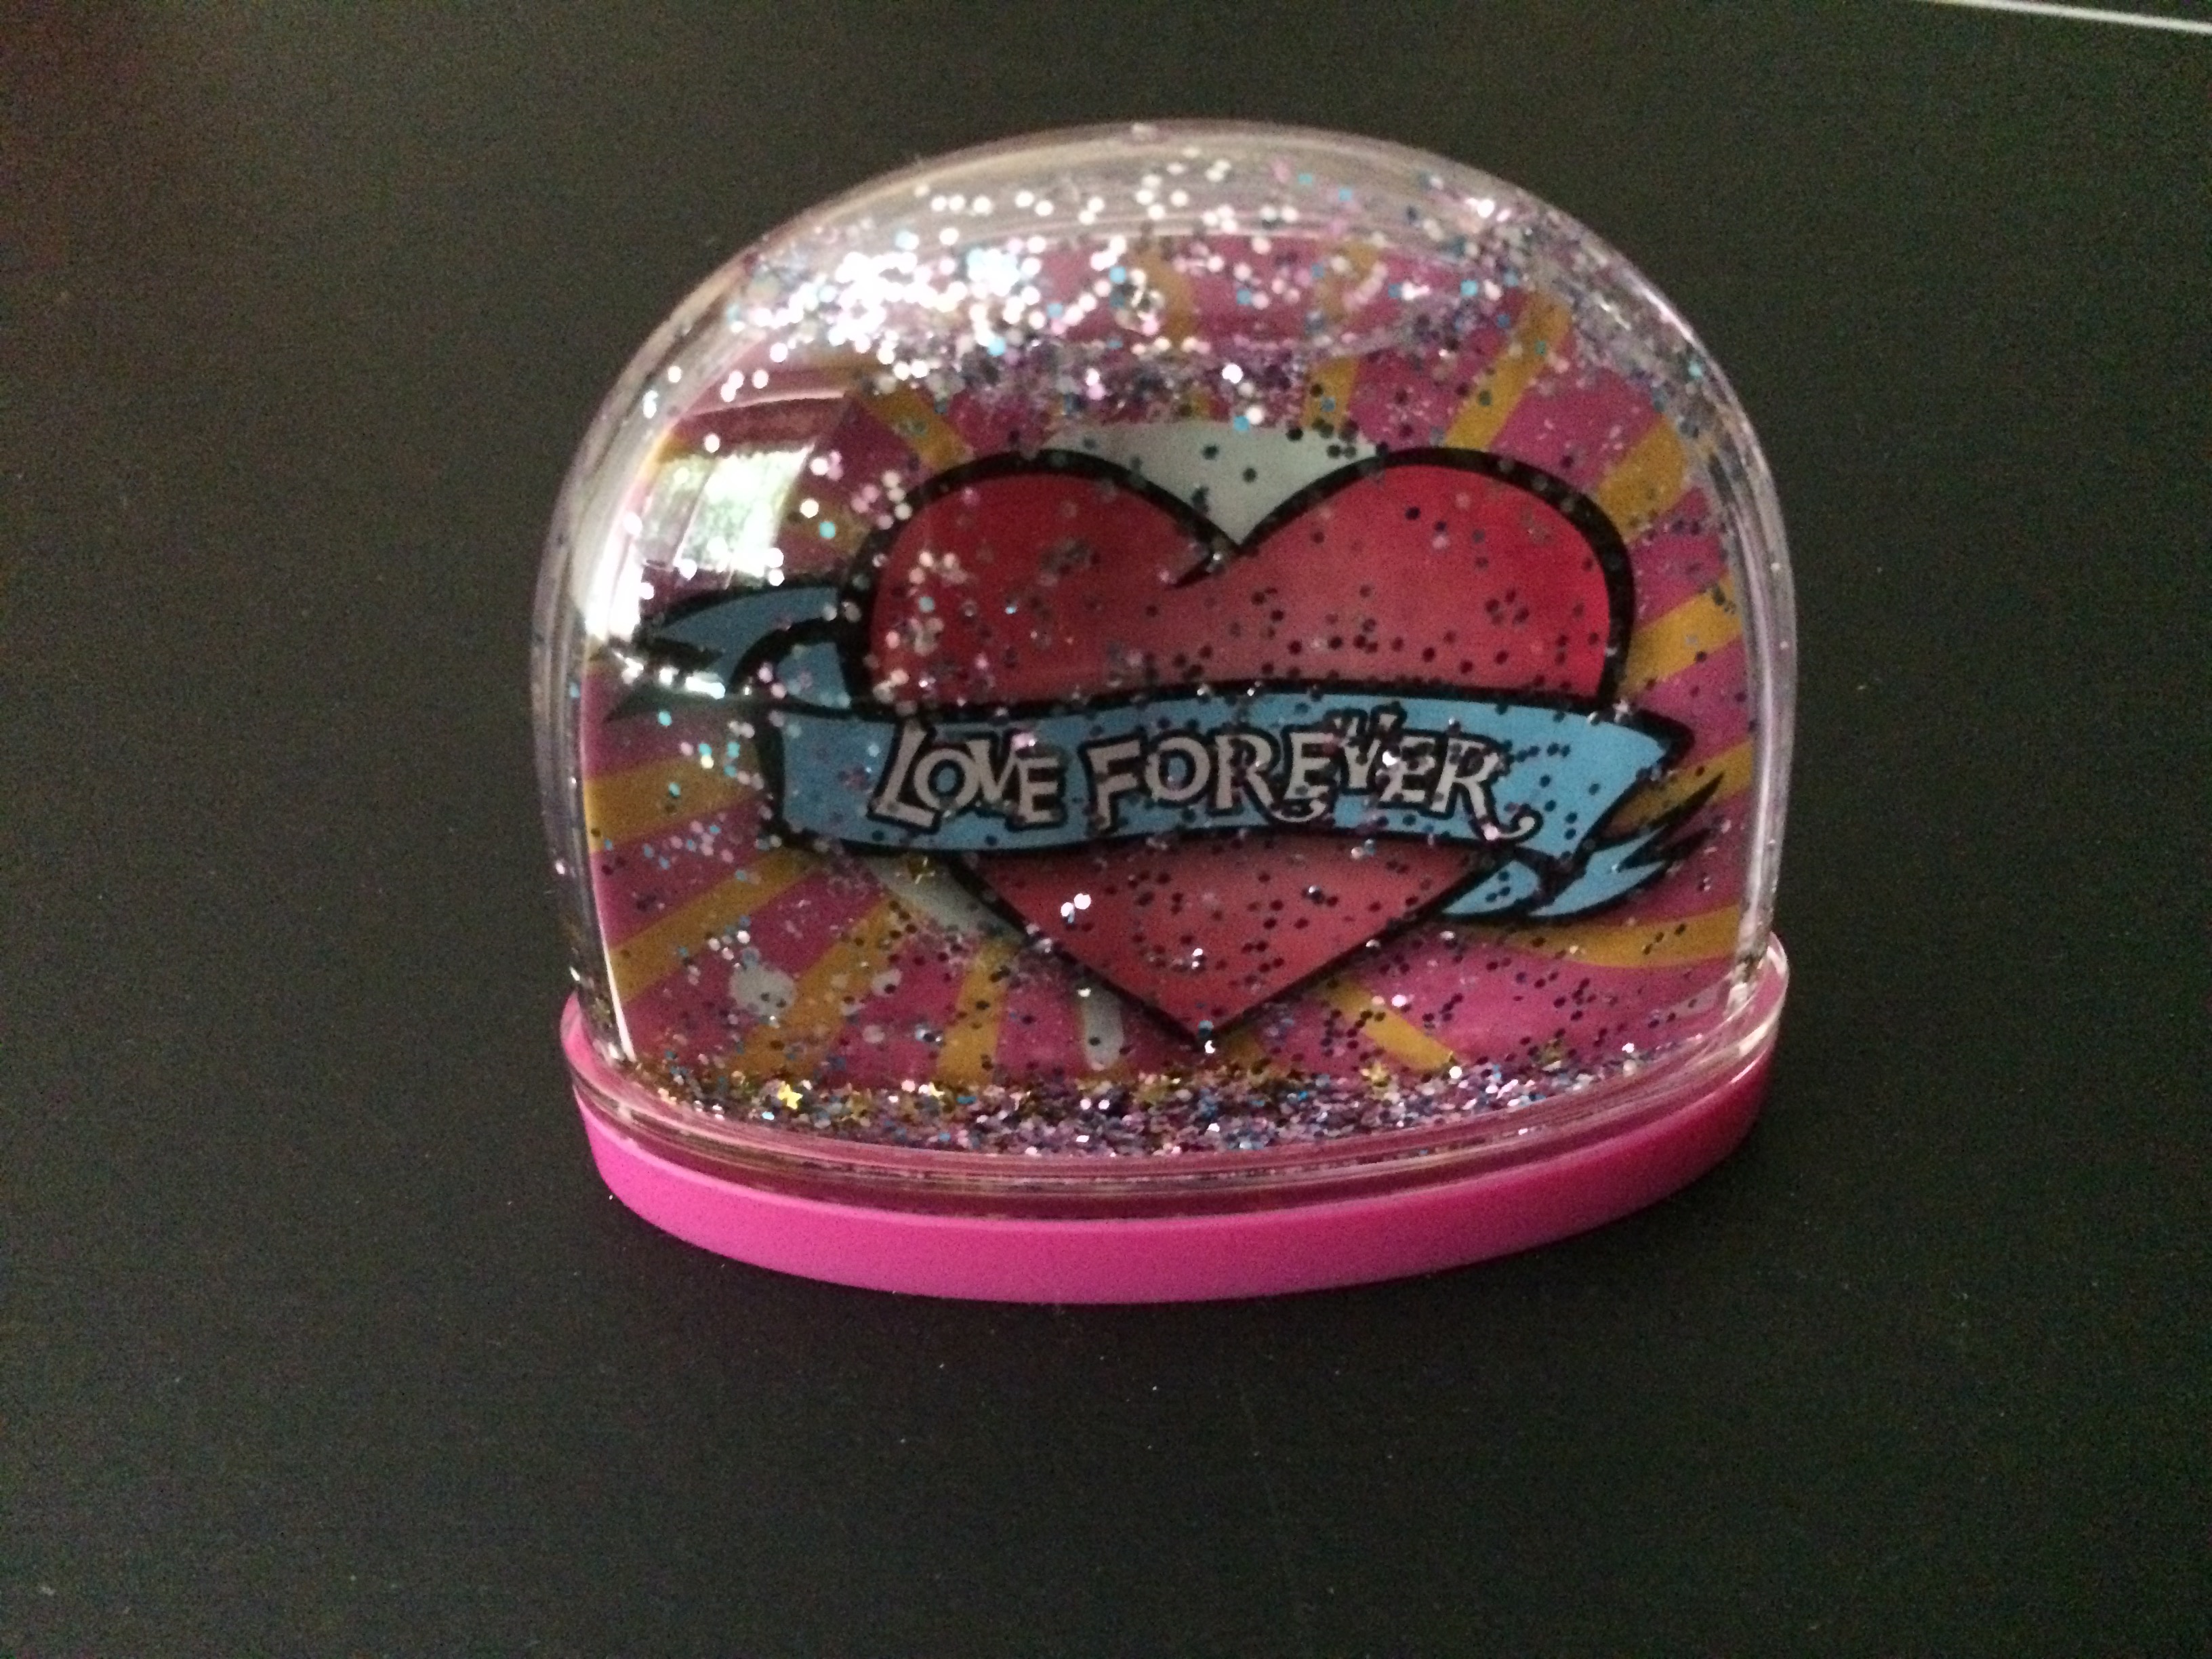
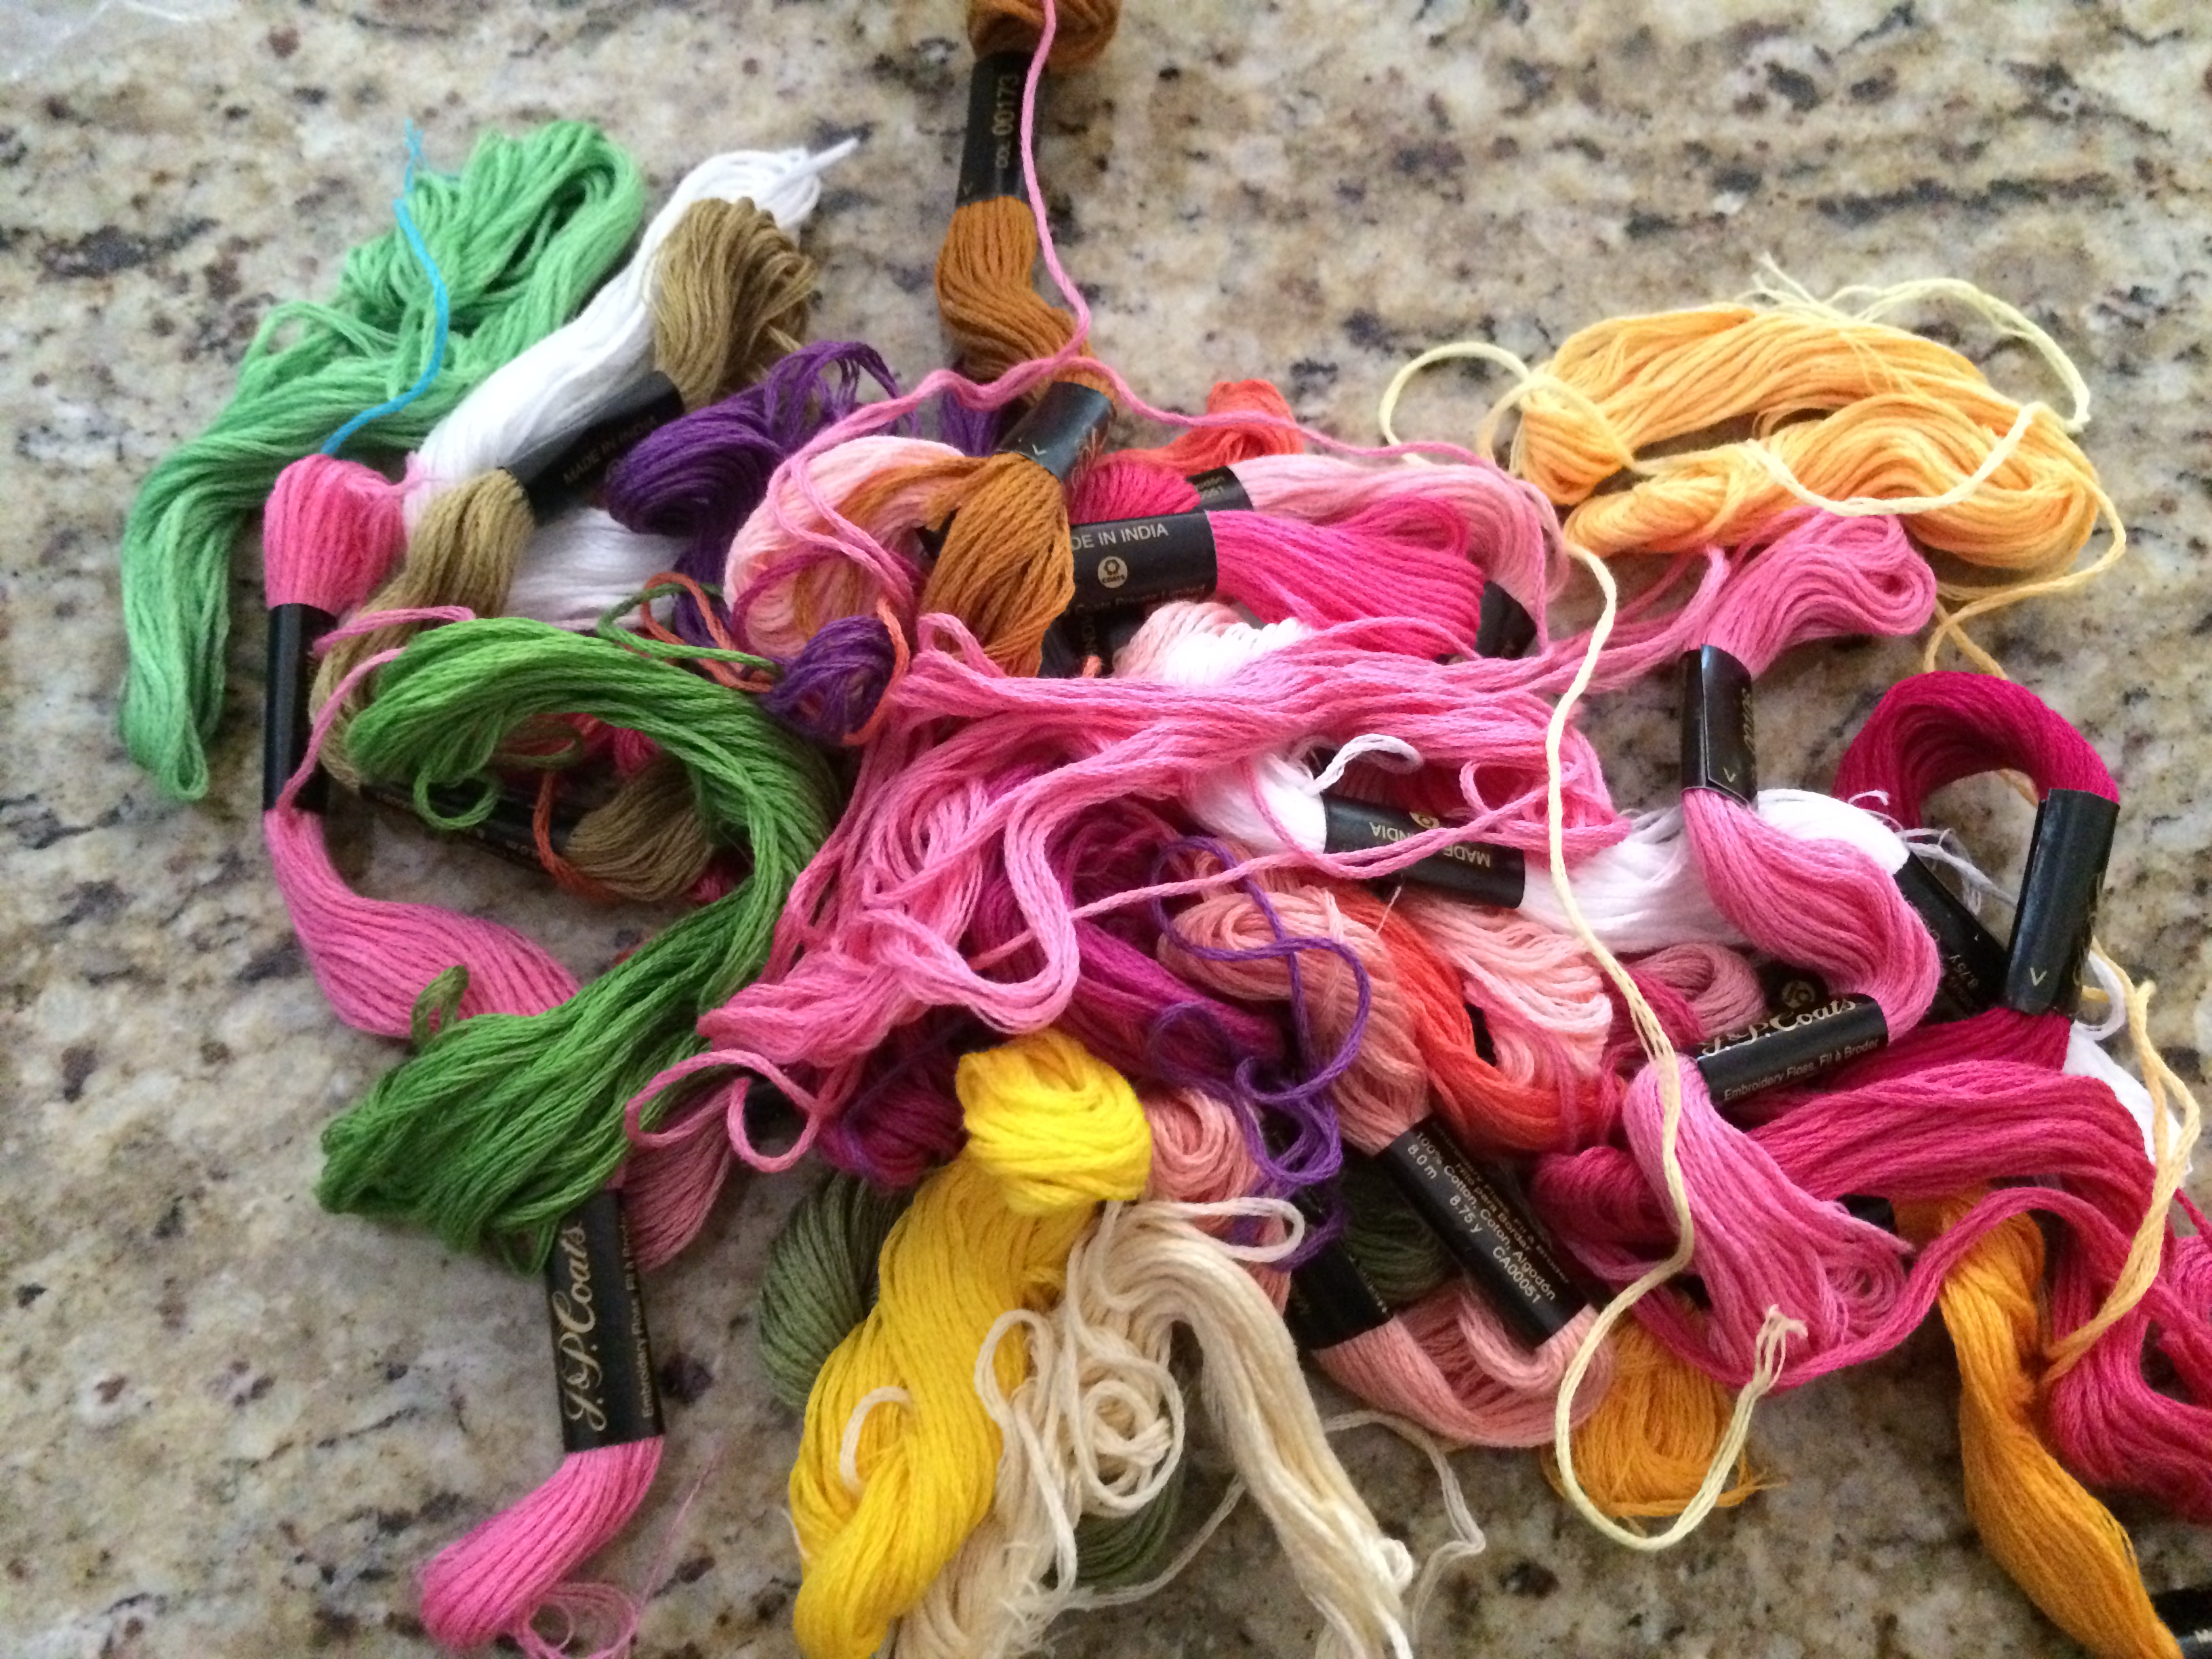
I also went through the toy closet and it was full of crafty birthday gifts my daughter has received over the last few years so I decided this summer we would get to one every week or so. We also did some crafting of our own. We painted using food colored bubbles, painted glass bowls, made friendship bracelets, tie dyed, made snow globes, sewed a pillow, made a doll bed, made headbands and decorated a plush doll.


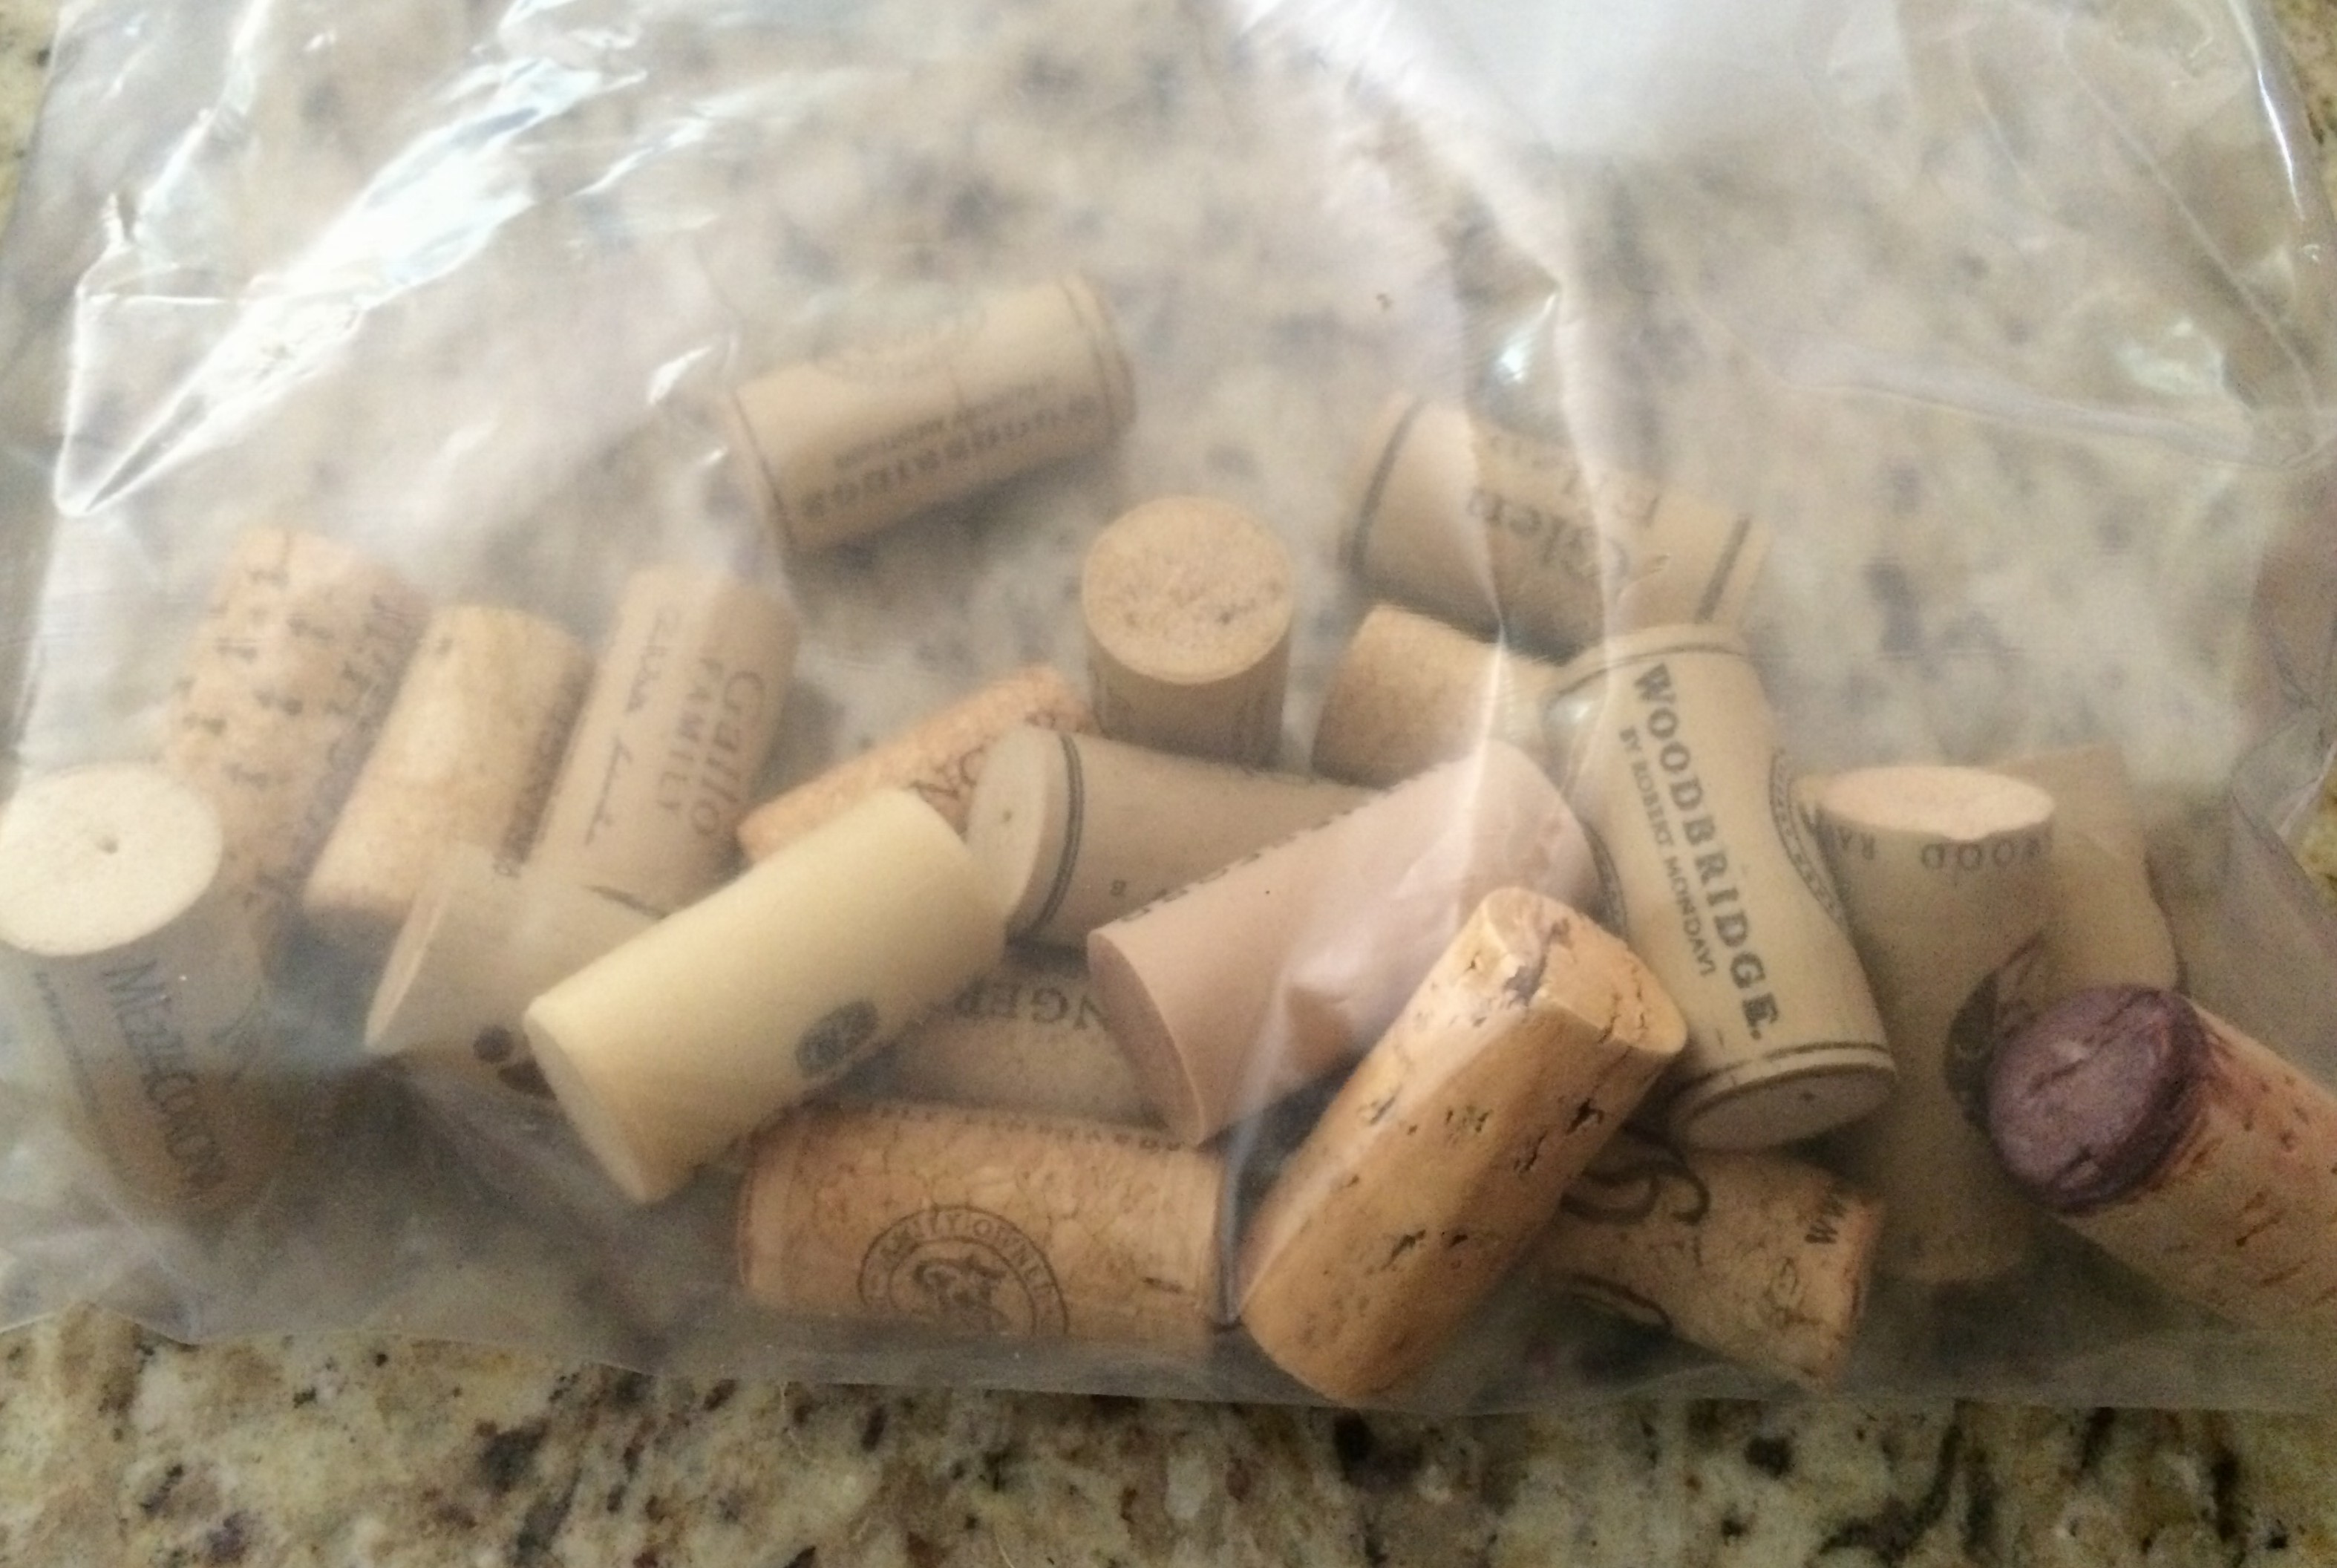
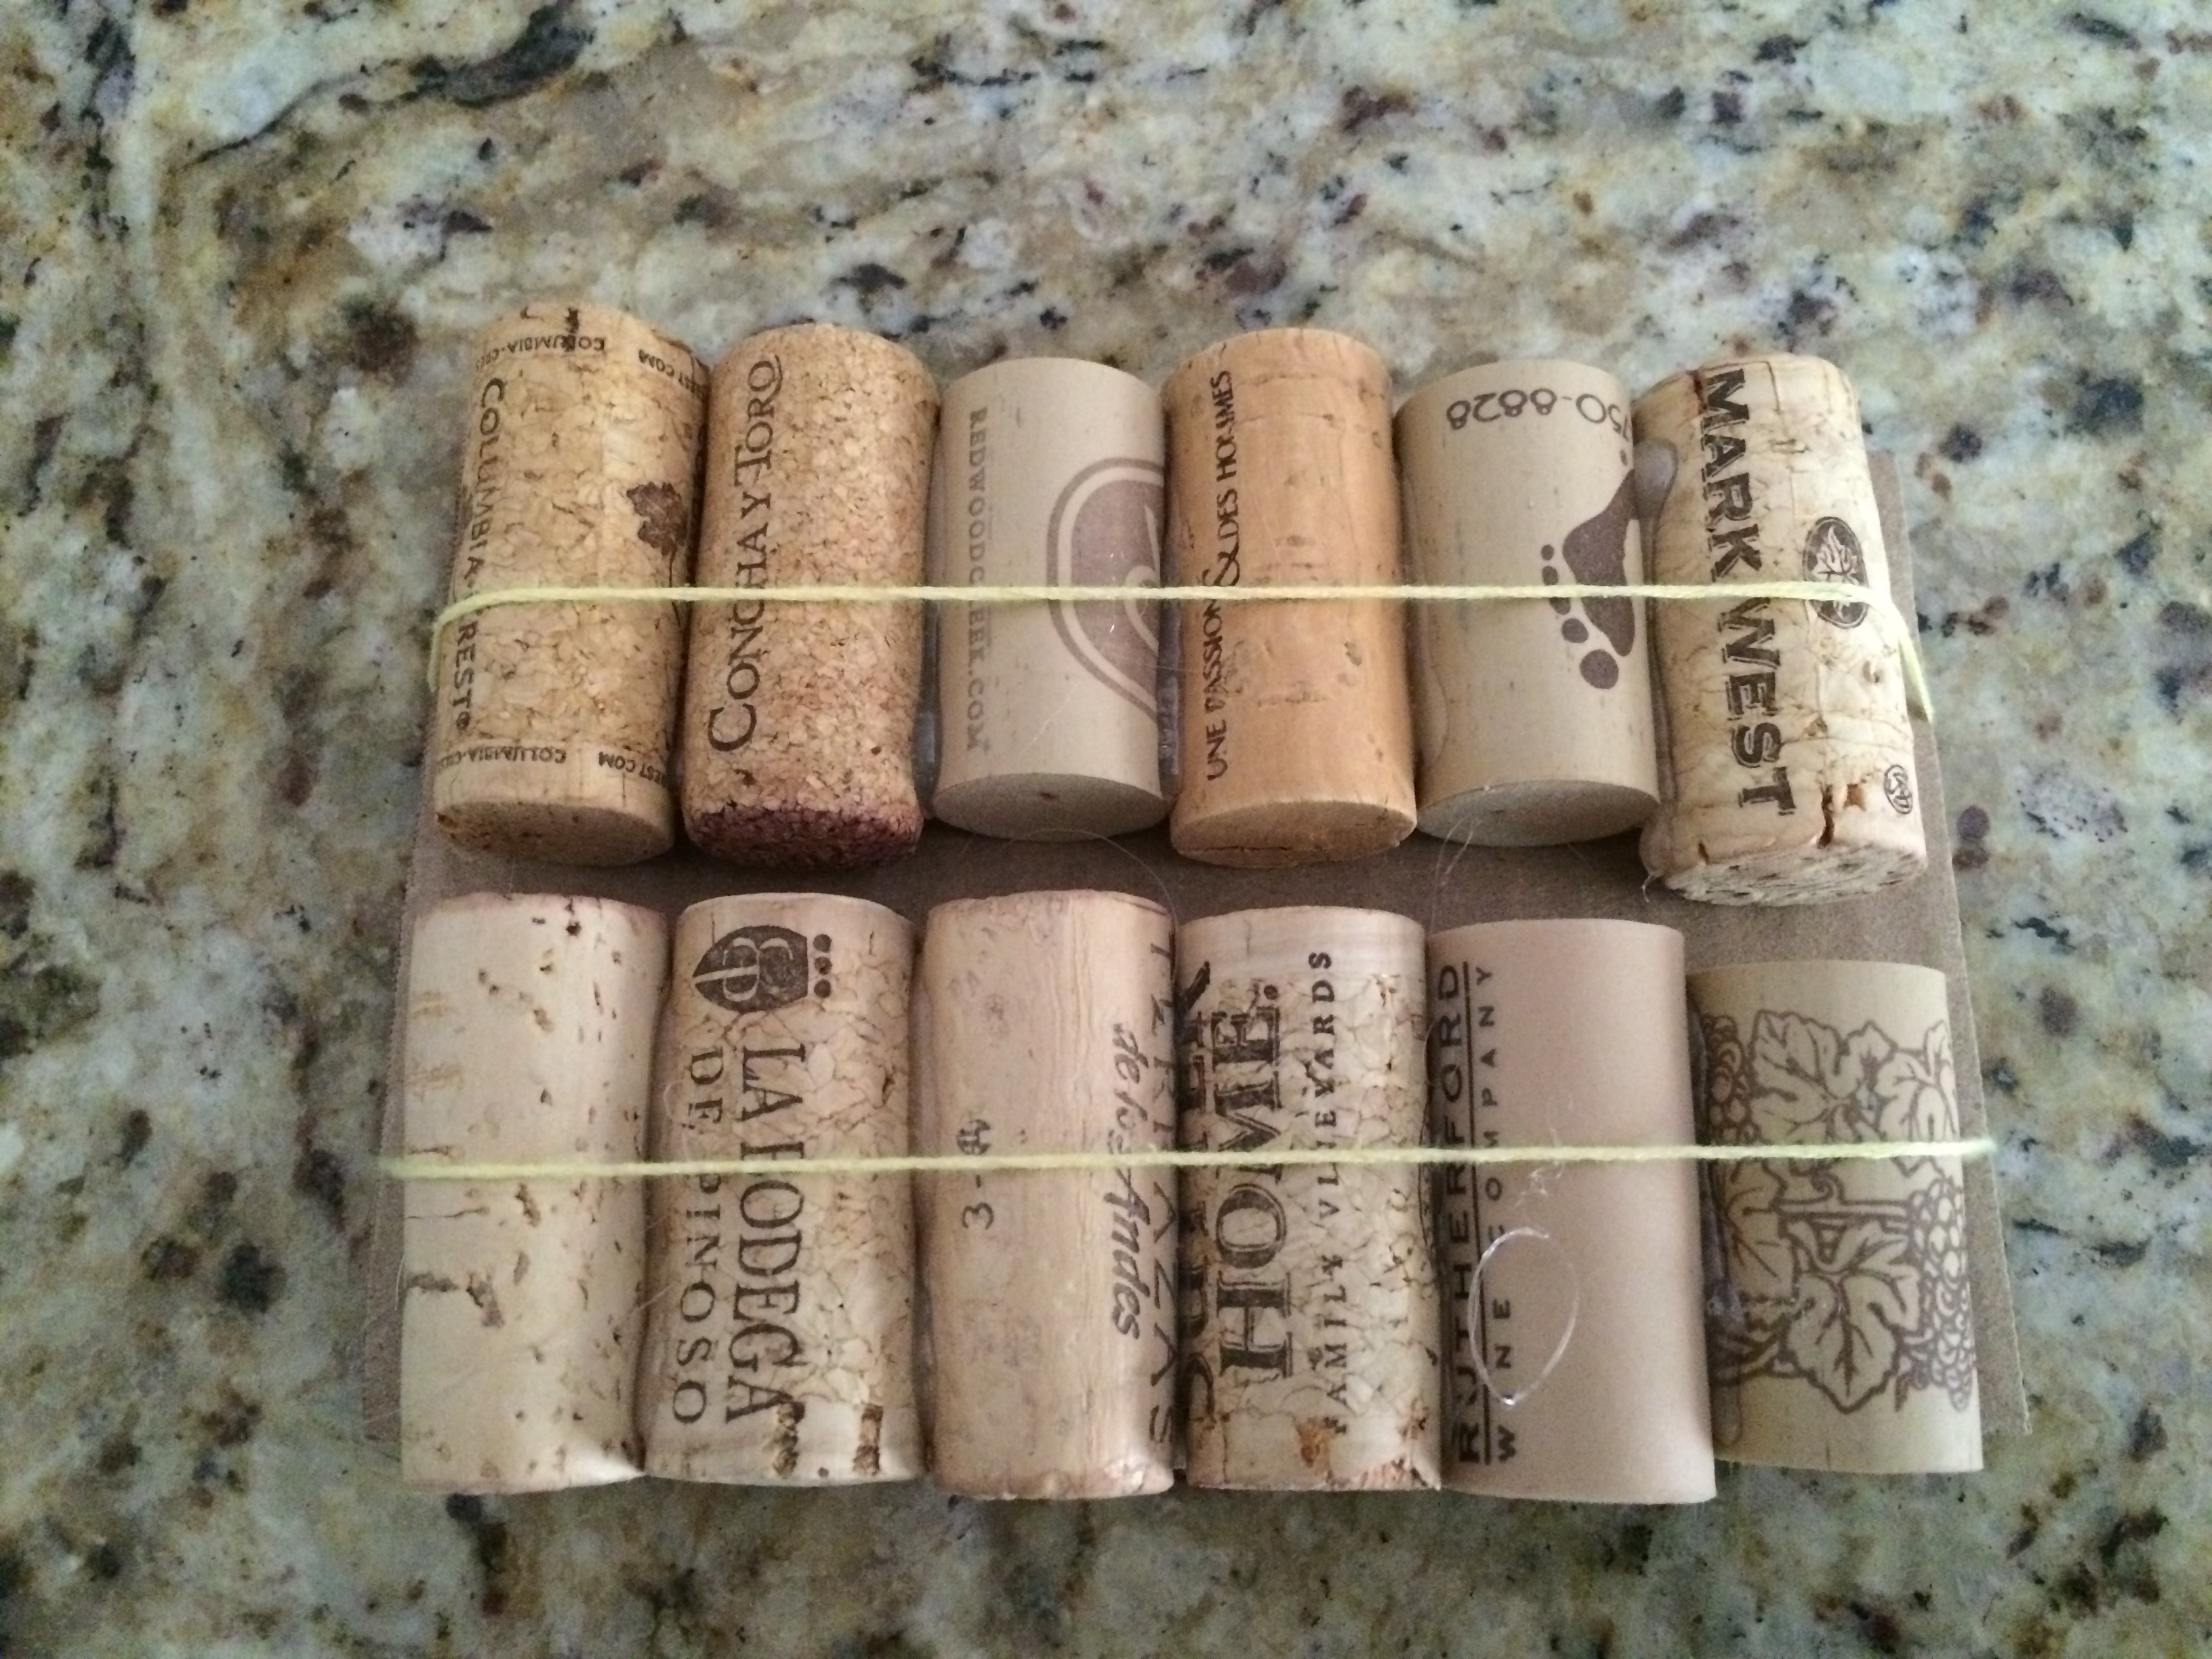
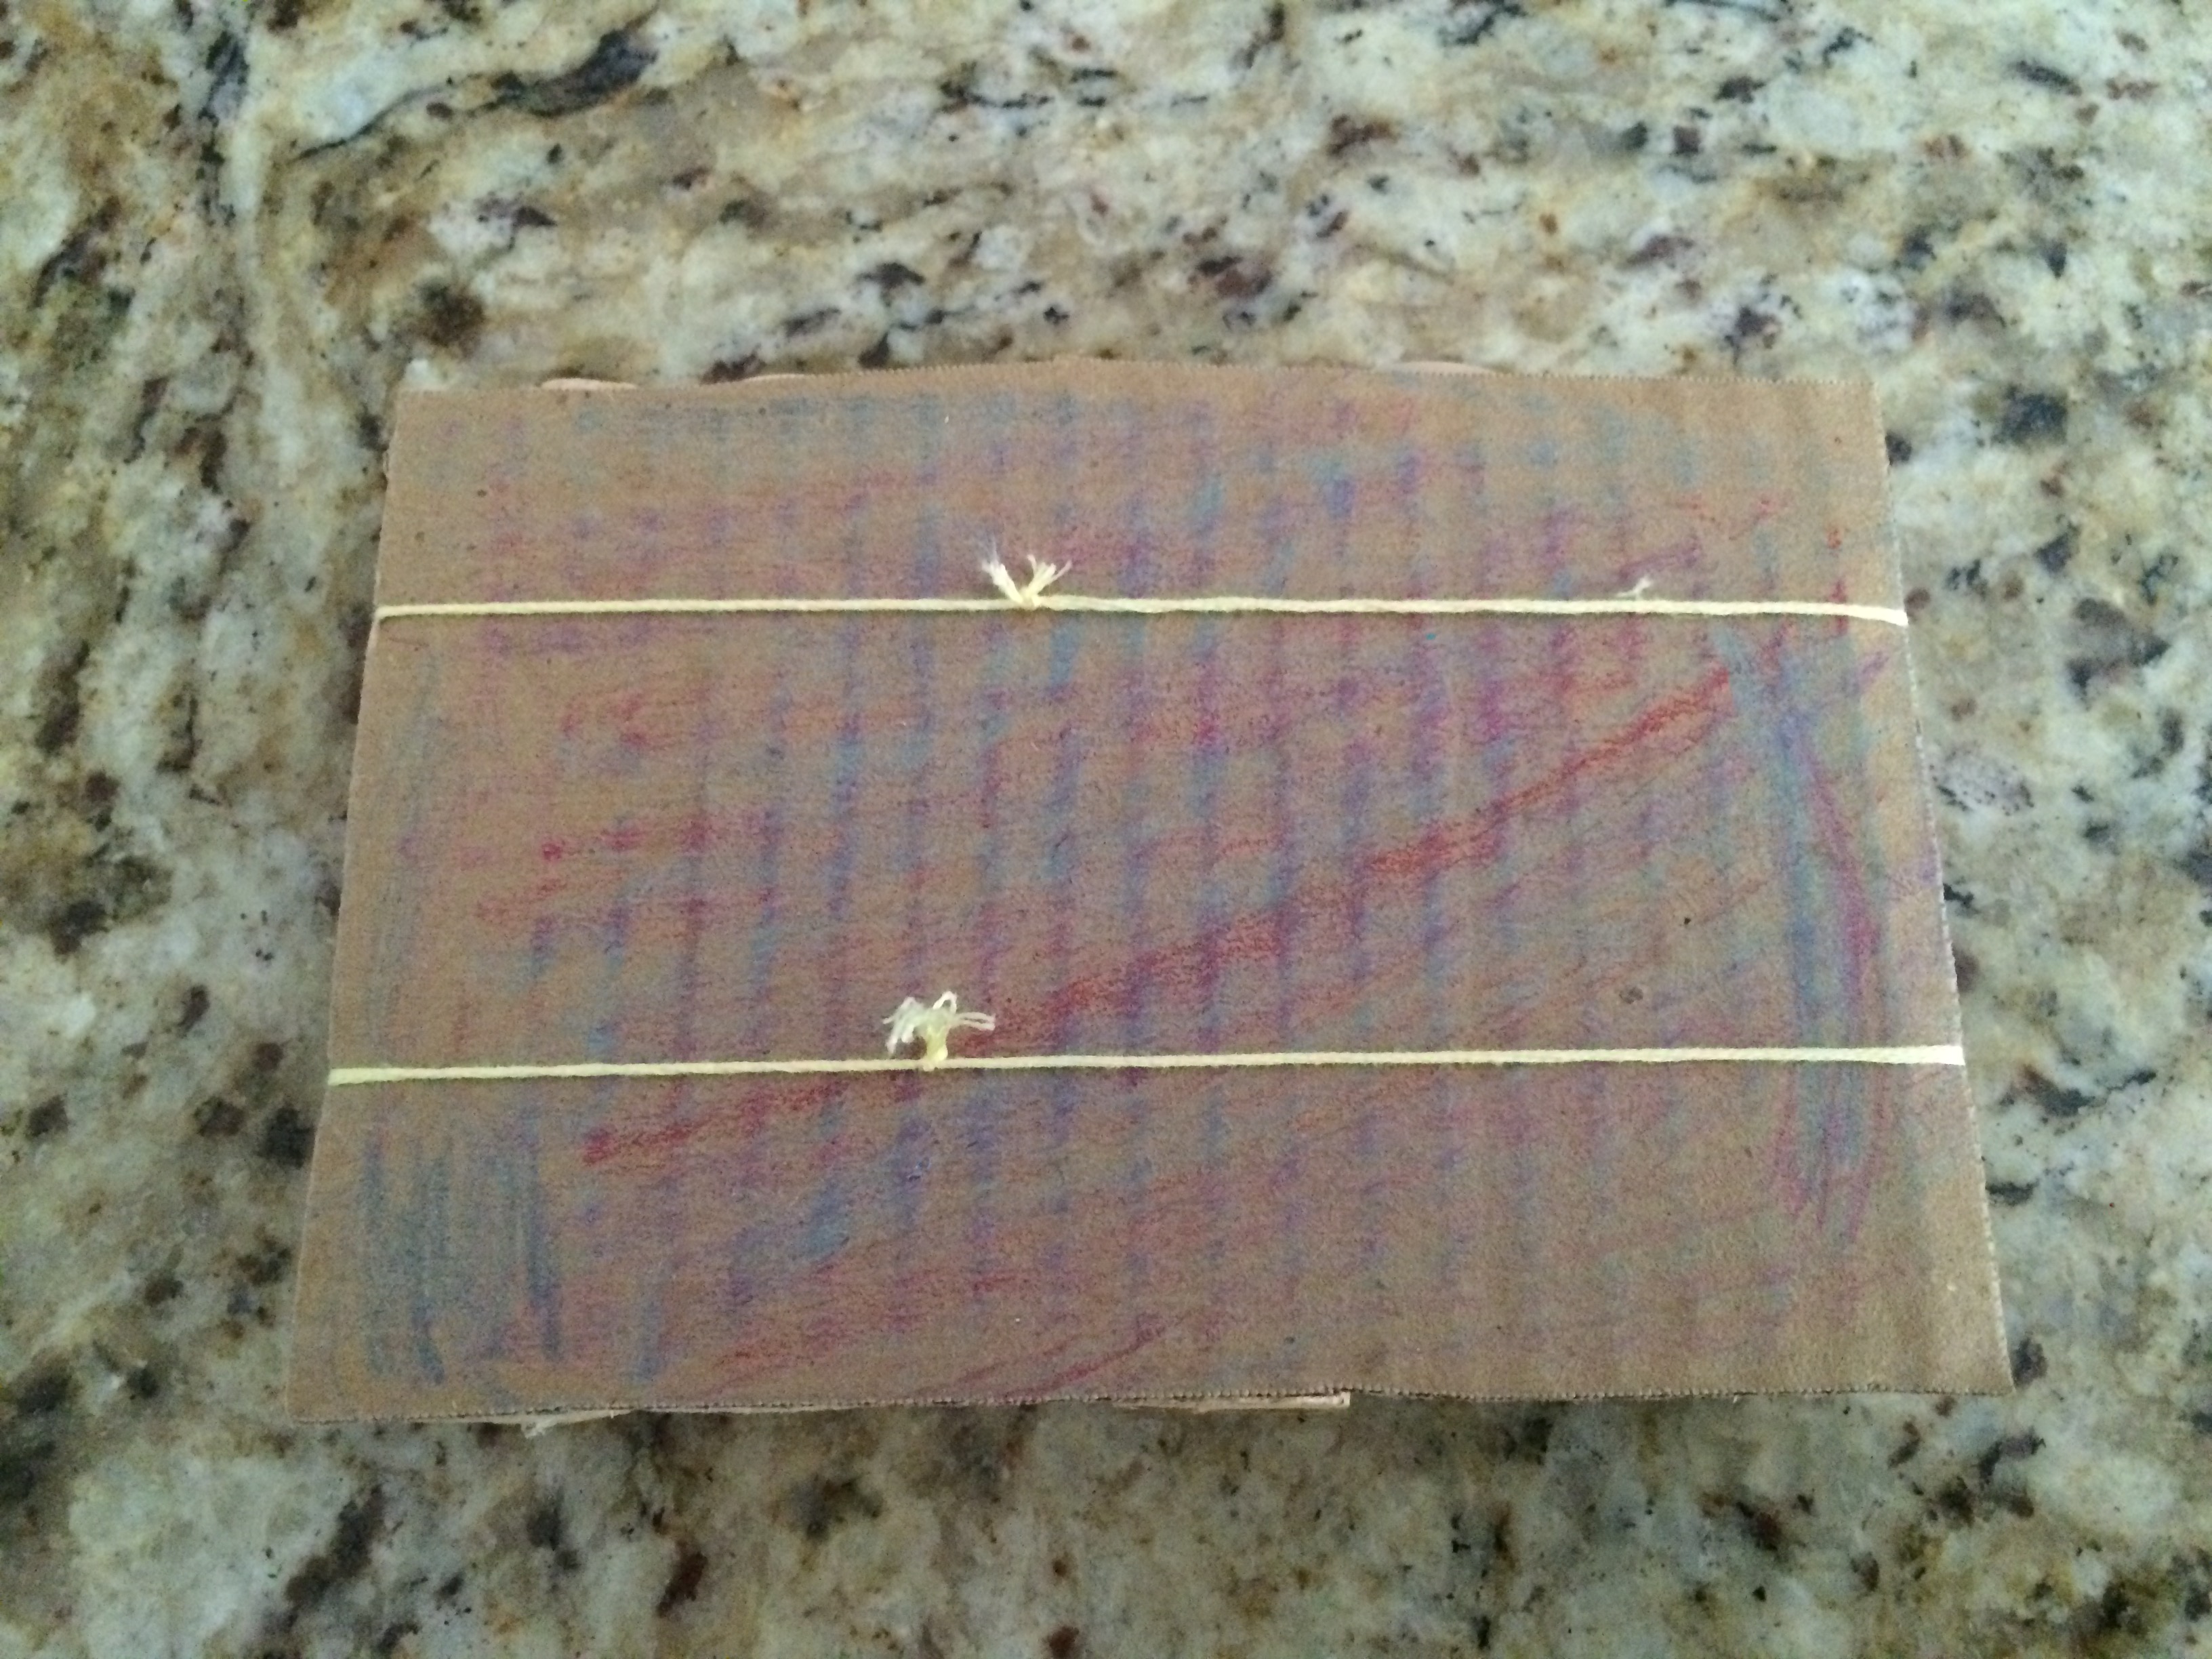
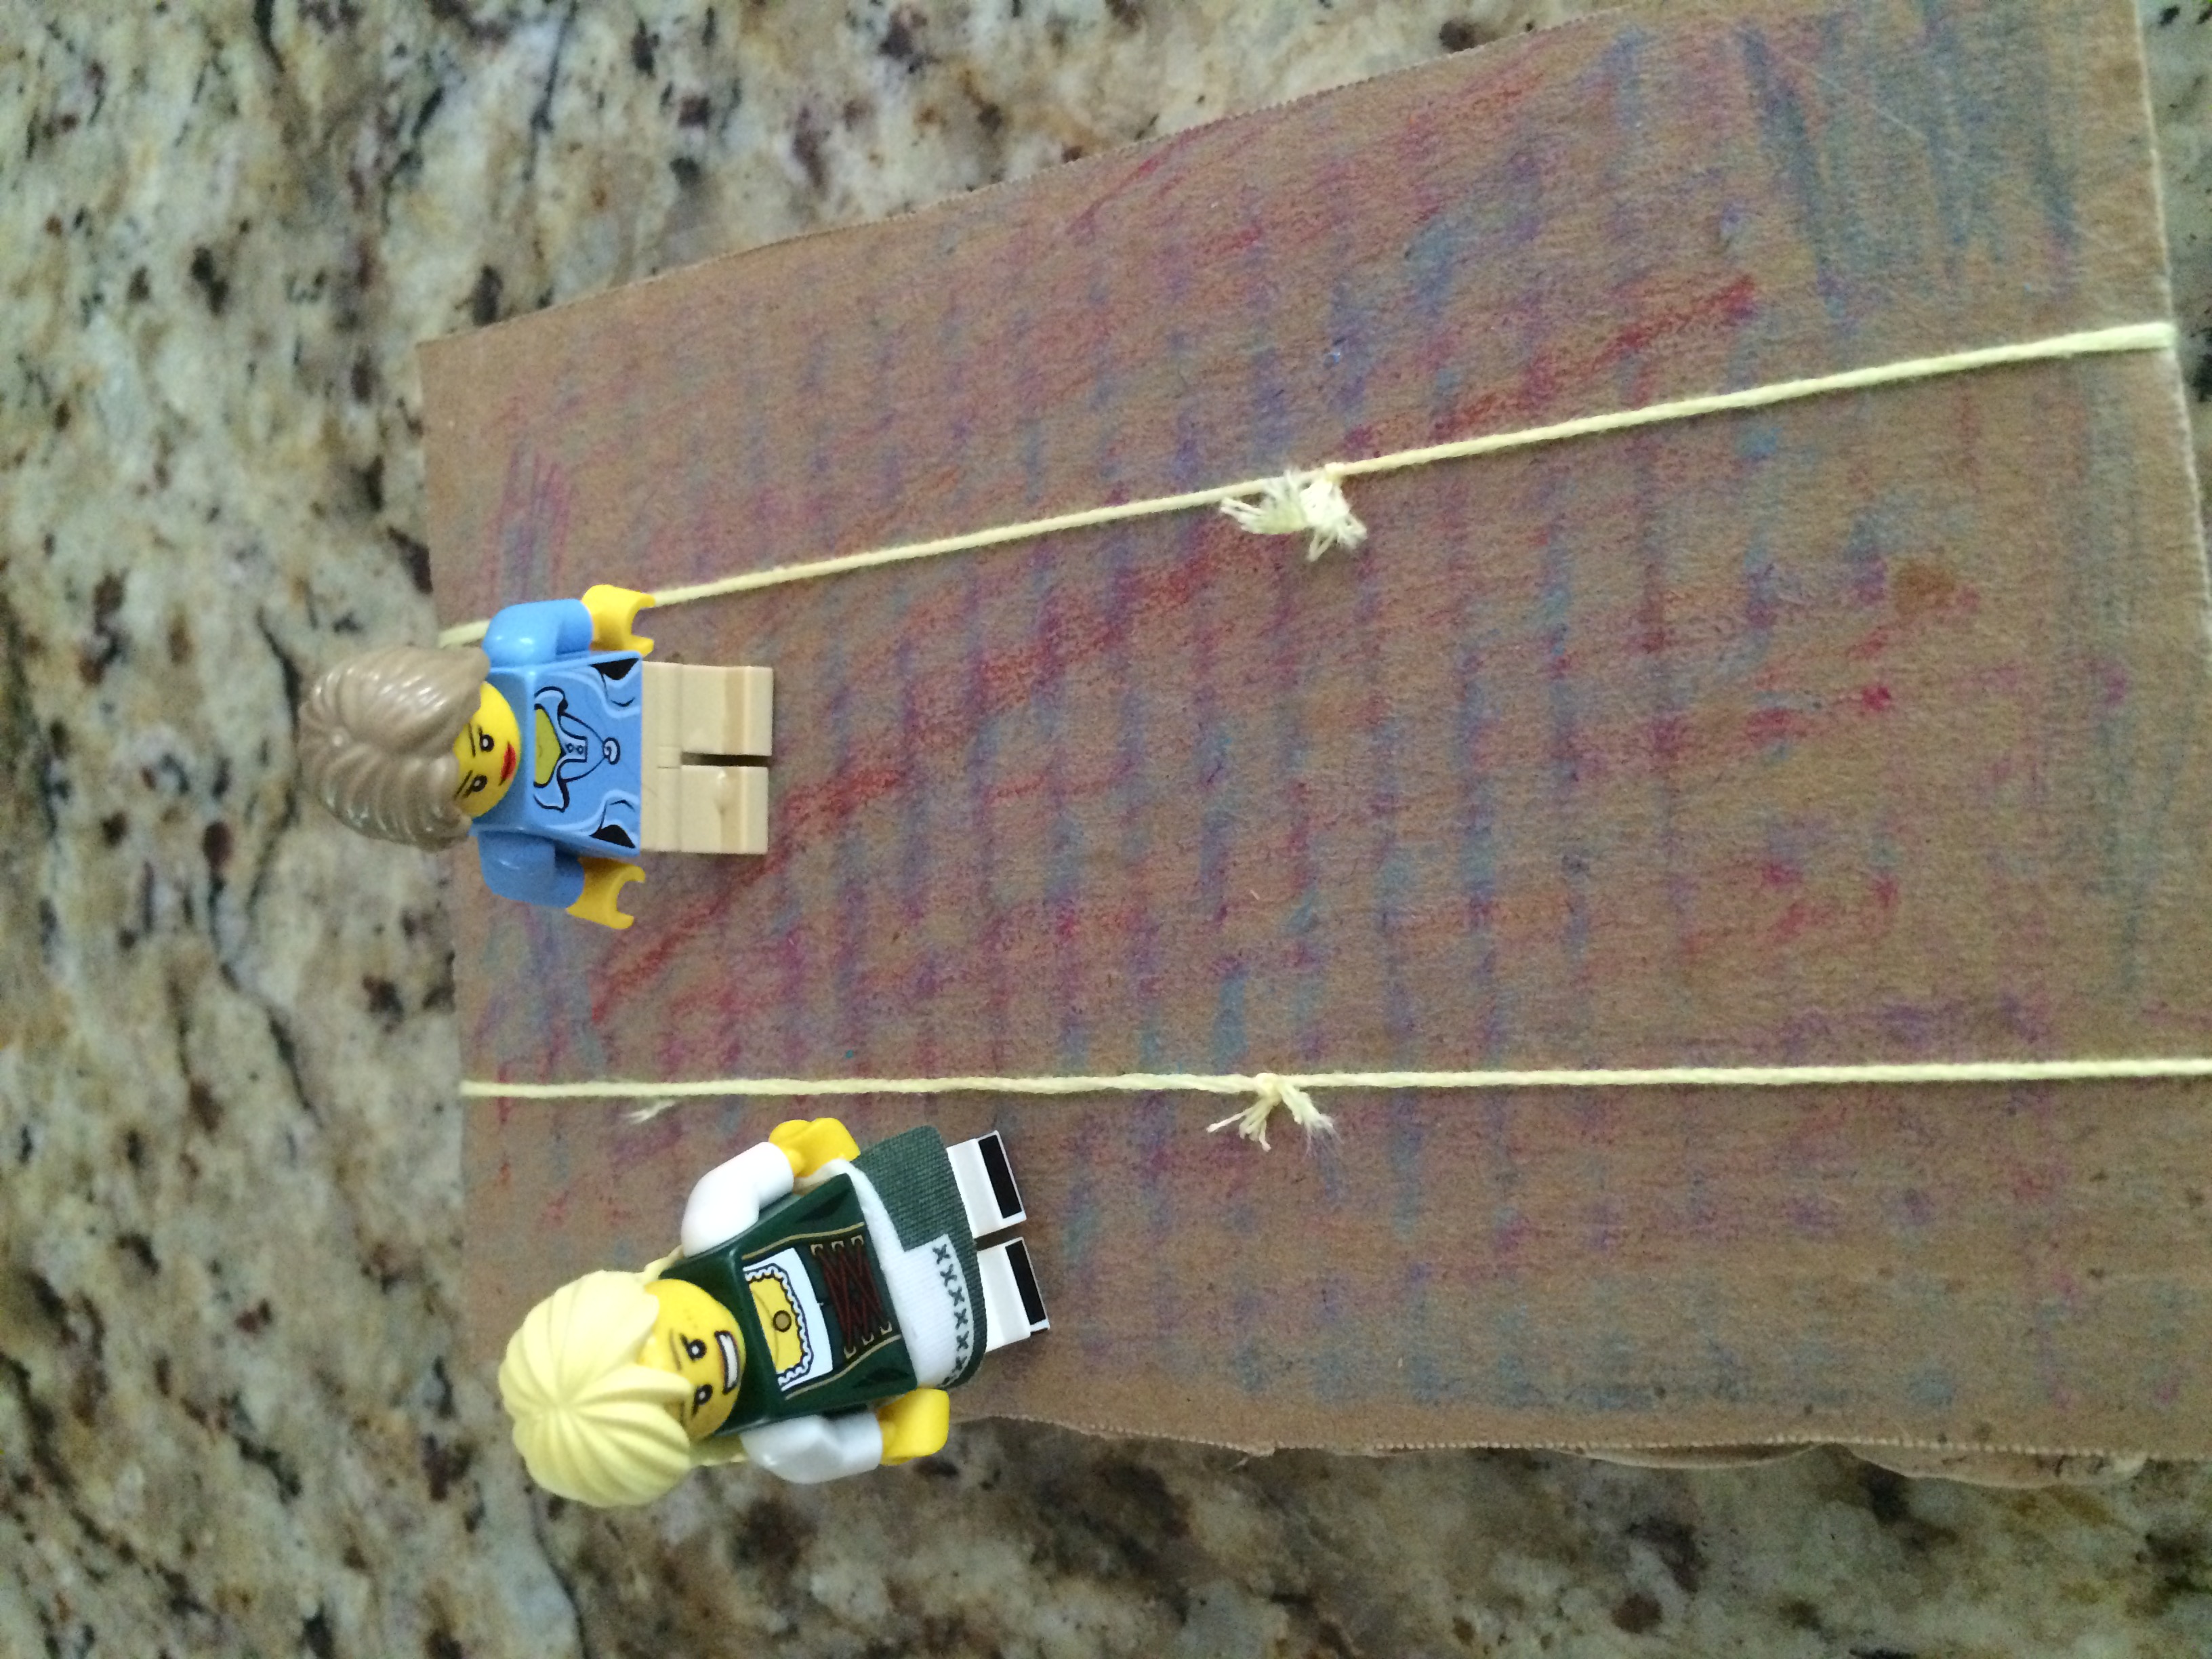
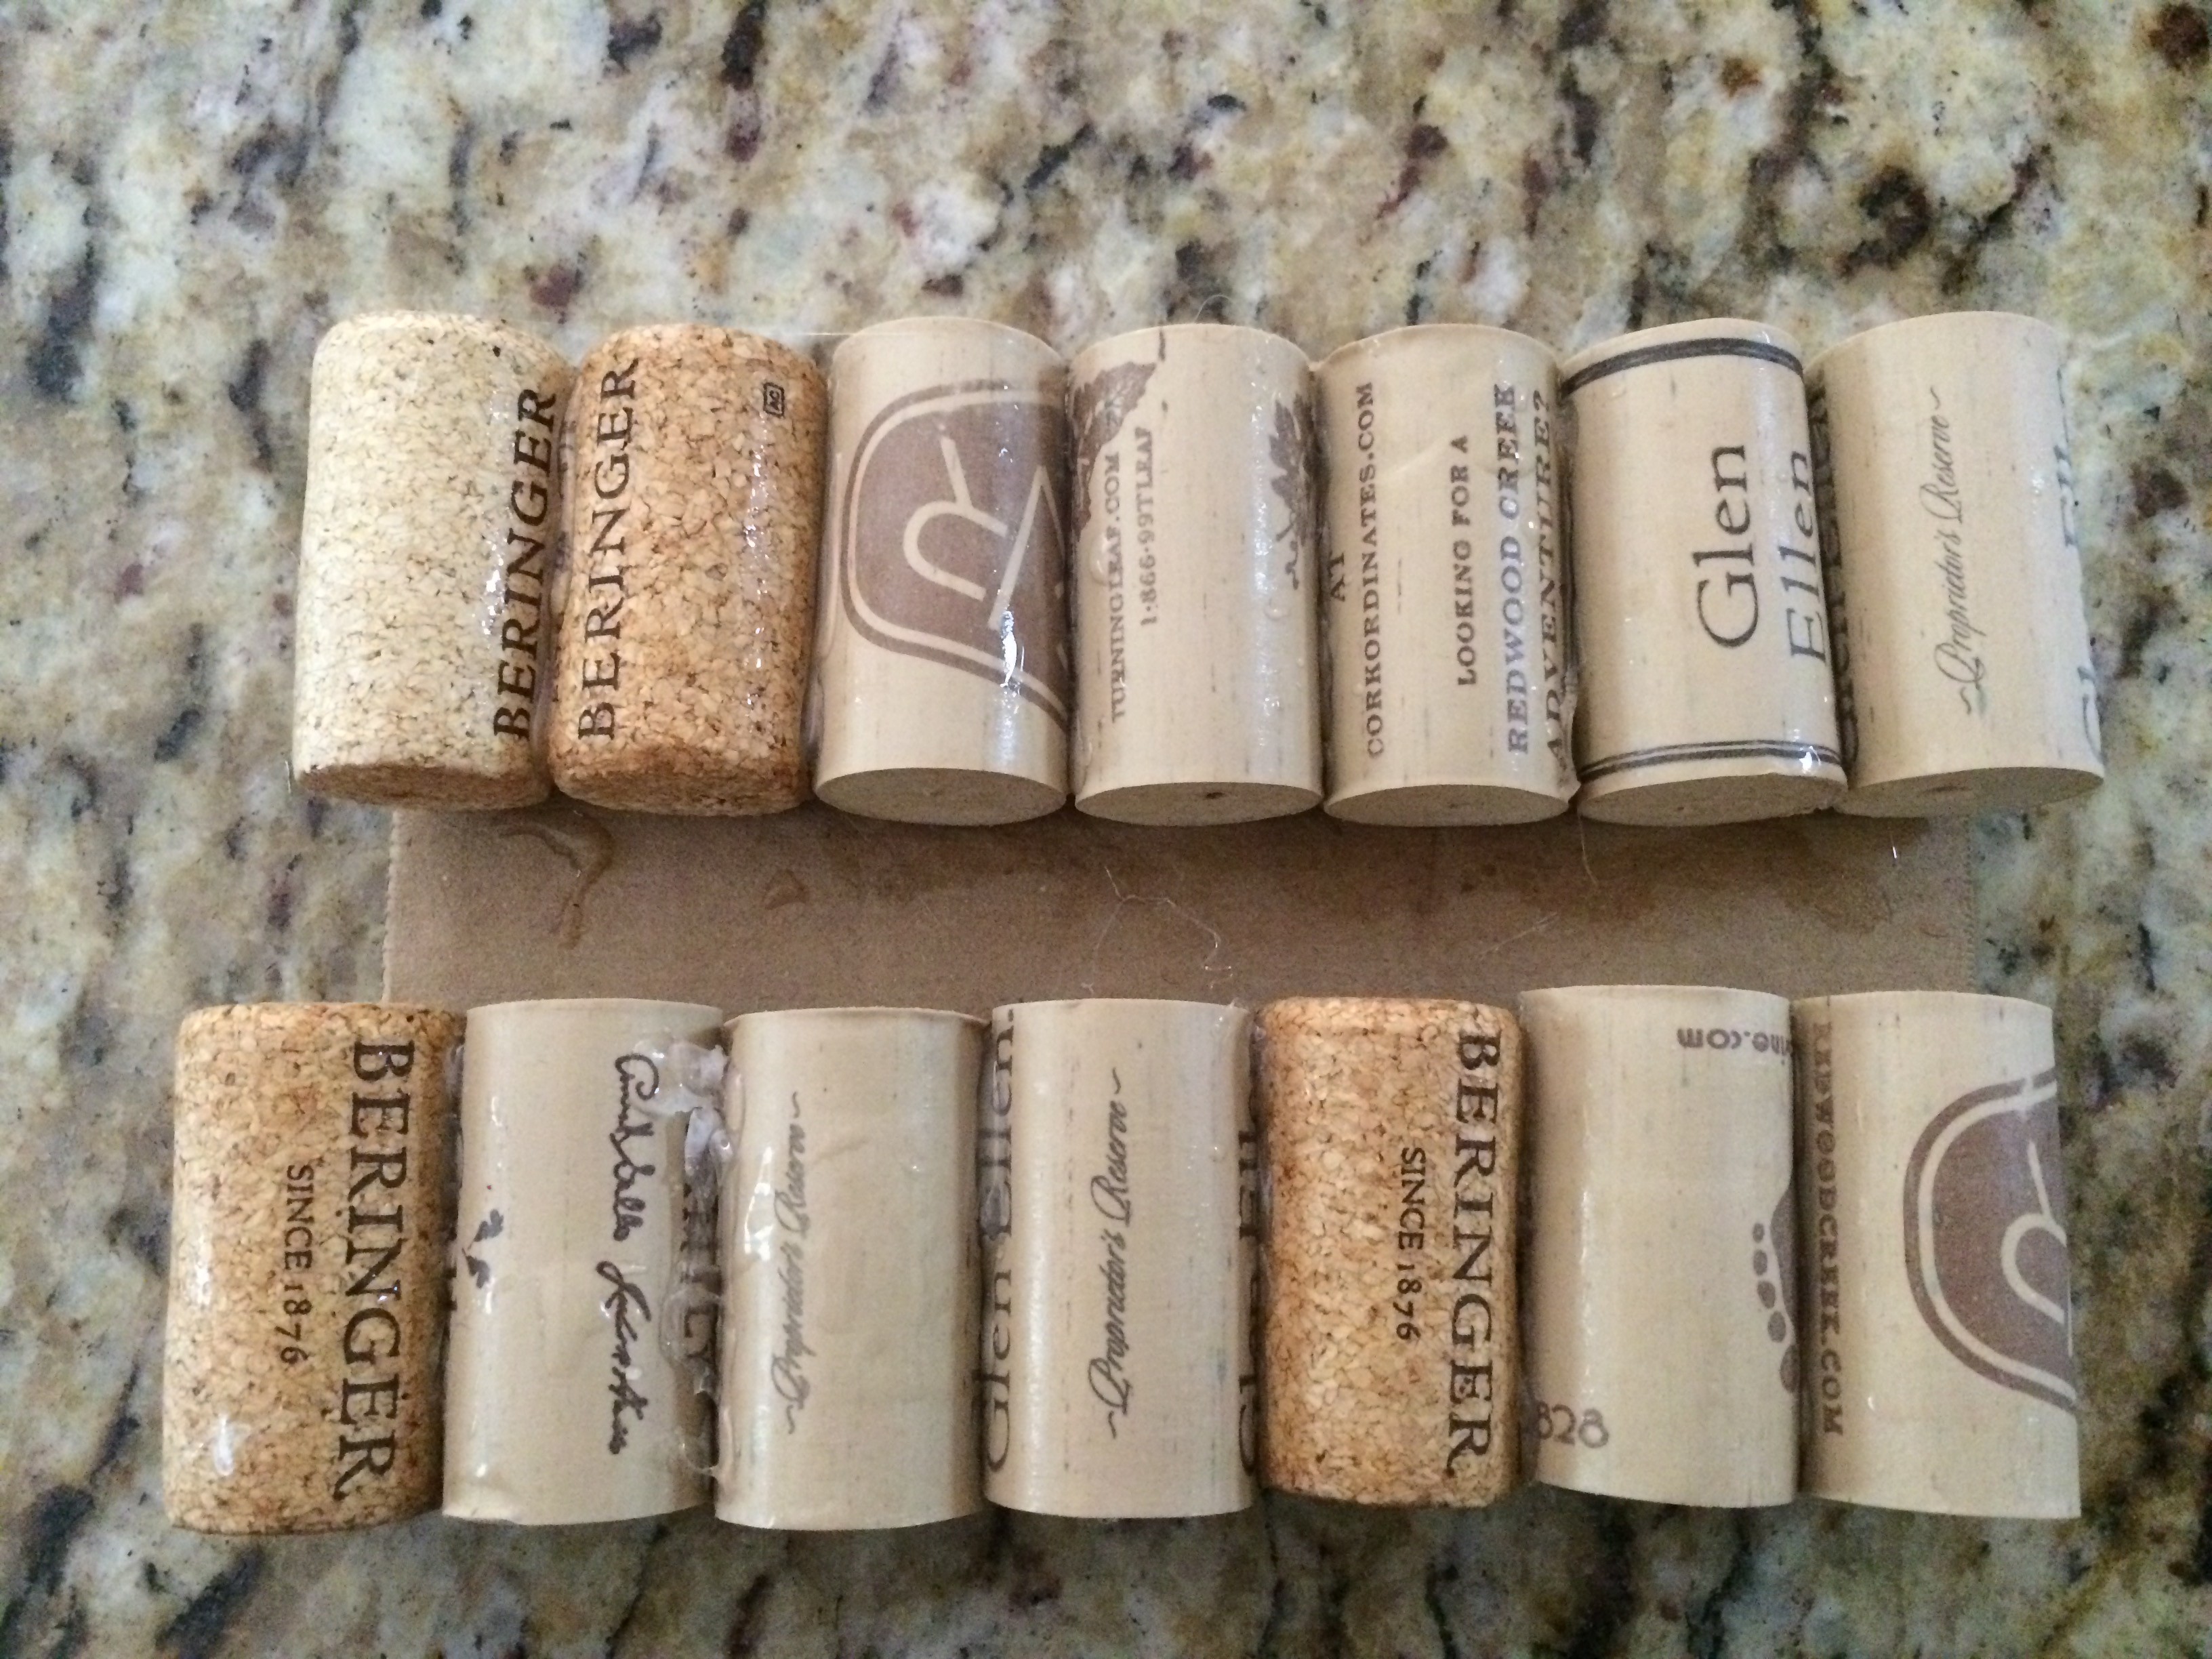
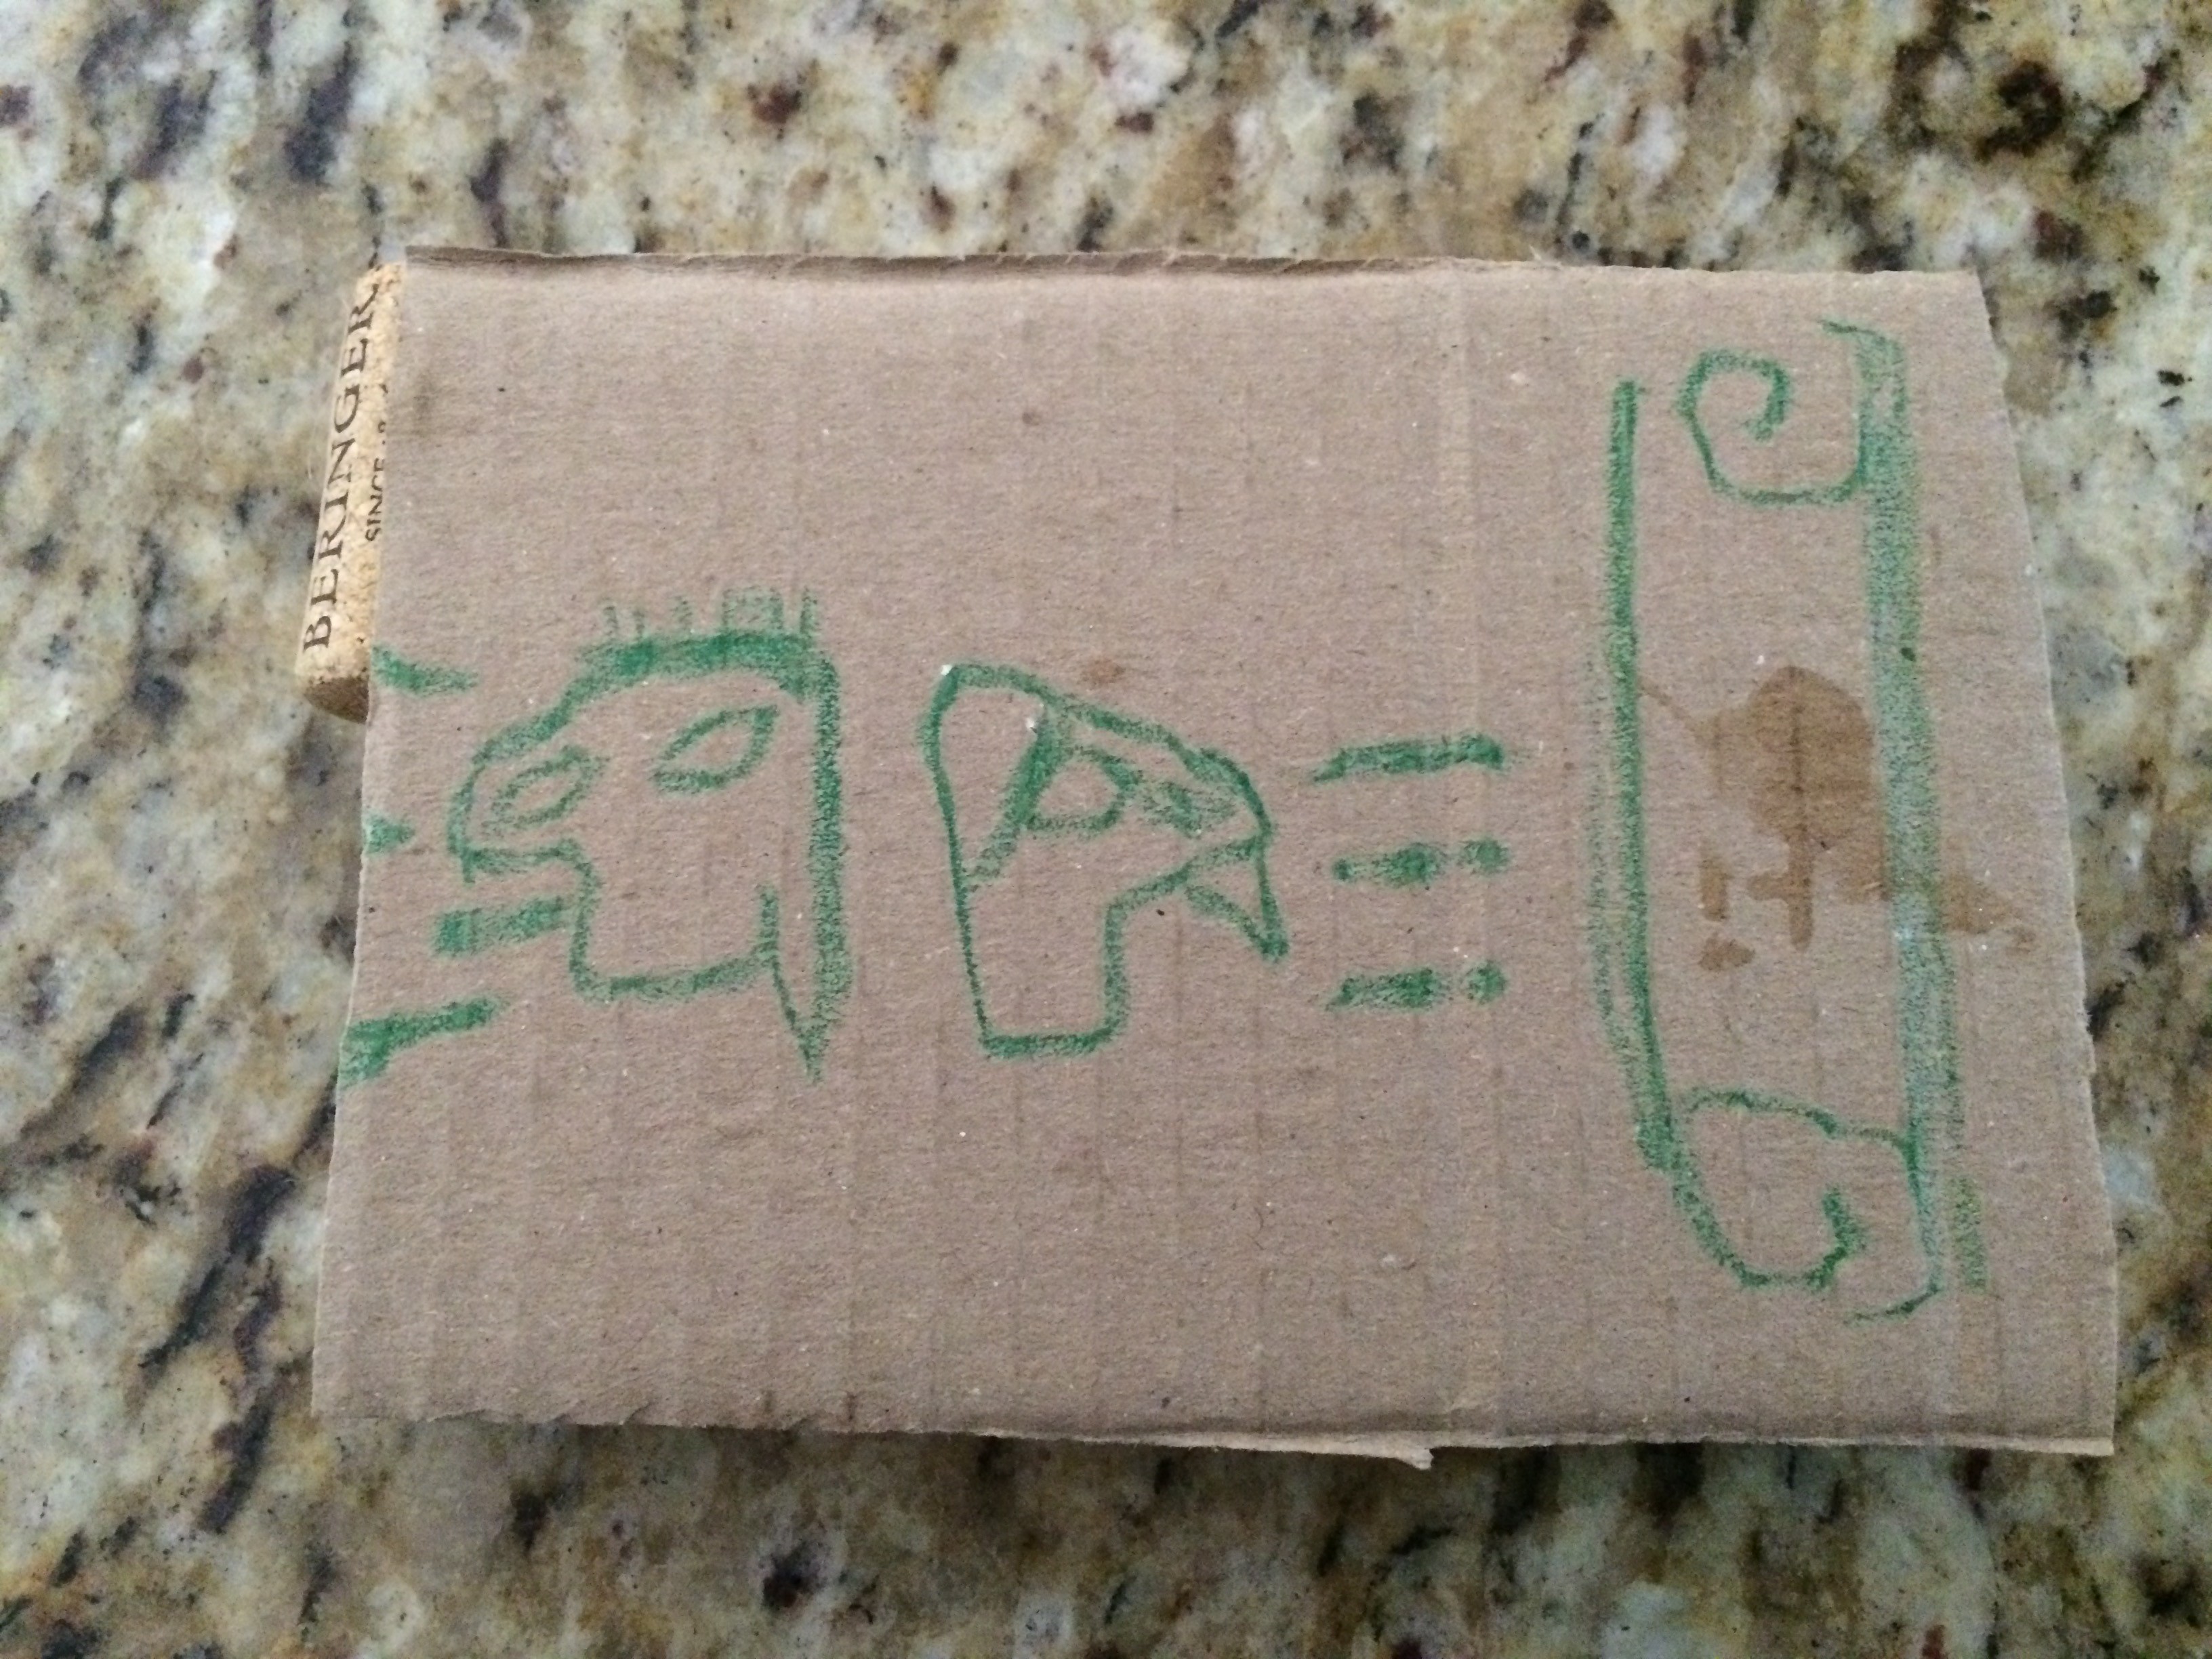
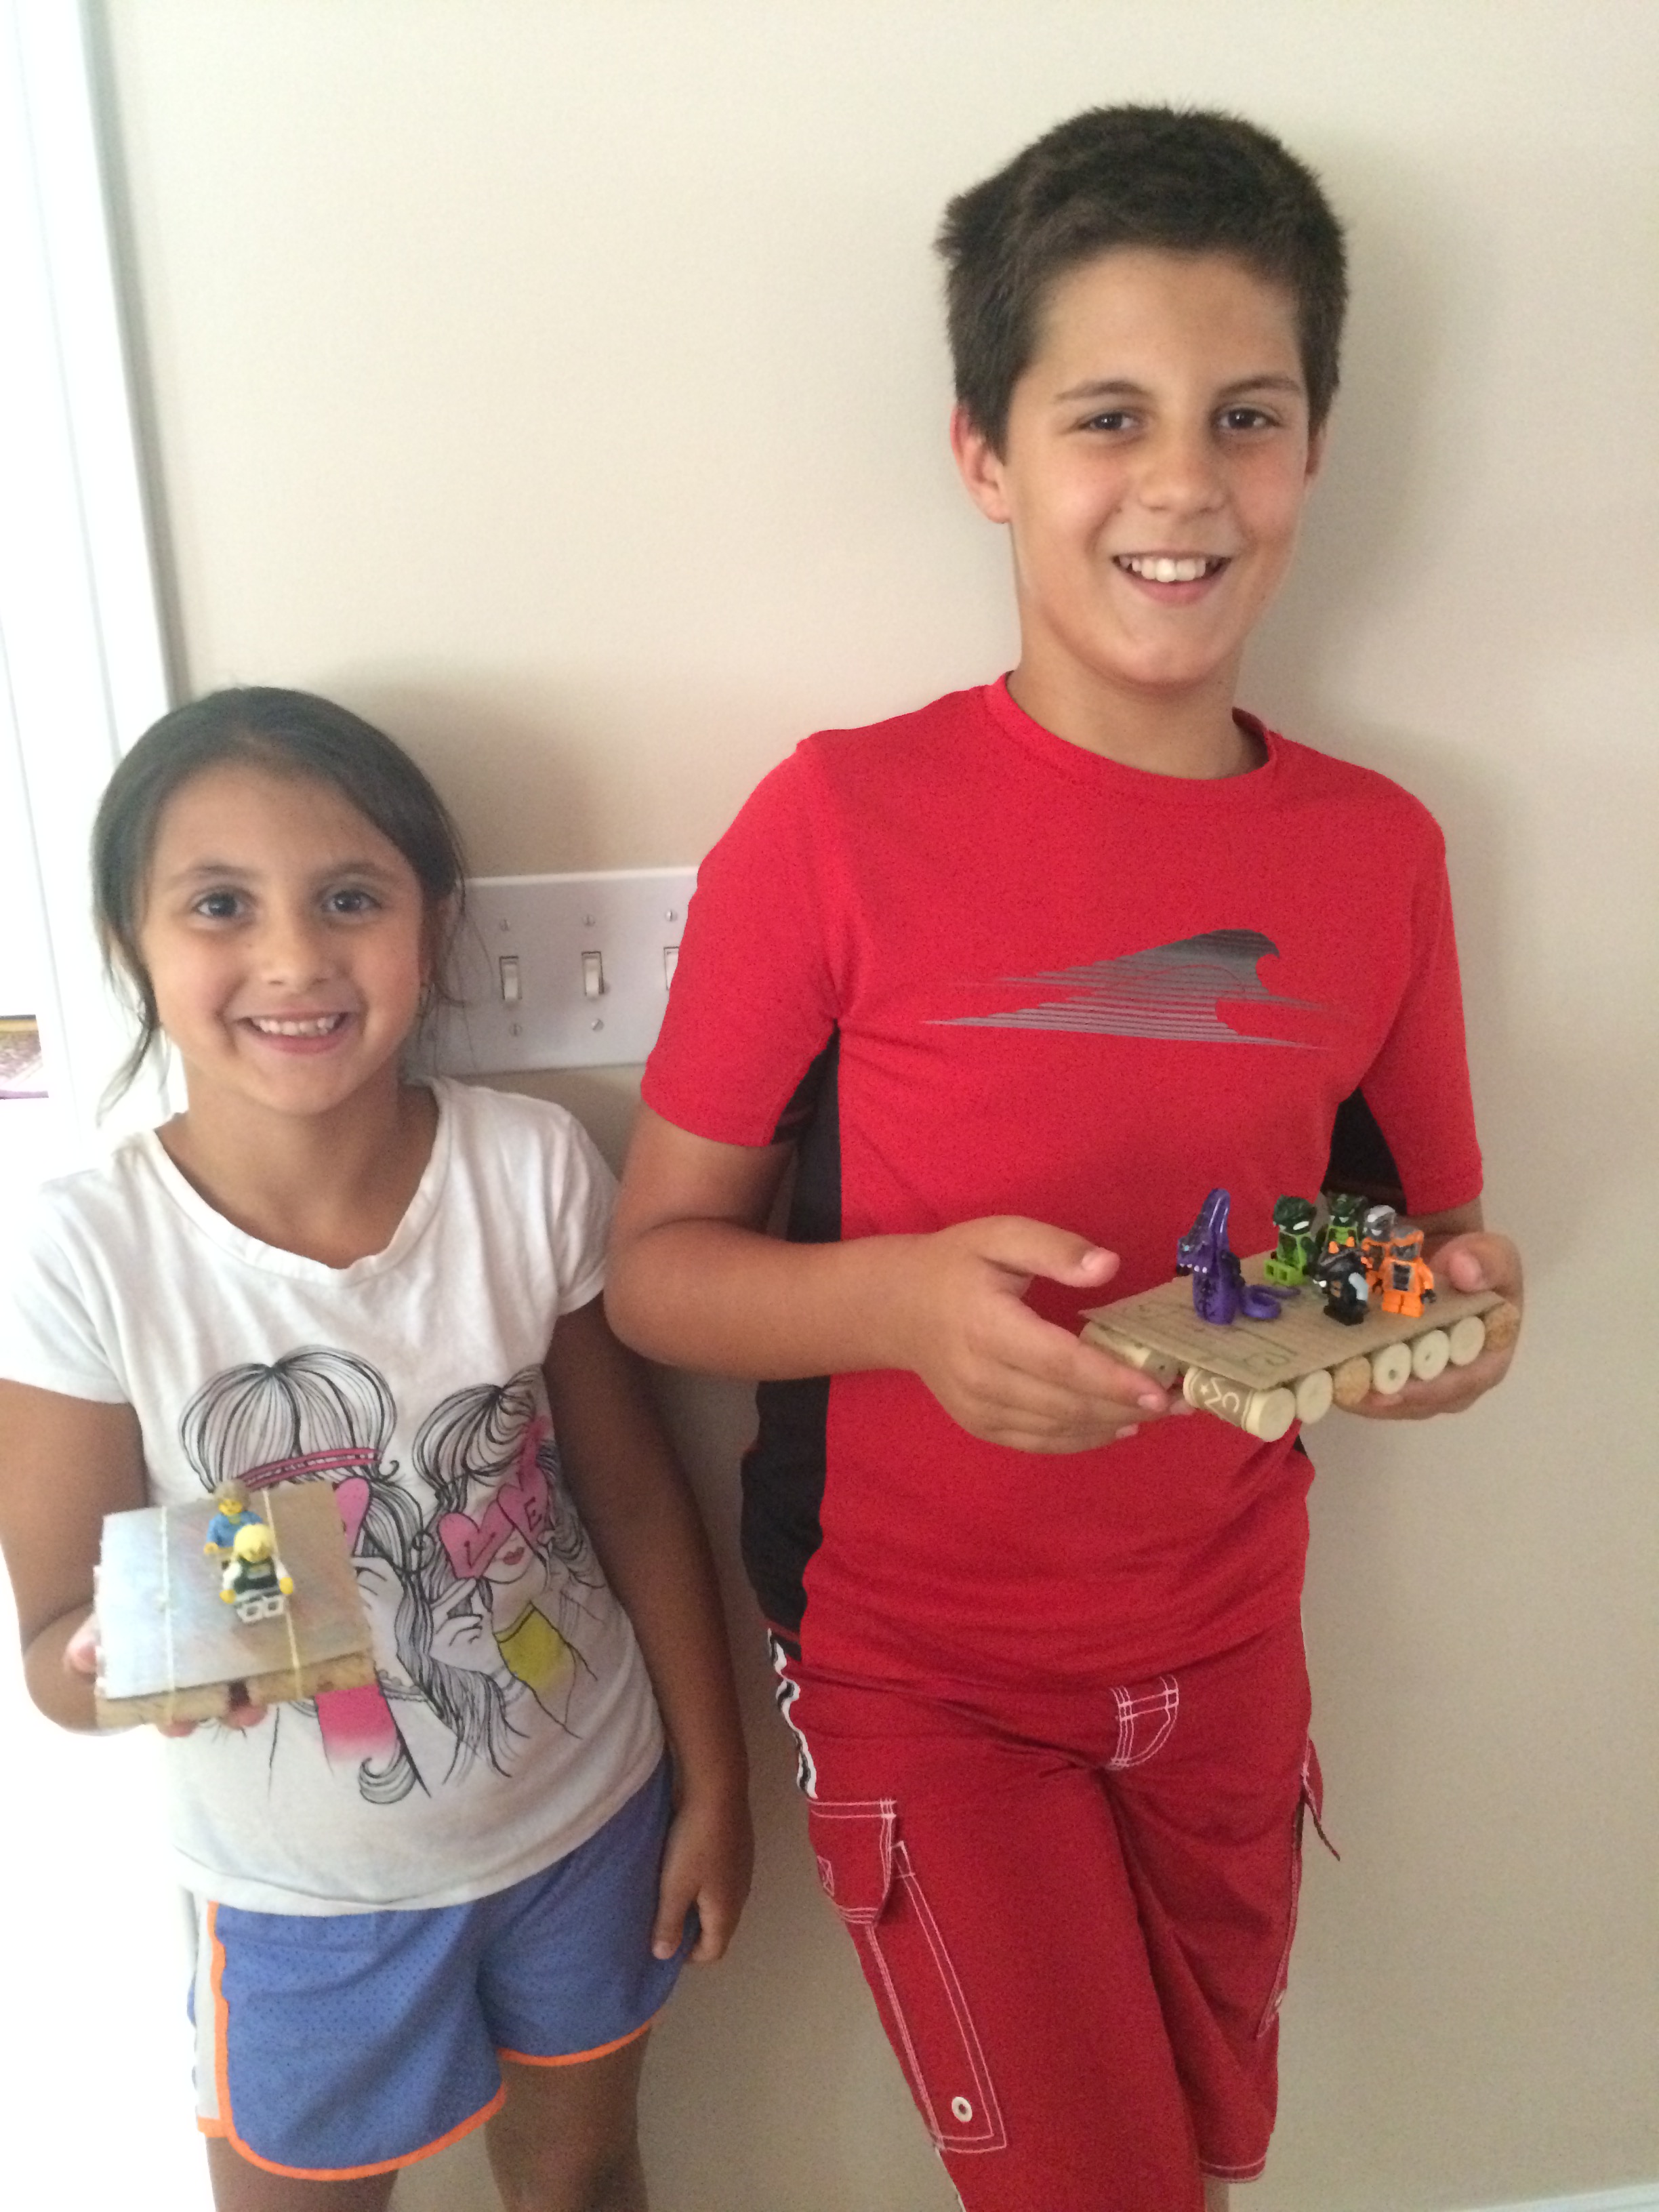
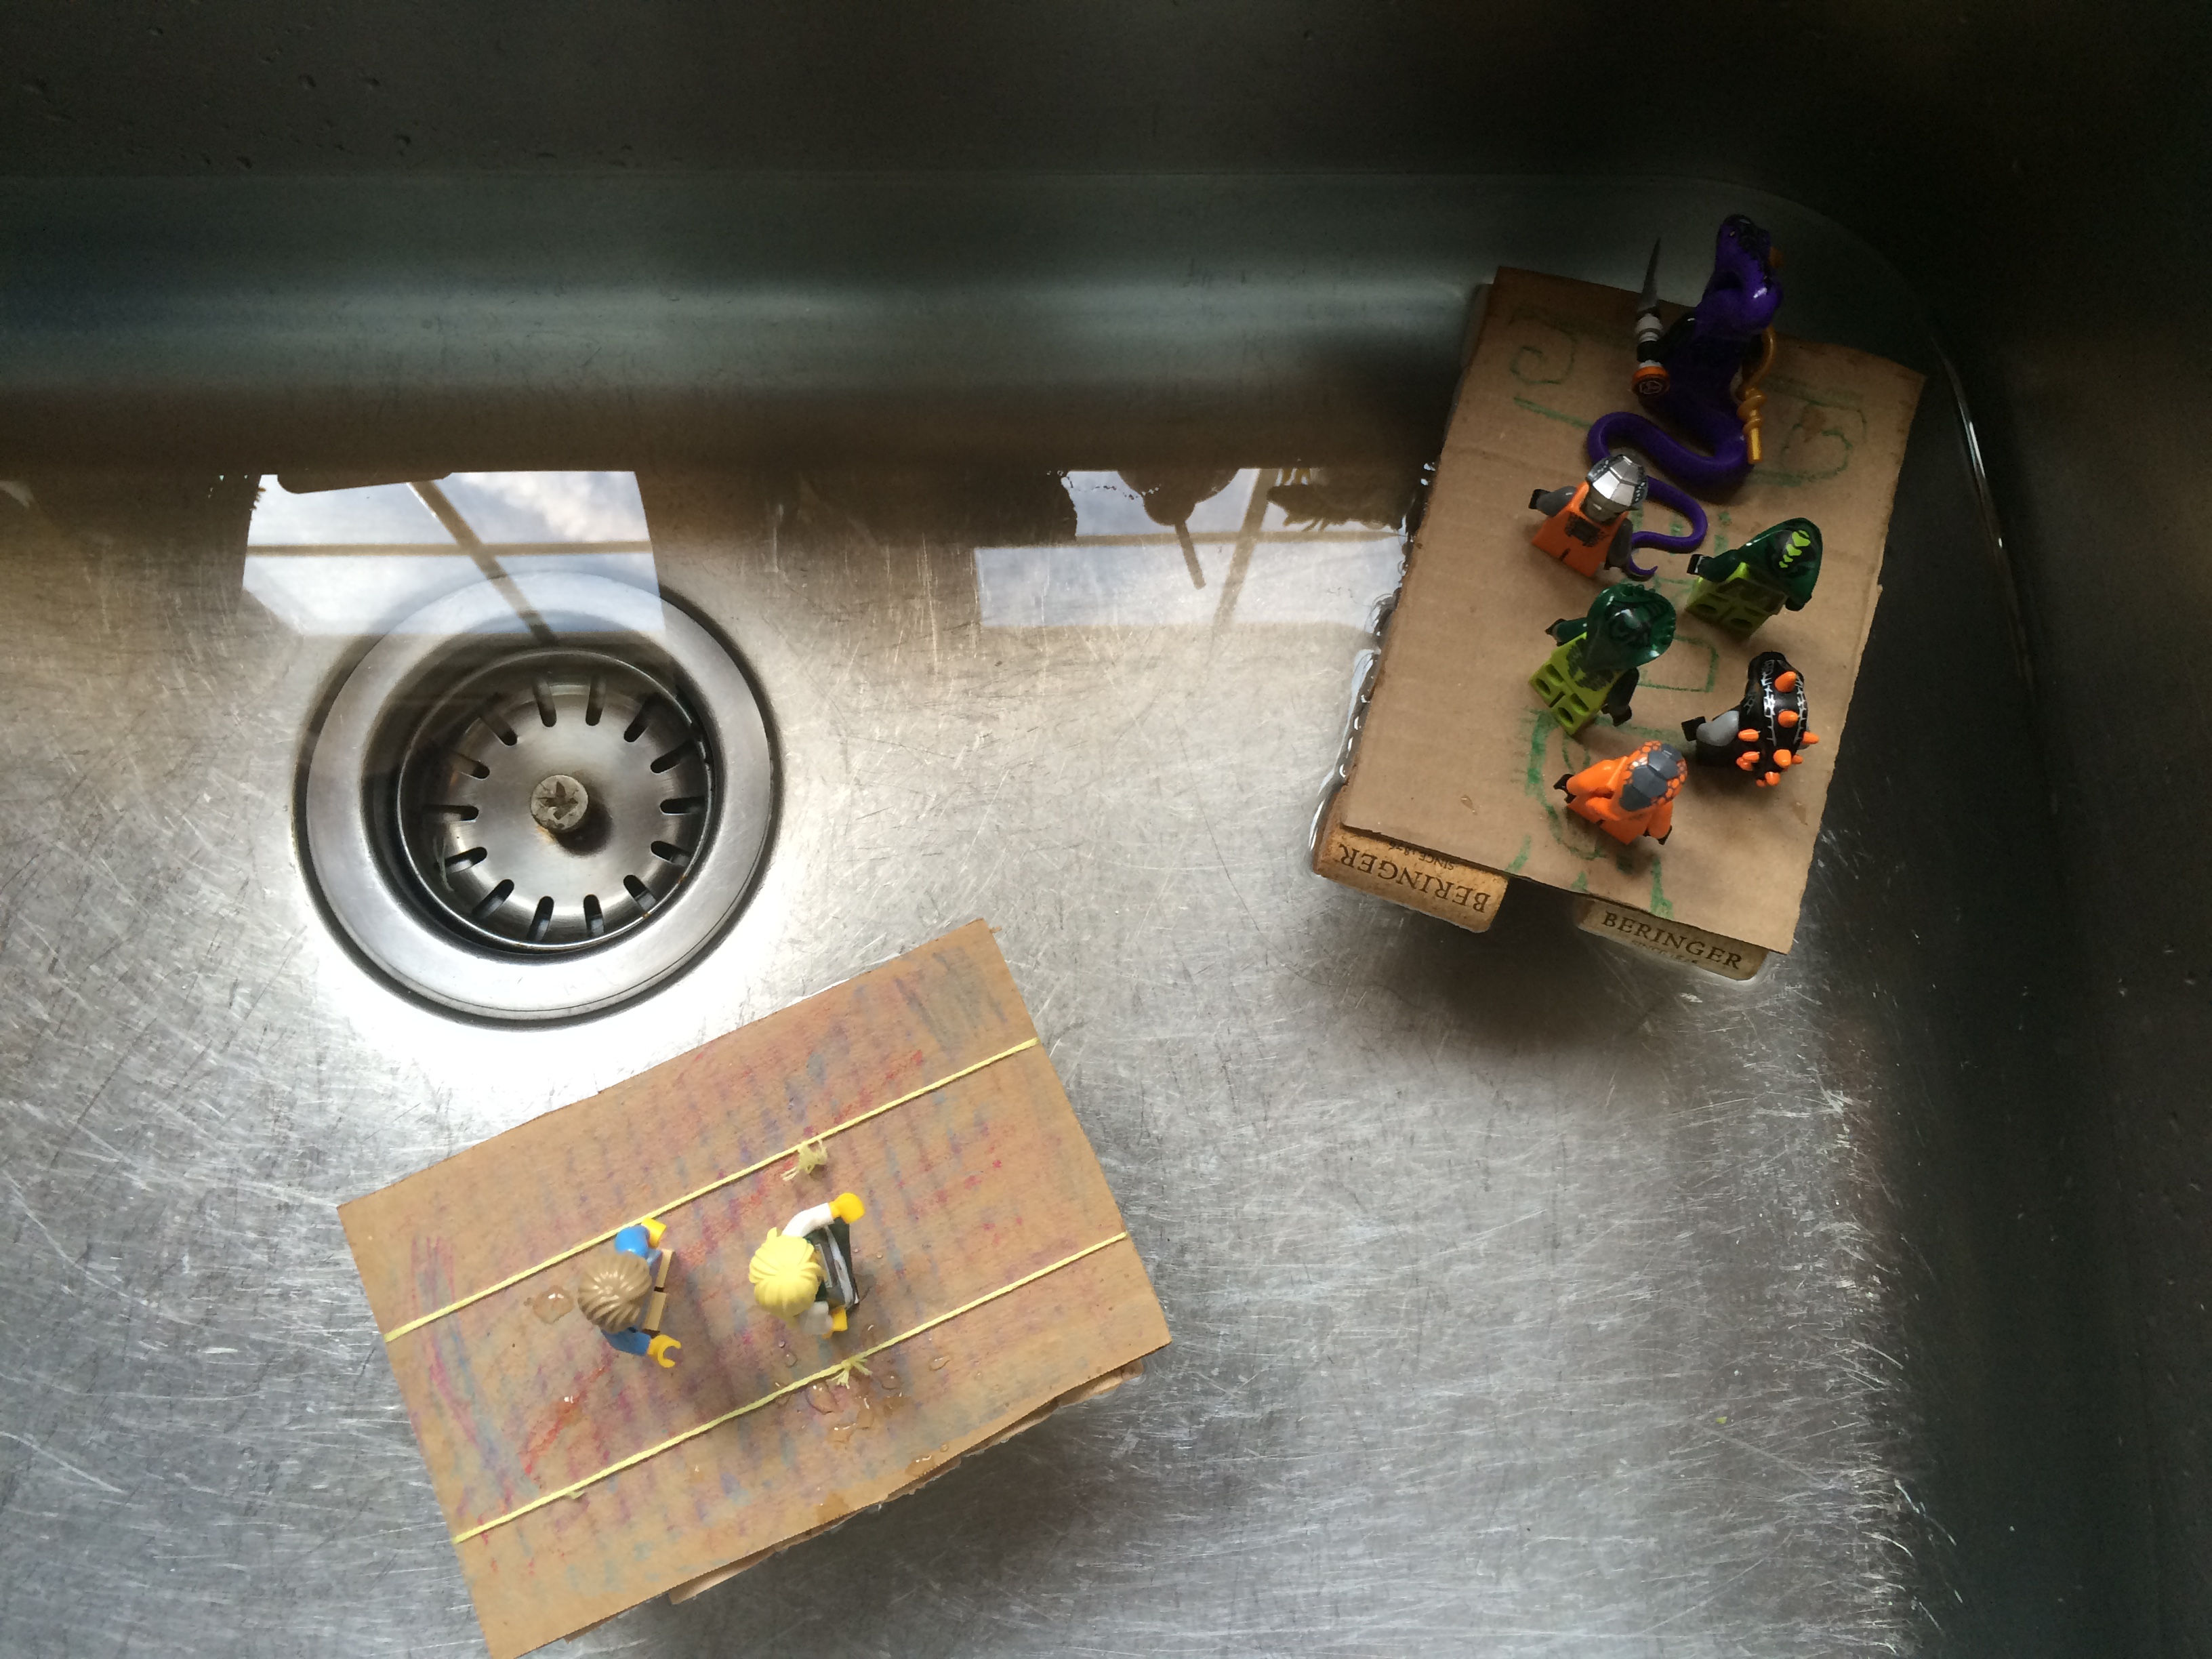
One of my favorite things we did was a challenge. One day recently everyone seemed to be in a funk. I was thinking about something exciting to do with stuff we had around the house. Like some kind of a challenge. So after a Google search didn’t turn up much, I went to Pinterest and found a Cork Raft Challenge for Kids. Basically they had to build a raft that would float people across water. With all the materials in hand and a bit of improvisation, I wrote my kids a note and delivered it to them in their rooms. It said: “Come to the kitchen for a challenge. Do you accept? P.S. Bring two Lego Minifigures.” I was gearing up for a fight, “this is boring”, “I don’t want to do this”, but they got right into it and loved it!


Wow! We actually did a lot! After re-reading this post, maybe they are bored because we did too much! Sounds like I am running a summer camp. But all-in-all, I am a very hands-on mother and I love to play and do projects so I guess as long as I can keep them interested, we all benefit! For any of you feeling the same as parents, I hope this post helped you, also check out my post called 10 Fun and Free Activities to do With Your Child This Summer. Enjoy the last month of summer!
Pulled Pork and Cole Slaw – Easiest Recipe Ever!
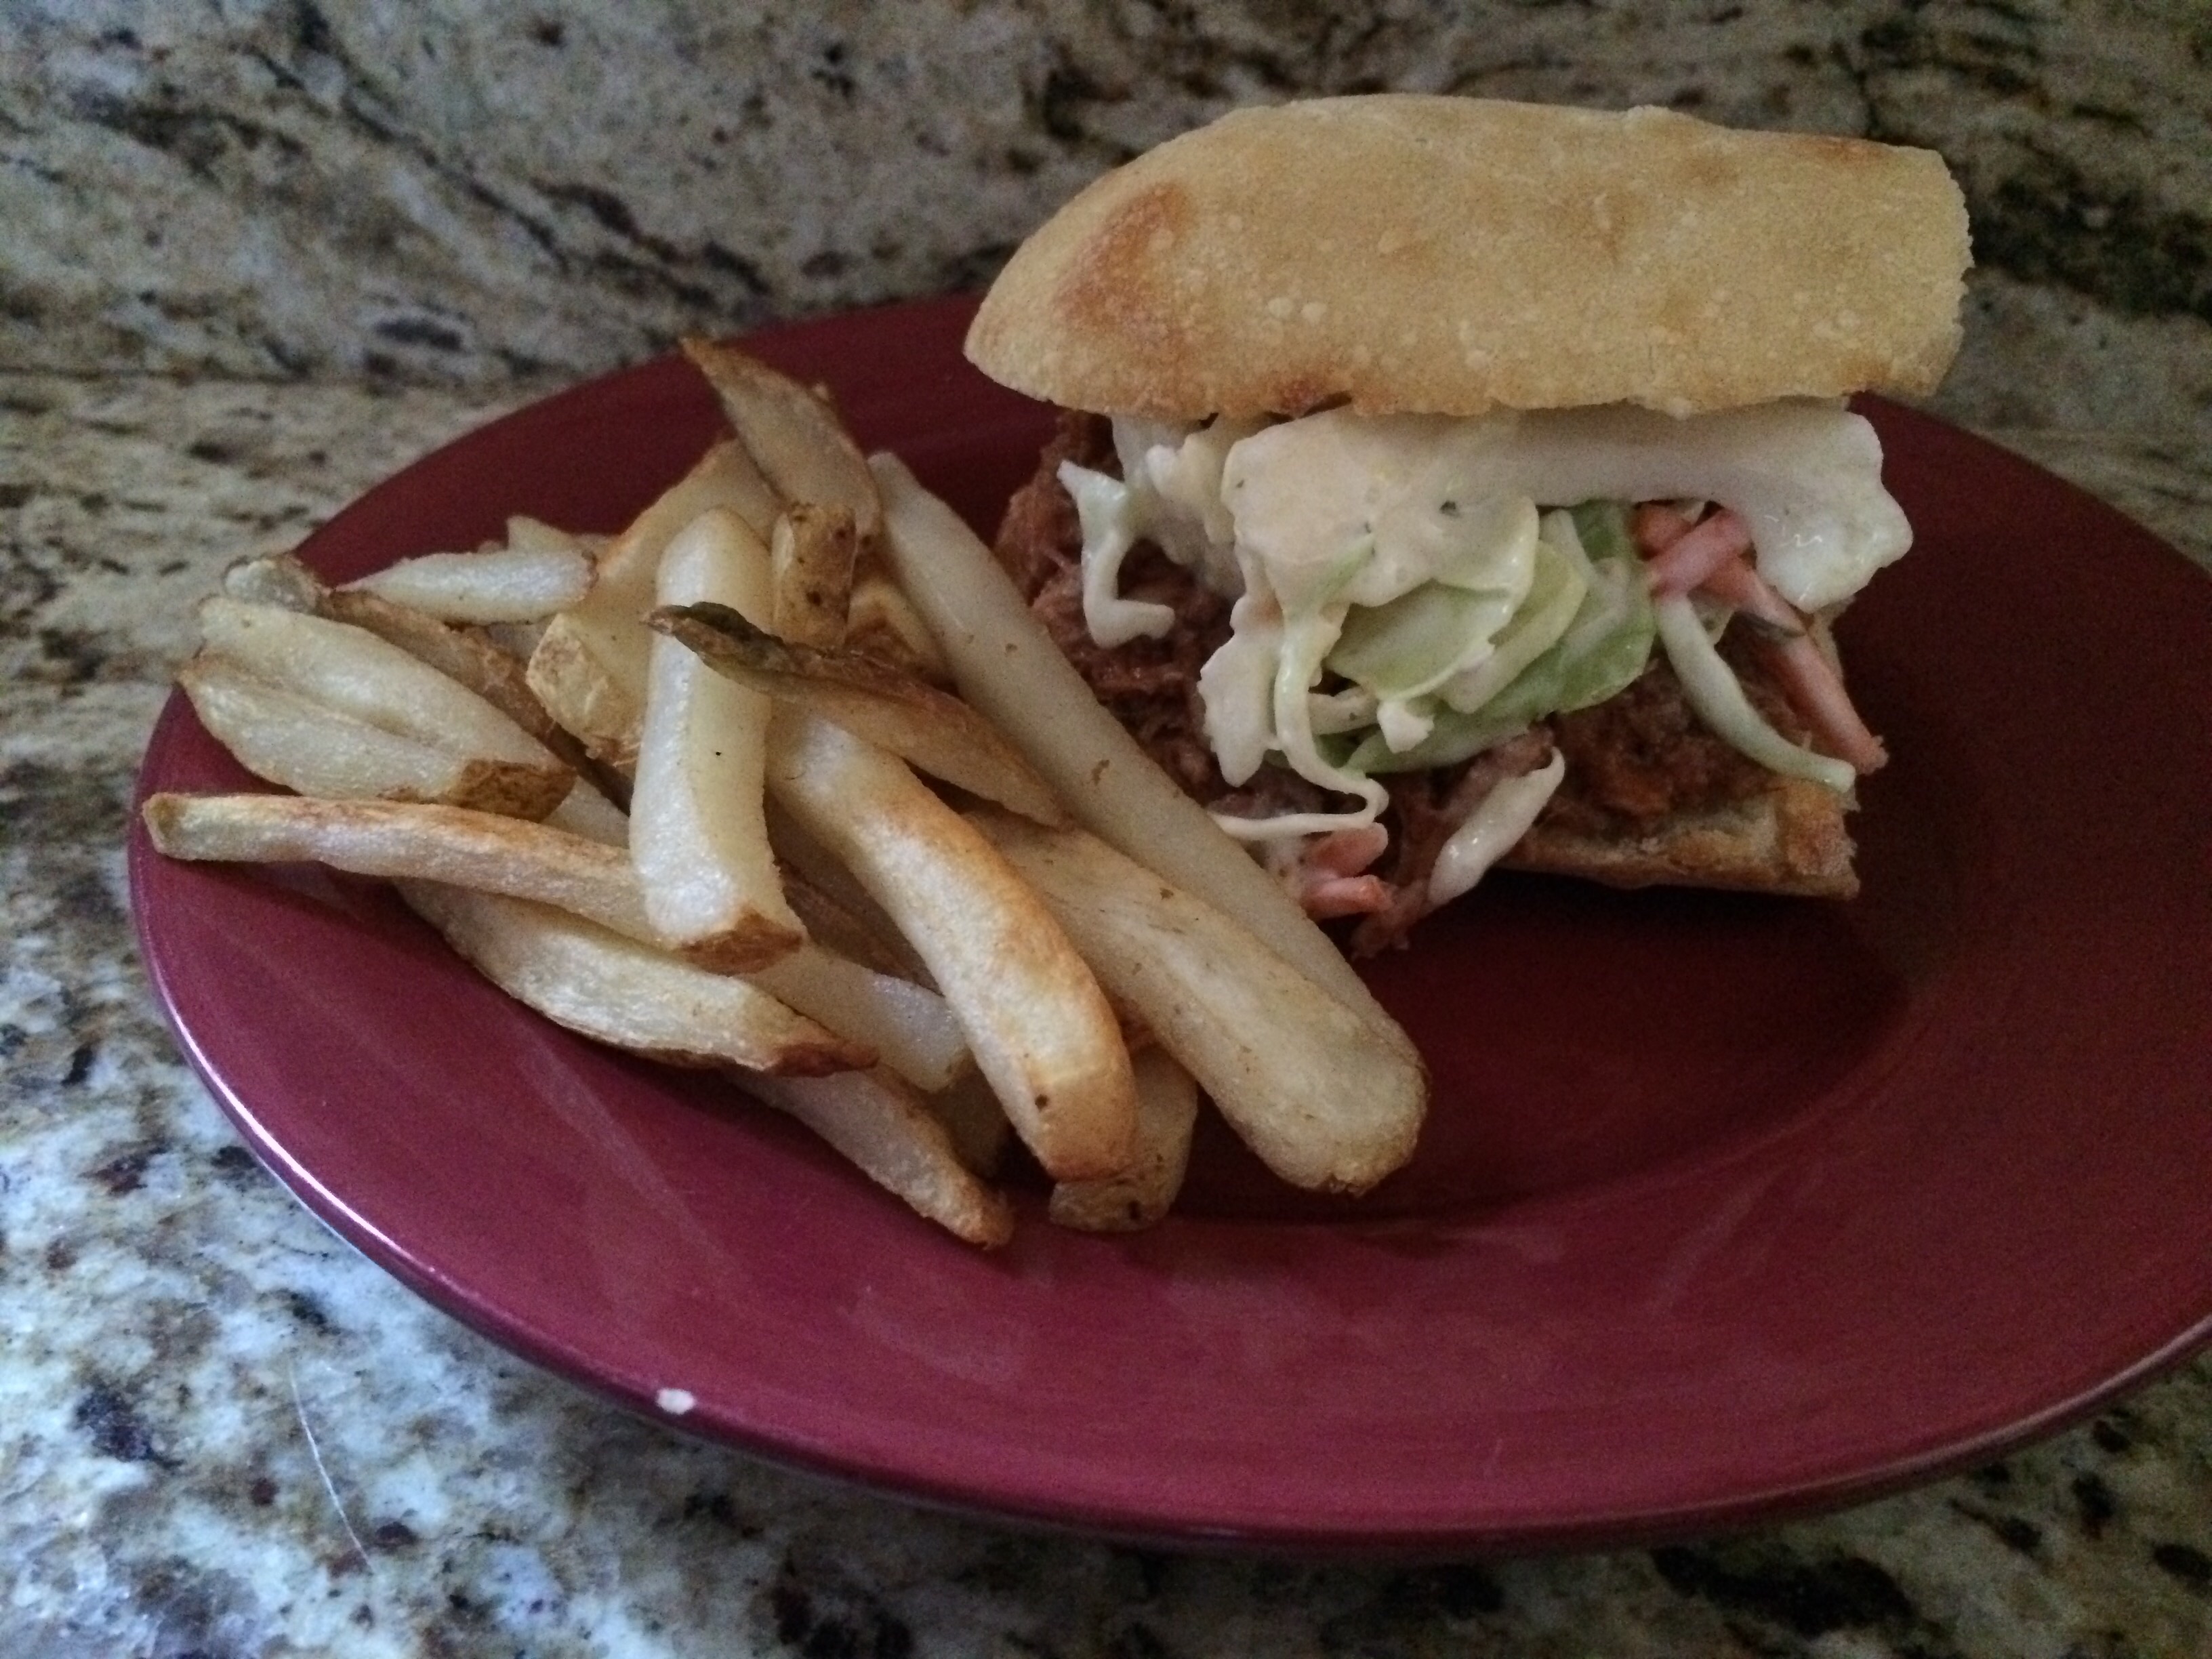
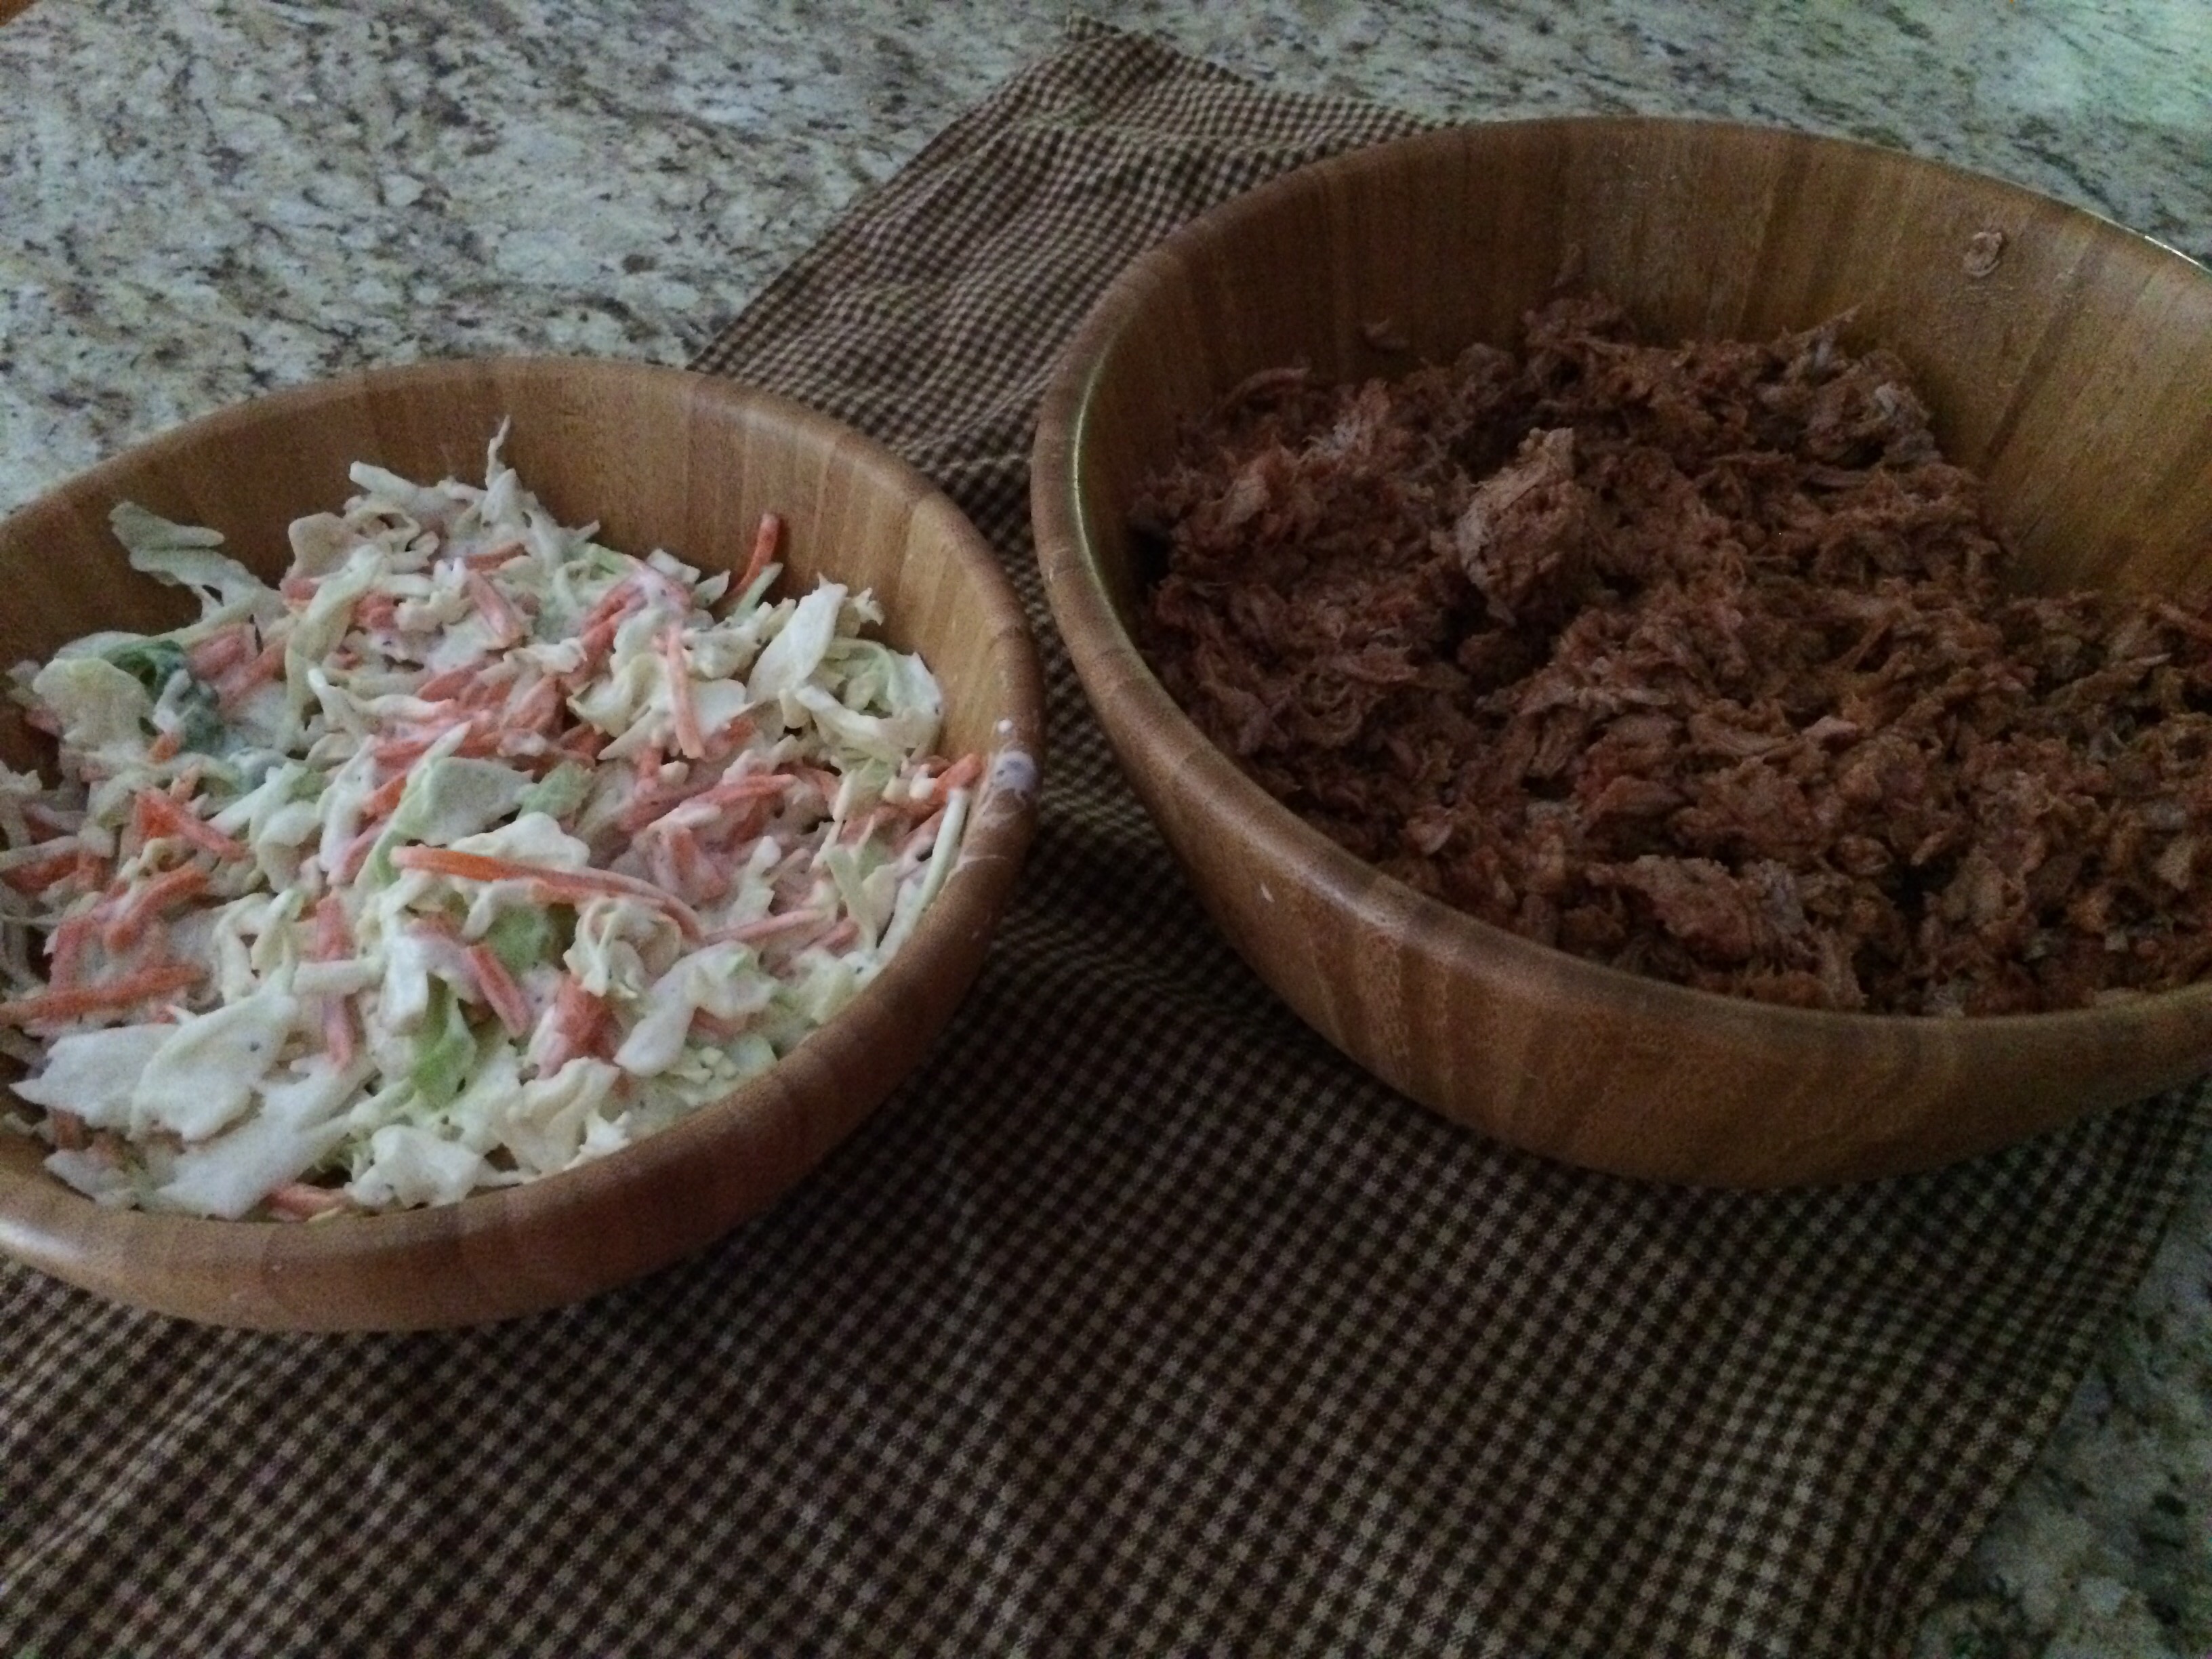
A few years ago, it seemed like pulled pork became the new dinner craze! I wanted to make it, but wasn’t into the rubs and the full day cooking so I created my own quick, easy and yummy way to make pulled pork using a pork tenderloin.
Ingredients:
Pork tenderloin (can easily find pre-wrapped in grocery store or butcher)
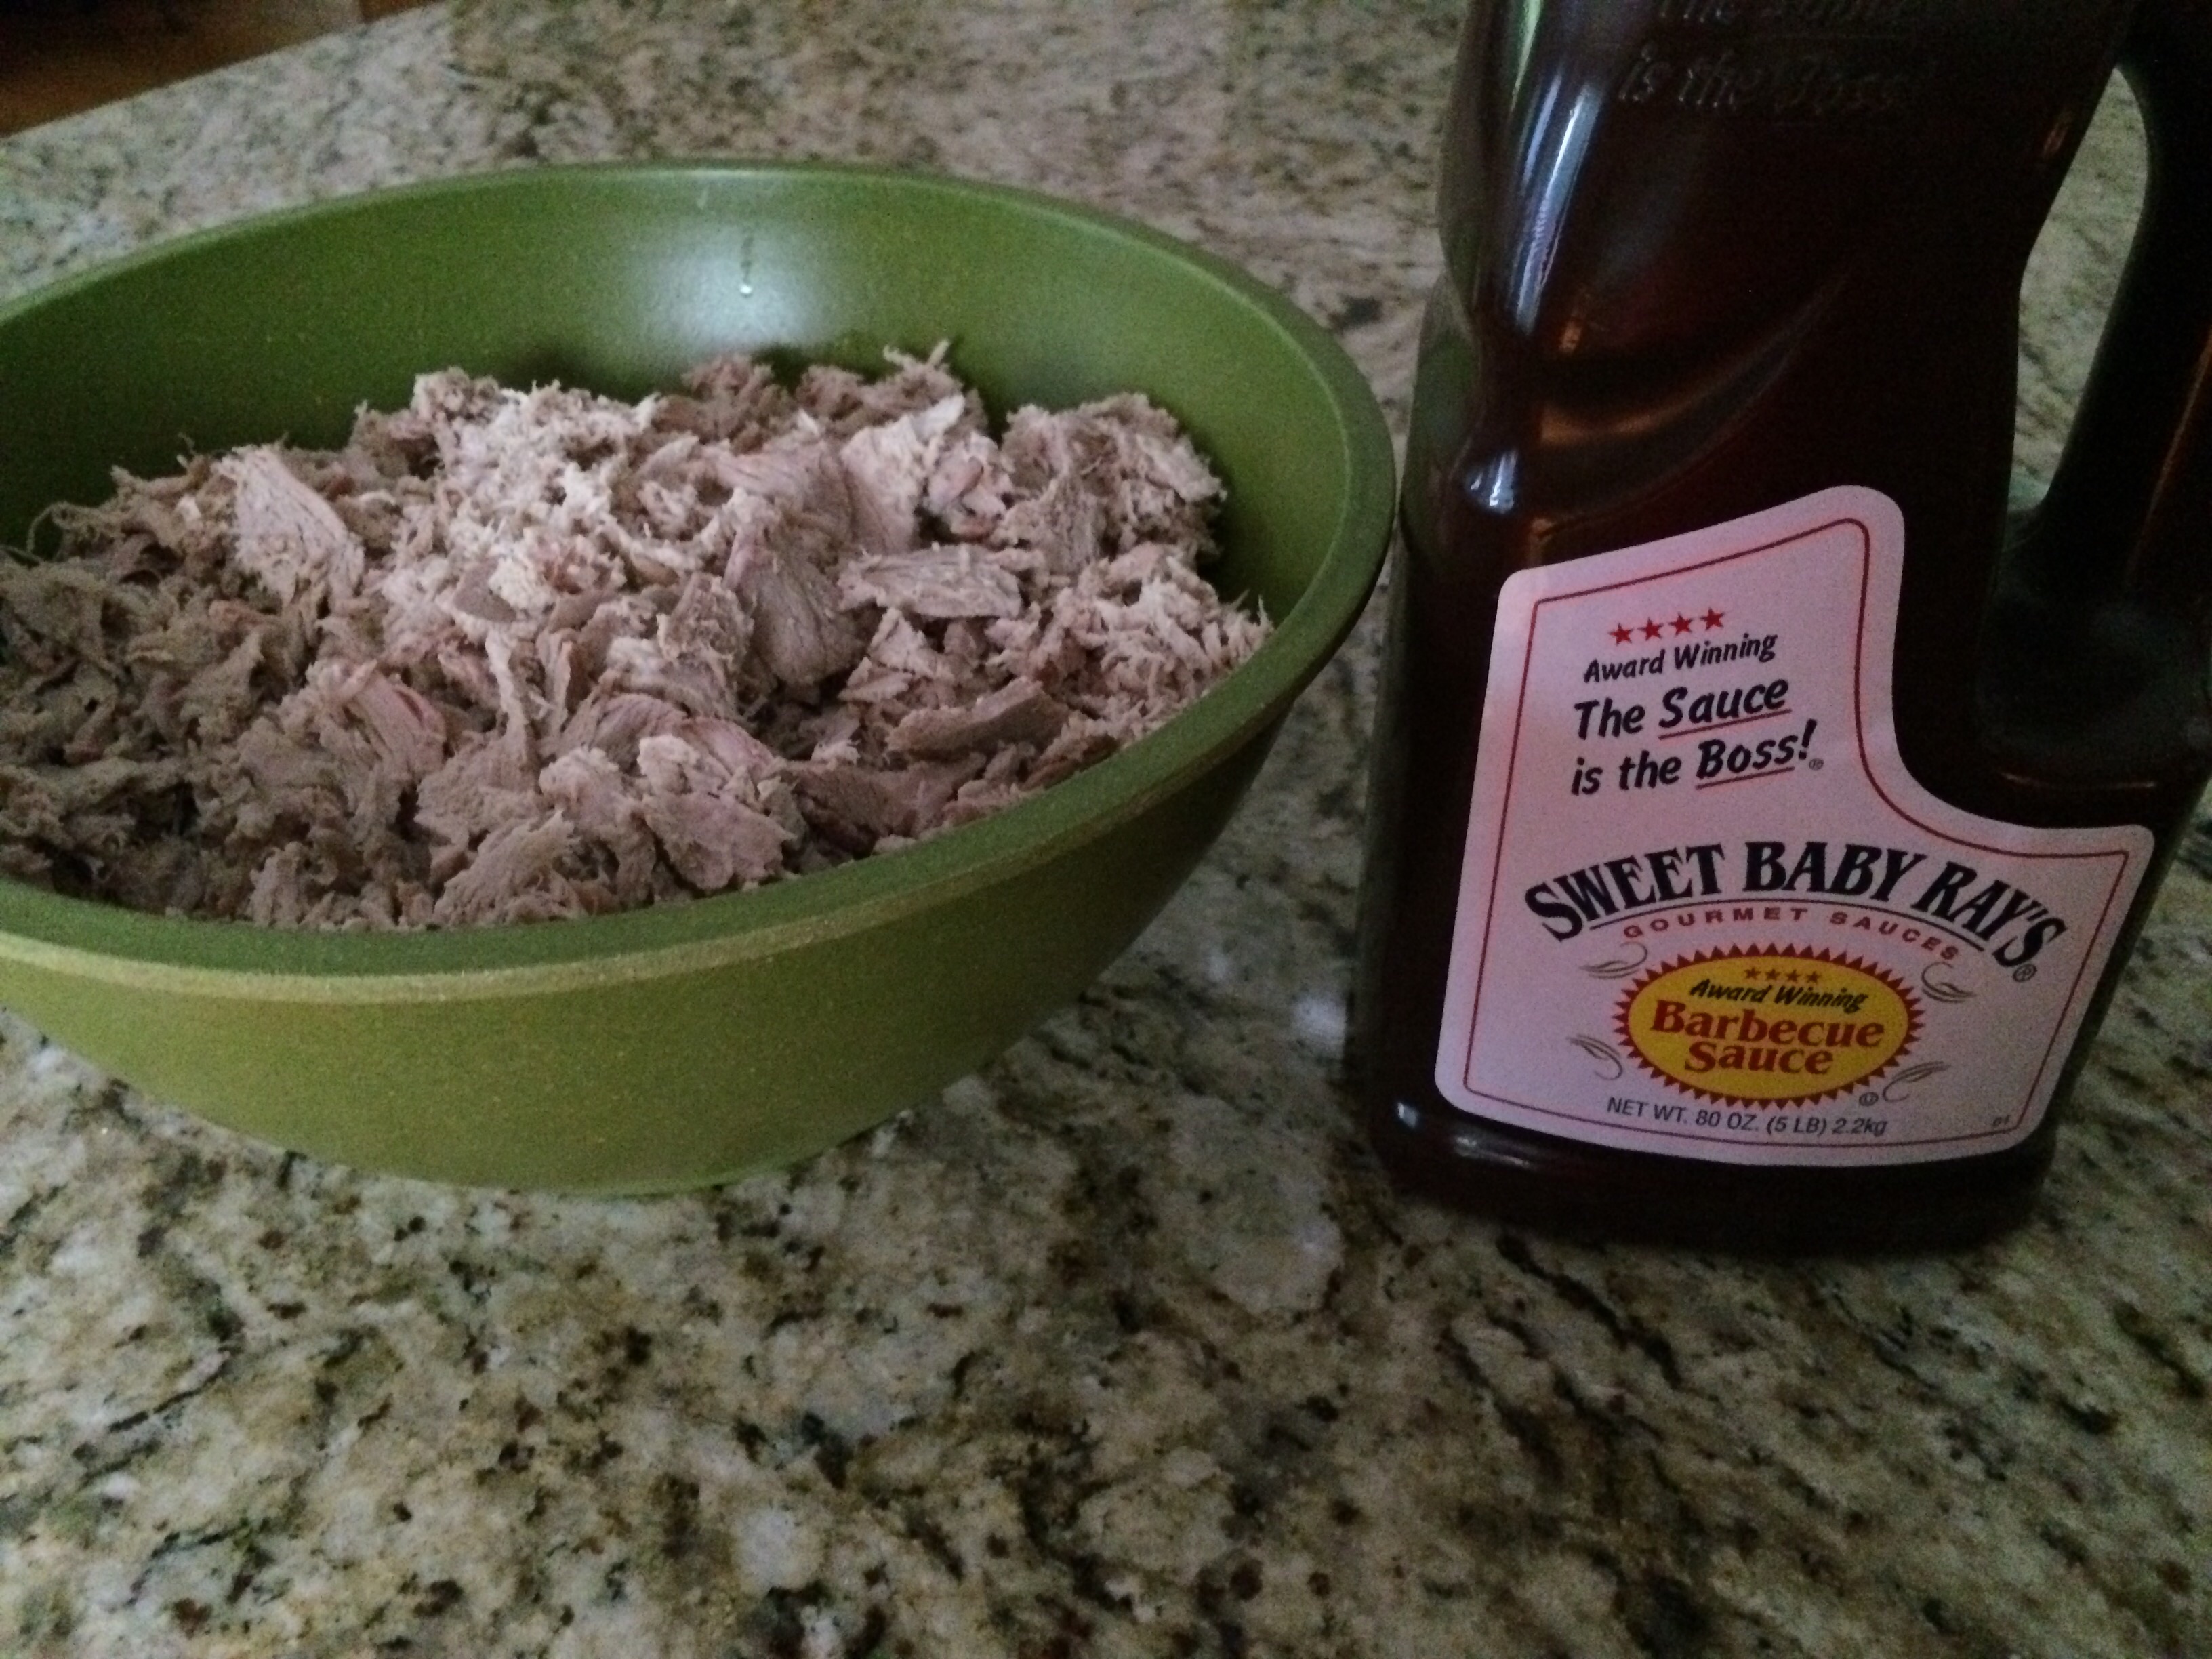
Sweet Baby Ray’s BBQ sauce (or any BBQ sauce you love)
Rolls (regular size hard rolls or sliders)
Salt
Pepper
Garlic Powder
Olive Oil
1. Preheat oven to 400 degrees. Take Pork Tenderloin out of package and put in a small roasting pan. I use a Pampered Chef Stoneware stone.
2. Drizzle olive oil over the pork and season with salt, pepper and garlic powder. Bake for 40-50 minutes or until no longer pink in the middle.
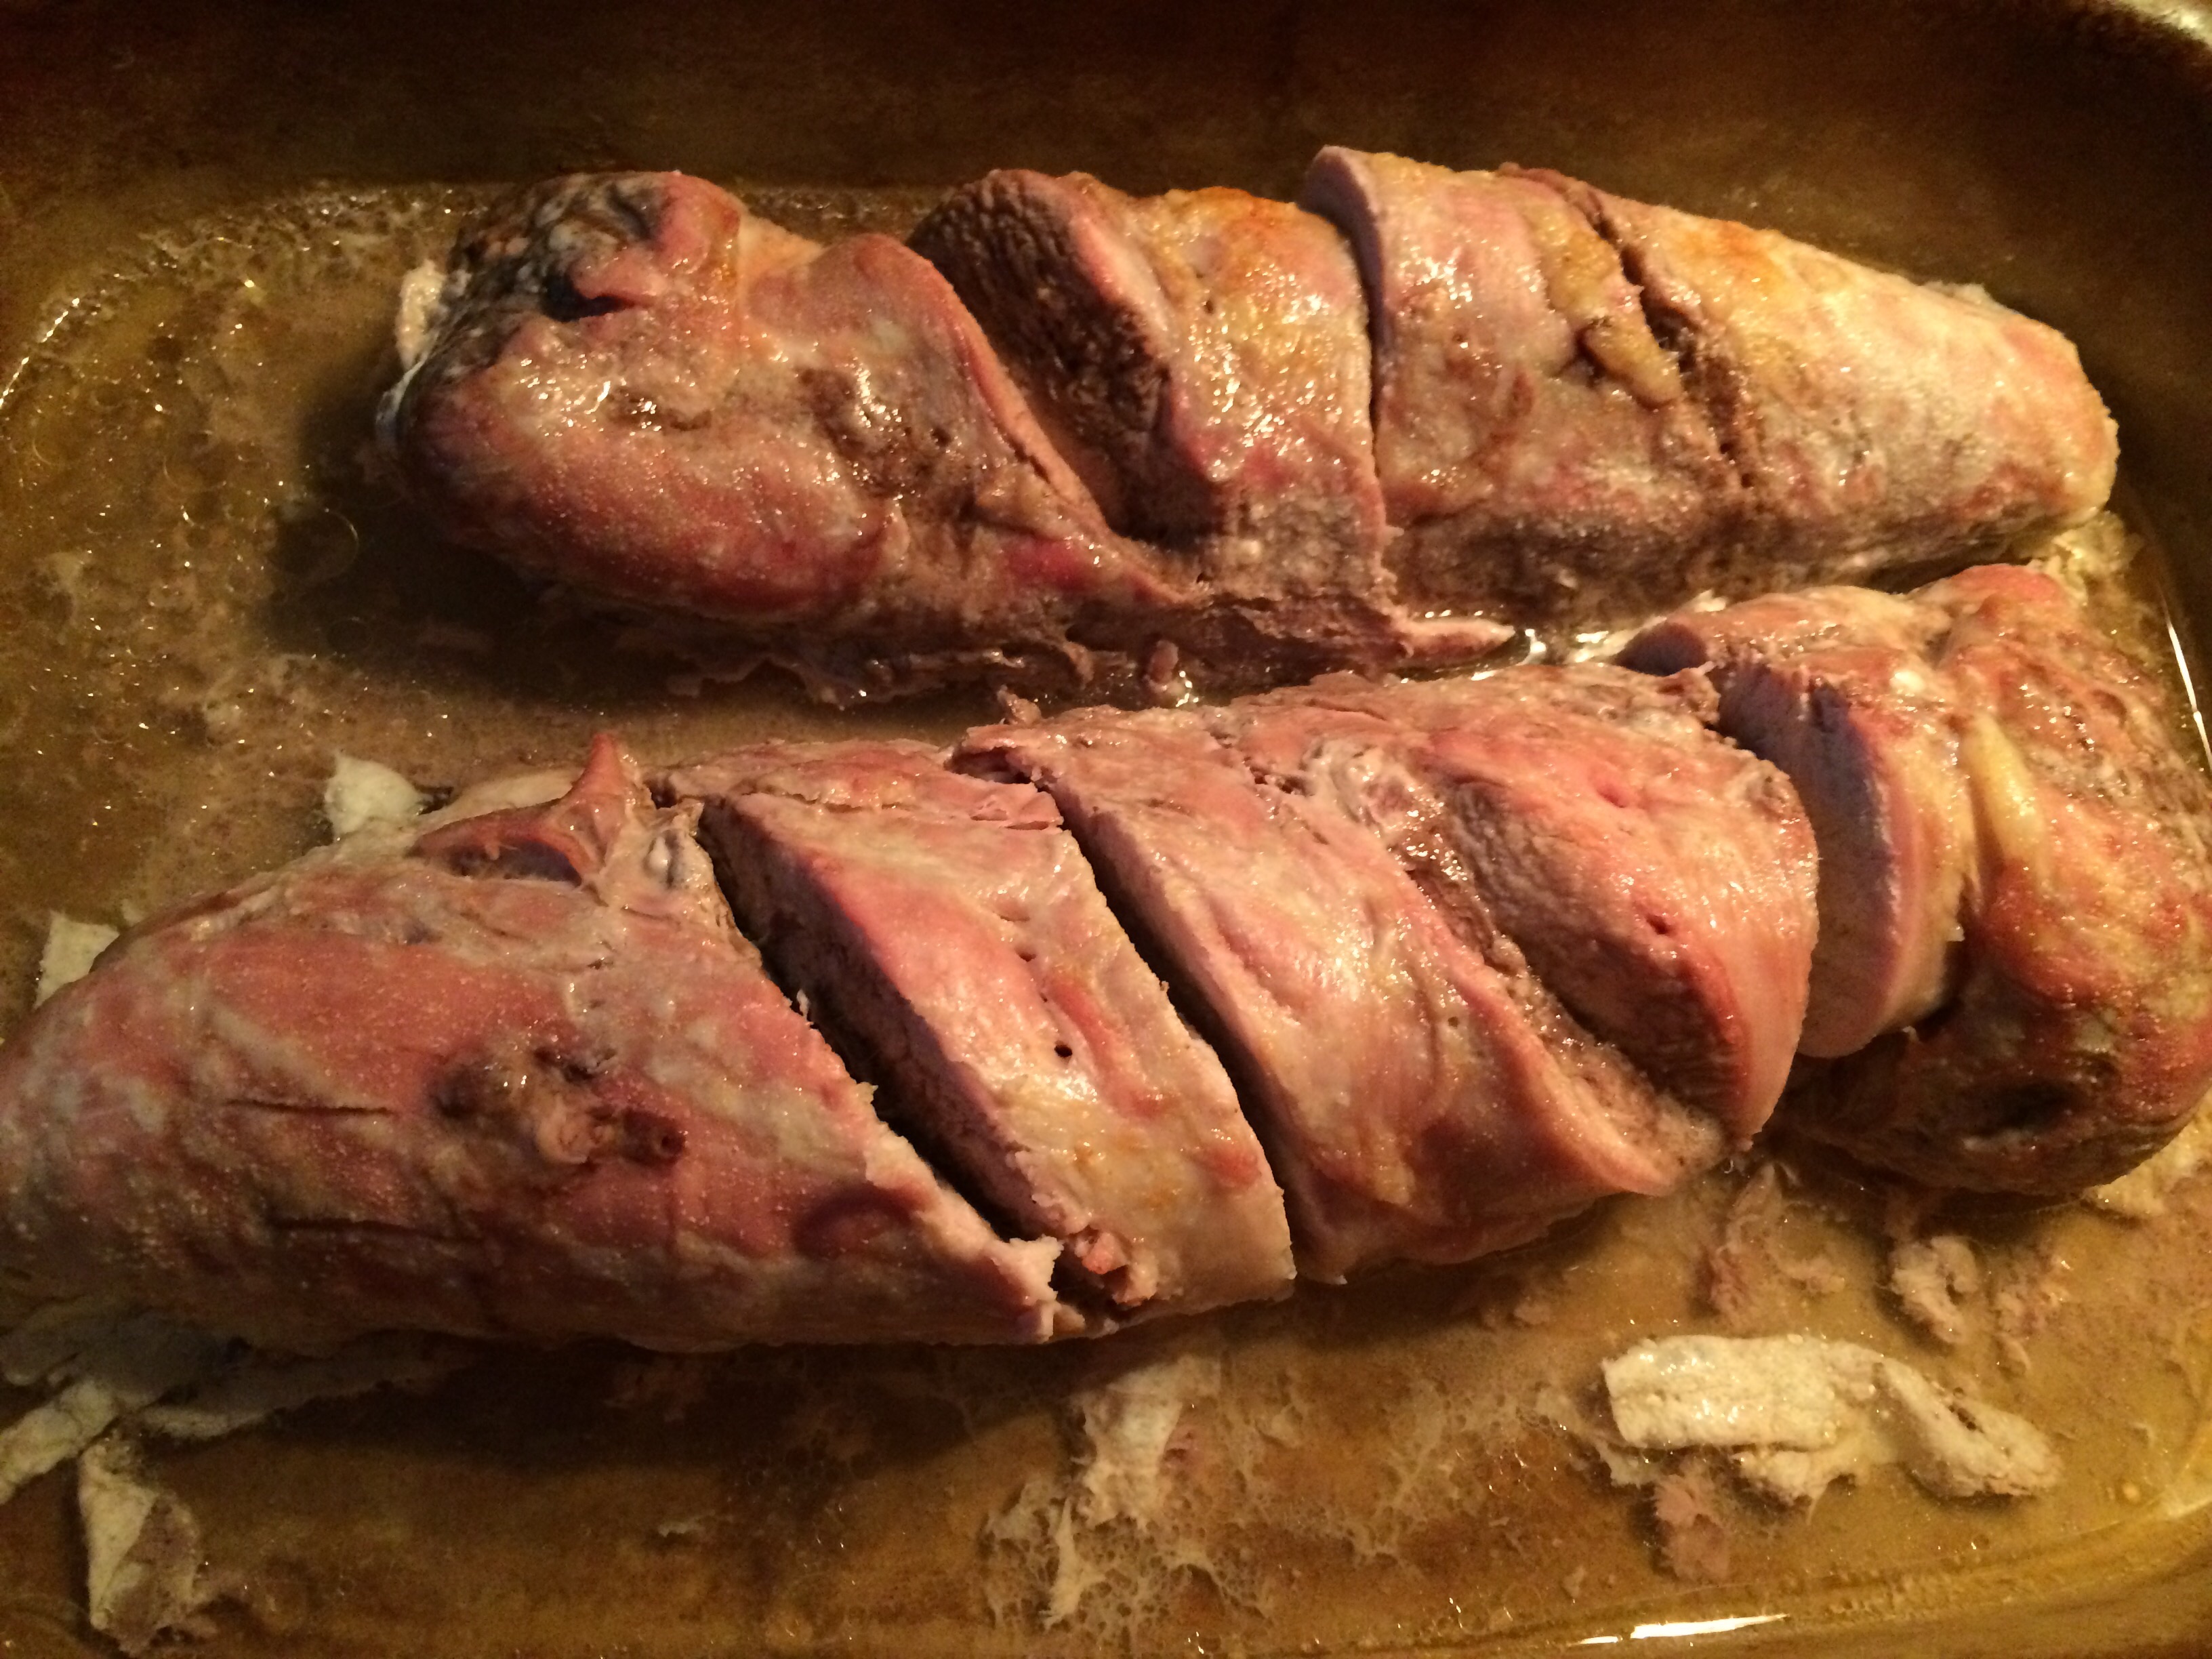
3. Remove from oven and cool slightly.
4. Slice the meat lengthwise so it will fit in the tube of your food processor. Set the food processor up with the shredding blade. Feed the pork in to shred the meat (depending on the size of your processor, you may have to empty shredded meat a few times as you go).
 5. Pour shredded meat into a bowl and fold in BBQ sauce. The amount of sauce you use will depend on how you like it. I use enough sauce to make sure all the meat is covered and none of it looks dry.
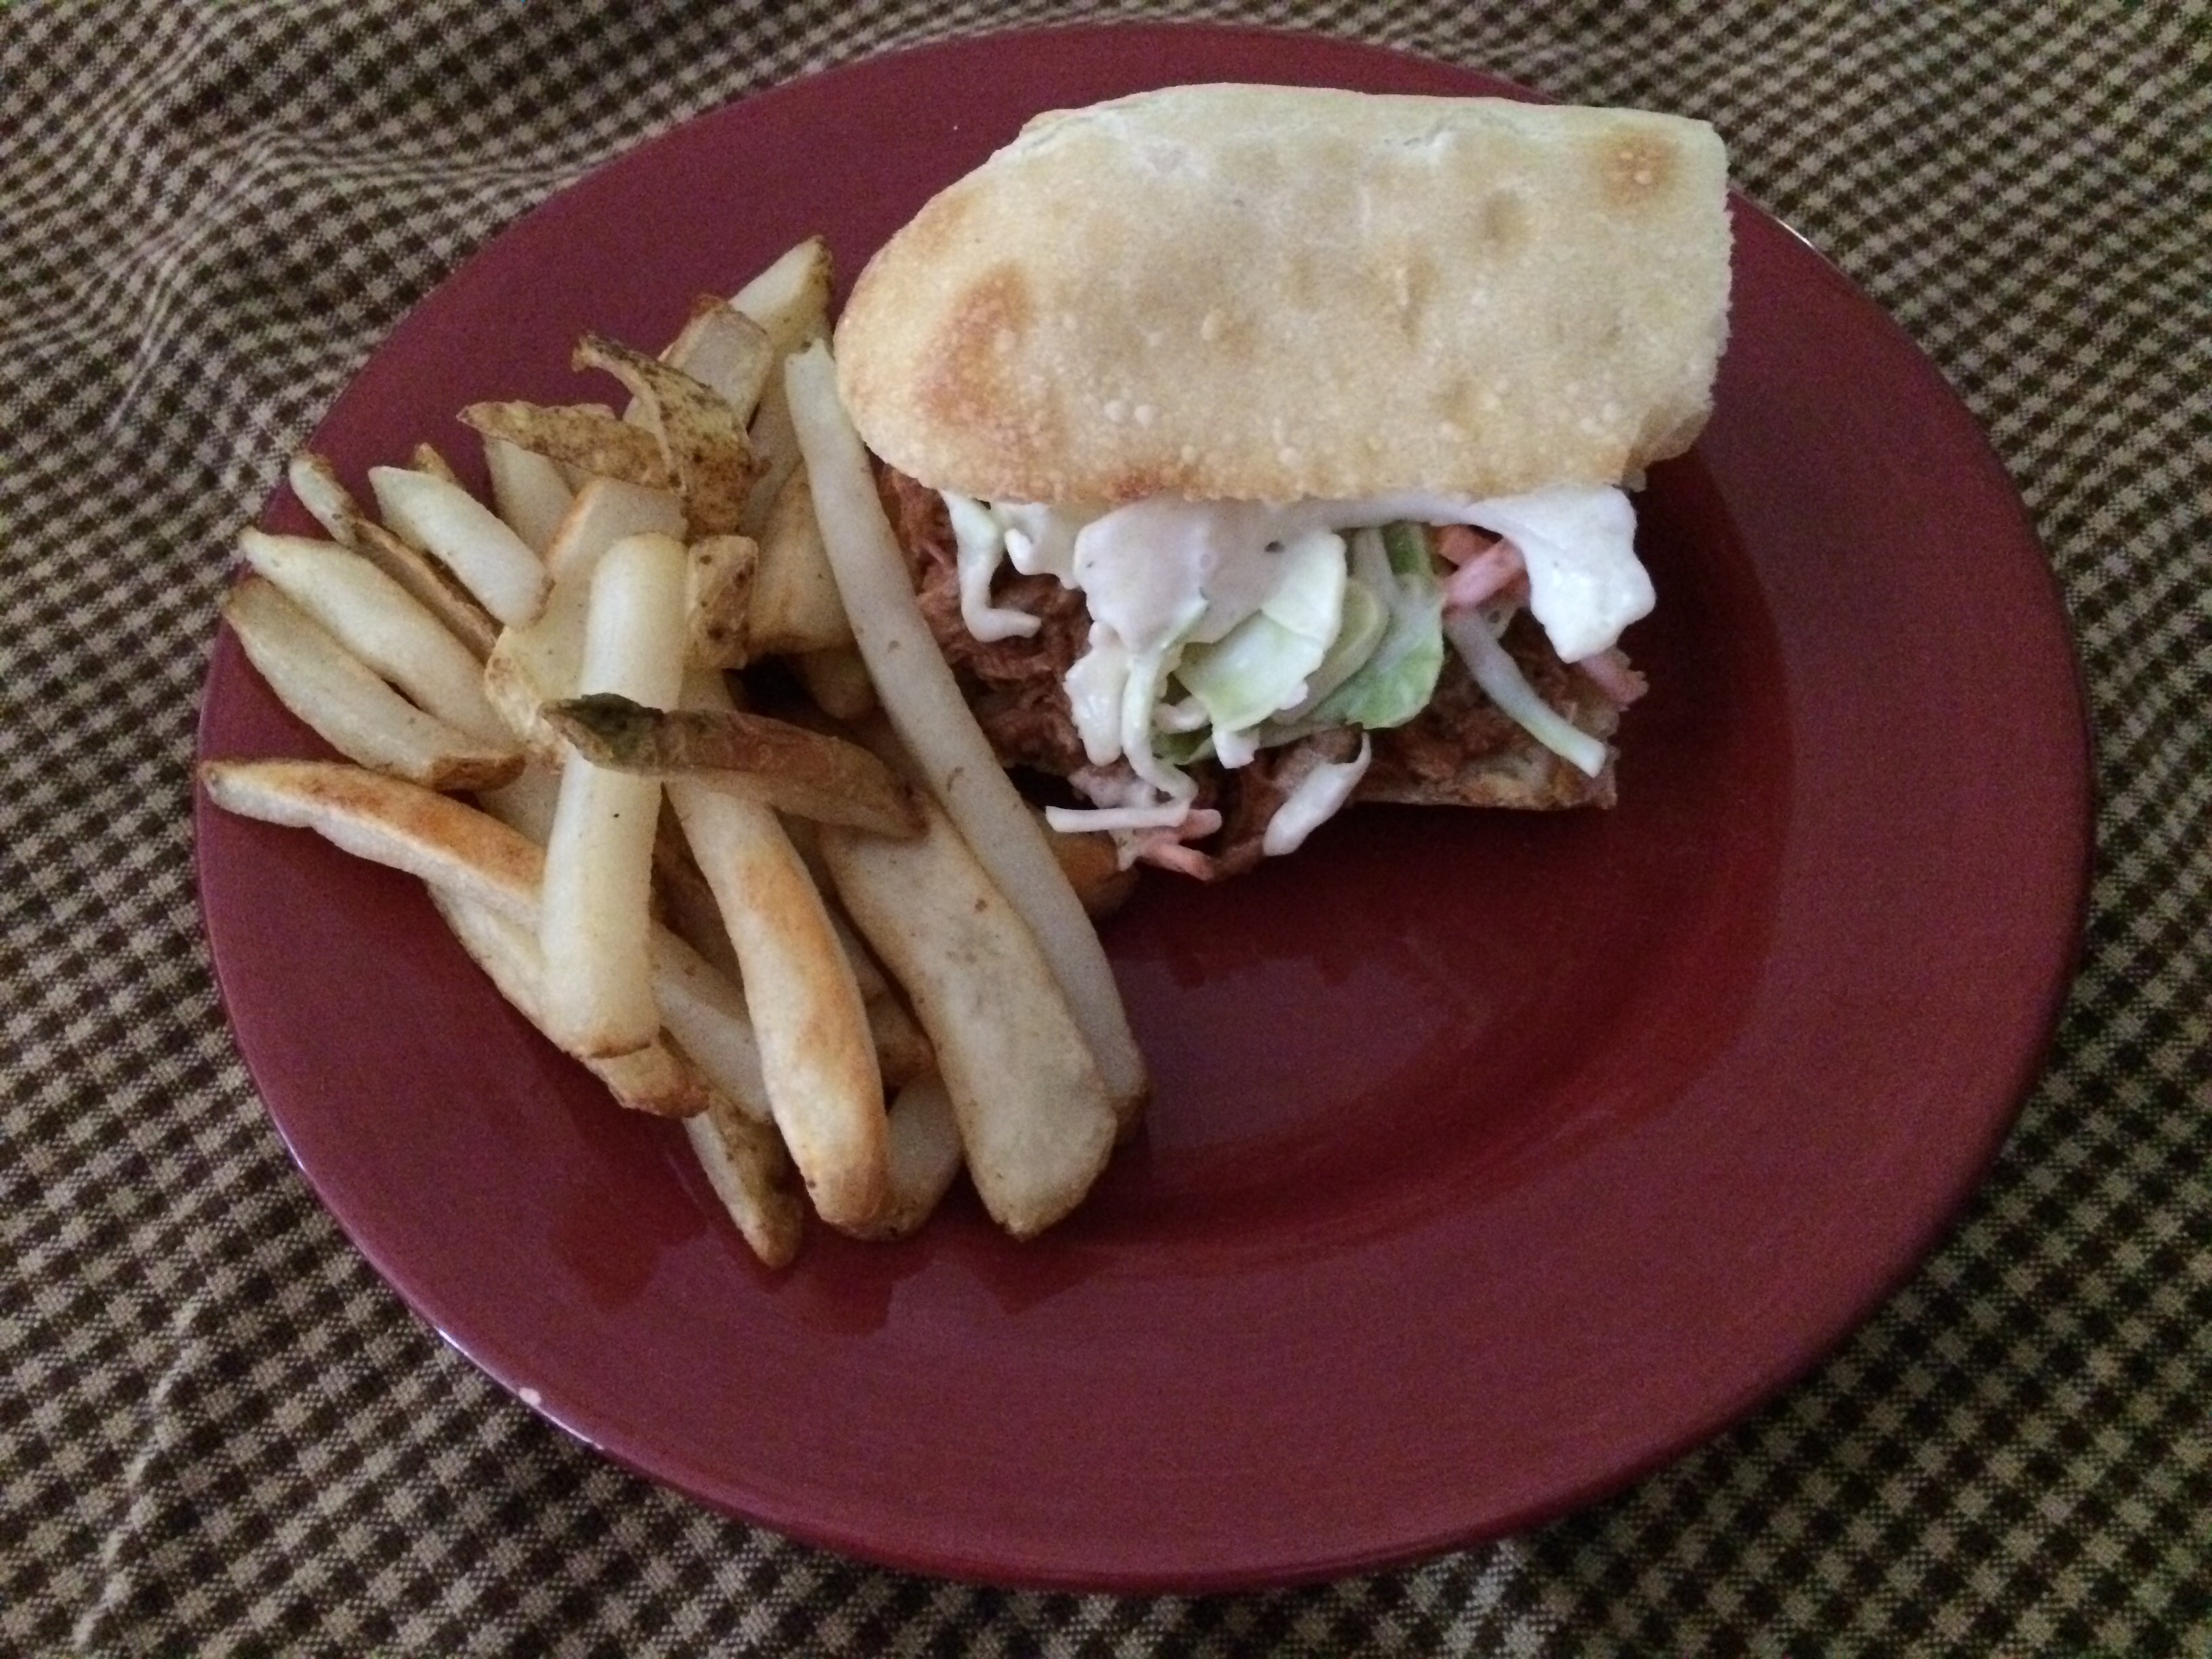
 6. Once BBQ sauce is mixed in, you are ready to serve. I like to serve it on a roll topped with cole slaw (see recipe below).
Cole Slaw
Ingredients:
1 package of cole slaw (any brand you like)
Bottle of Bolthouse Farms Classic Ranch Dressing

1. Pour cole slaw into a bowl.
2. Add Ranch dressing and mix well (I usually use about 1/2 to 3/4 bottle of the dressing)
3. Refrigerate at least two hours to overnight (I think it tastes better when refrigerated on the longer side)
Dollhouse Bookcase

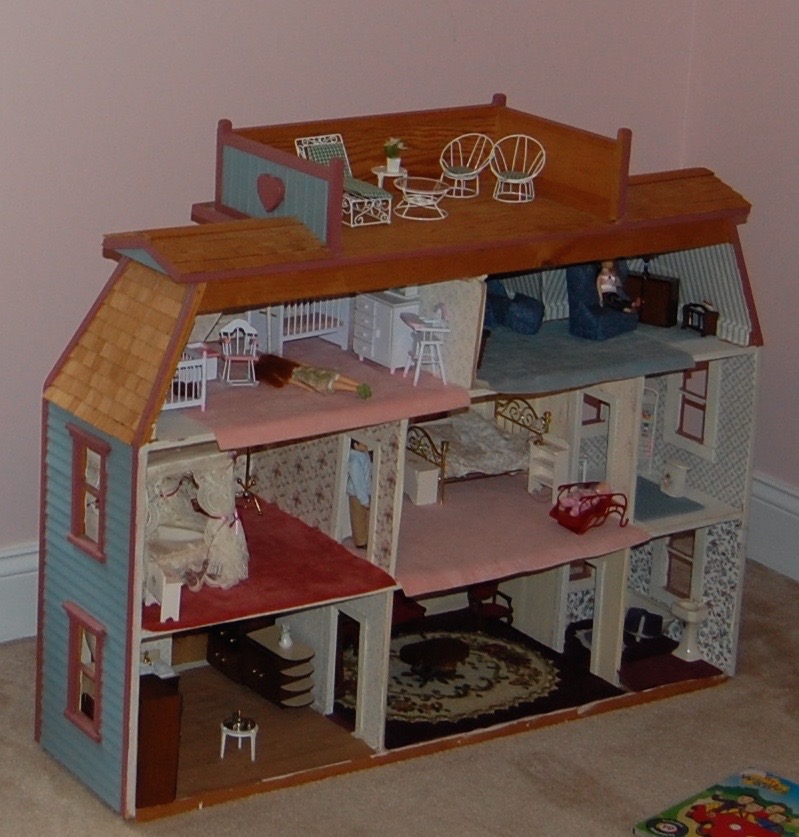
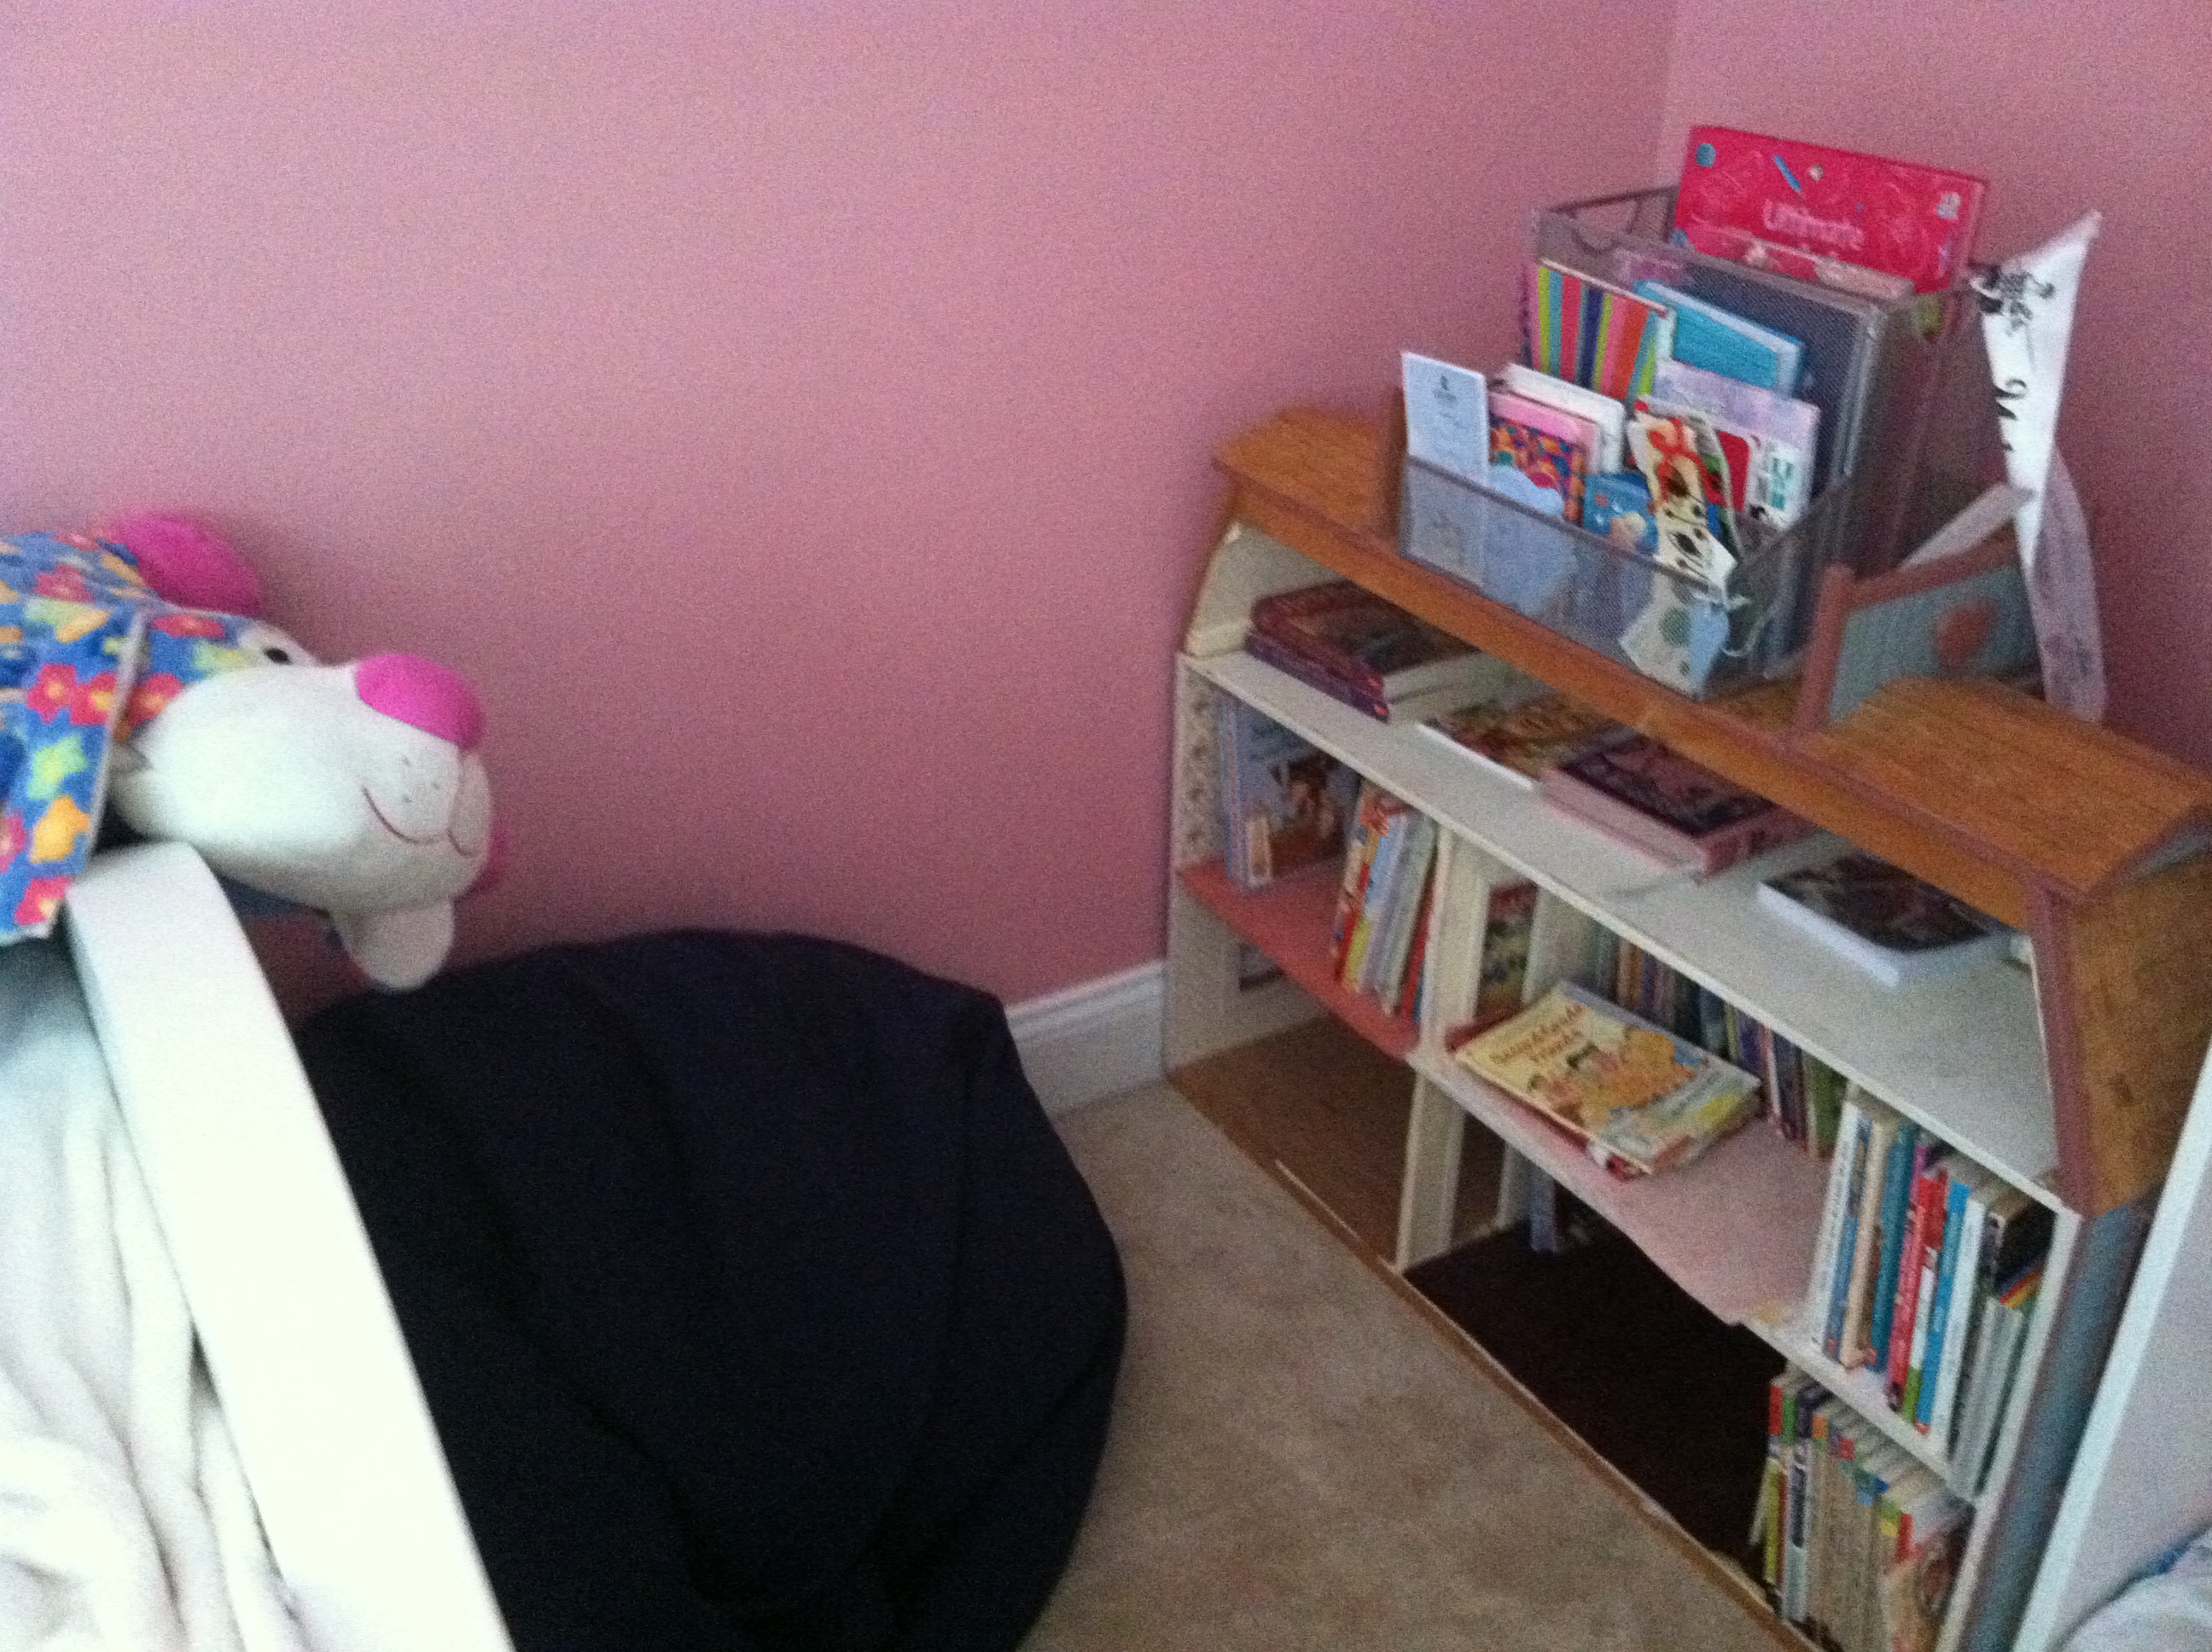
Summer reading! The school assignment that parents have a love-hate relationship with. My ten-year-old son loves to read and religiously reads every night before bed. He’s already knocked off two out of the four chapter books assigned! LOVE it! He does the reading on his own and enjoys it. My eight-year-old daughter, on the other hand, is still on her first book. HATE it! I have to pull every trick out to get her to read. I know what you’re thinking…maybe she struggles with reading. Nope! She is a really good reader, above grade level. So, I decided to involve her in creating a book corner in her room. She has a dollhouse in her room that was mine when I was a kid. She has stopped playing with it so we emptied it of the furniture, pushed it against the wall and used it as a bookshelf. We added a beanbag chair to the corner and Voila! A book corner where she can read or write in journals. She loves it and so far so good with the reading!


Orange Chicken Salad

I have been making this recipe for over 10 years! It is filling enough to serve for dinner or a luncheon. It is very refreshing and makes a great summer meal! It pairs nicely with a light white wine.
Serves 4
Ingredients:
3 large seedless oranges
1 cup long-grain rice
2 cups water
3/4 cup vinaigrette dressing (separate recipe below)
2 teaspoons Dijon mustard
1/2 teaspoon sugar
1 pound cooked chicken, diced
3 tablespoons chopped chives
1/2 cup roasted cashews
salt and black pepper
cucumber slices to garnish
1. Thinly peel 1 orange, taking only the colored part of the rind and leaving the white pith
2. Combine the rind, rice and water in a saucepan. Add a pinch of salt. Bring to a boil, then cover and simmer over very low heat for 15-18 minutes, or until the rice is tender and all the water has been absorbed.
3. Peel the remaining oranges and cut out the segments, reserving the juice. Add the orange juice to the vinaigrette dressing (recipe for dressing below). Add the mustard and sugar and whisk to combine well. Taste and add more salt and pepper if needed.
4. When the rice is cooked, remove it from the heat and cool slightly, uncovered. Discard the orange rind.
5. Turn the rice into a bowl and add half of the dressing. Toss well and cool completely.
6. Add the chicken, chives, cashews and orange segments to the rice with the remaining dressing. Toss gently. Serve at room temperature, garnished with cucumber.
Vinaigrette Dressing
Makes just over 3/4 cup
Ingredients:
3 tablespoons wine vinegar
salt and pepper
2/3 cup vegetable or olive oil
1. Put vinegar, salt and pepper in a bowl and whisk to dissolve the salt. Gradually add the oil, stirring with the whisk. Taste and adjust seasoning.
This recipe was taken from a Barnes and Noble cookbook titled: The Cook’s Encyclopedia of Chicken
Greek Orzo Salad

A few years back my friend Marie asked me what she could bring to my daughter’s summer birthday party as a side dish to BBQ foods. I wasn’t sure what she should bring and she suggested an Orzo Salad. Since everything she makes is amazing, I said, “Sure!” It was such a huge hit! Everyone loved it and since then it has earned a permanent place on my food table for my daughter’s birthday parties. I am sure there are similar recipes floating around the internet, this one was clipped out of a local newspaper.
Ingredients:
1 cup Orzo
6 tablespoons olive oil
5 tablespoons red wine vinegar
1 small red onion, minced
1 ½ teaspoons salt
½ teaspoon freshly ground pepper
1 teaspoon dried oregano
¼ cup minced parsley
2 large tomatoes, diced
1 English cucumber diced
12 Greek olives, halved and pitted
6 ounces feta cheese
In large saucepan bring 2 quarts water to a vigorous boil. Add orzo and cook until slightly at dente (8 to 10 minutes). Rinse, drain, and place in 2 quart serving dish, toss with 1 tablespoon oil.
Whisk together remaining olive oil, vinegar, onion, salt, pepper, oregano and parsley. Pour over orzo, cover and chill for 2 to 24 hours. Toss remaining ingredients with orzo mixture before serving.
Serves 8
Notes:
It’s important to use fresh parsley rather than dried because the fresh parsley is part of the great flavor.
I have made this recipe the day before by following the instructions above and refrigerating. I also chopped the cucumbers and tomatoes and put them in separate containers in the frig. Right before serving I added the tomatoes, cucumbers, olives and feta. This ensures those ingredients stay fresh and don’t get soggy soaking in the marinade overnight.
Zucchini Quiche

This is a recipe my great aunt used to make and I continue to make for my family. It is fast and easy to make and tastes great! It’s not exactly a “quiche”, it is much fluffier and has no crust. I usually serve it with a side salad. The amount this recipe makes is usually devoured by my family of four in one sitting.
Ingredients:
3-4 cups zucchini
1/2 cup grated parmesan cheese
1/2 cup chopped onions
1/2 cup oil
4 eggs
1 cup Bisquick
Dash of pepper
Chopped parsley fresh or dried
Preheat oven to 350 degrees
Mix together zucchini, cheese, onions and oil
Beat eggs one at a time and then add the four beaten eggs to the mixture
Mix in other ingredients
Put in a greased 13x9x2 pan for 45 mins. When done, should look fluffy and be golden brown on top as pictured.
Notes:
I have used a mixture of both green zucchini and yellow squash and it comes out just as good.
Any oil will work with this recipe, I’ve used olive, vegetable and canola in the past.
There is no salt added in this recipe. I like salt and feel it is a little blah without, so I will add some in the mixture and then on the quiche before I eat it.
Because “Bisquick” is used in this recipe, I did a quick search to make sure I wasn’t plagiarizing a recipe even though this one came out of the family recipe box. I found an extremely similar recipe on the Betty Crocker website. My great aunt probably got it off a Bisquick box long ago, some people on the website commented they have been making it since the 1970’s. Their recipe differs slightly adding more spices, you can find it by clicking this picture: 
Taylor Swift Rockin’ Birthday Party
My daughter wanted a Rock ‘n’ Roll / Taylor Swift themed 8th birthday party. I love to run with a theme and this was one was a lot of fun! We started by sending out ticket invitations that I made on my computer and printed at home.  Decorations
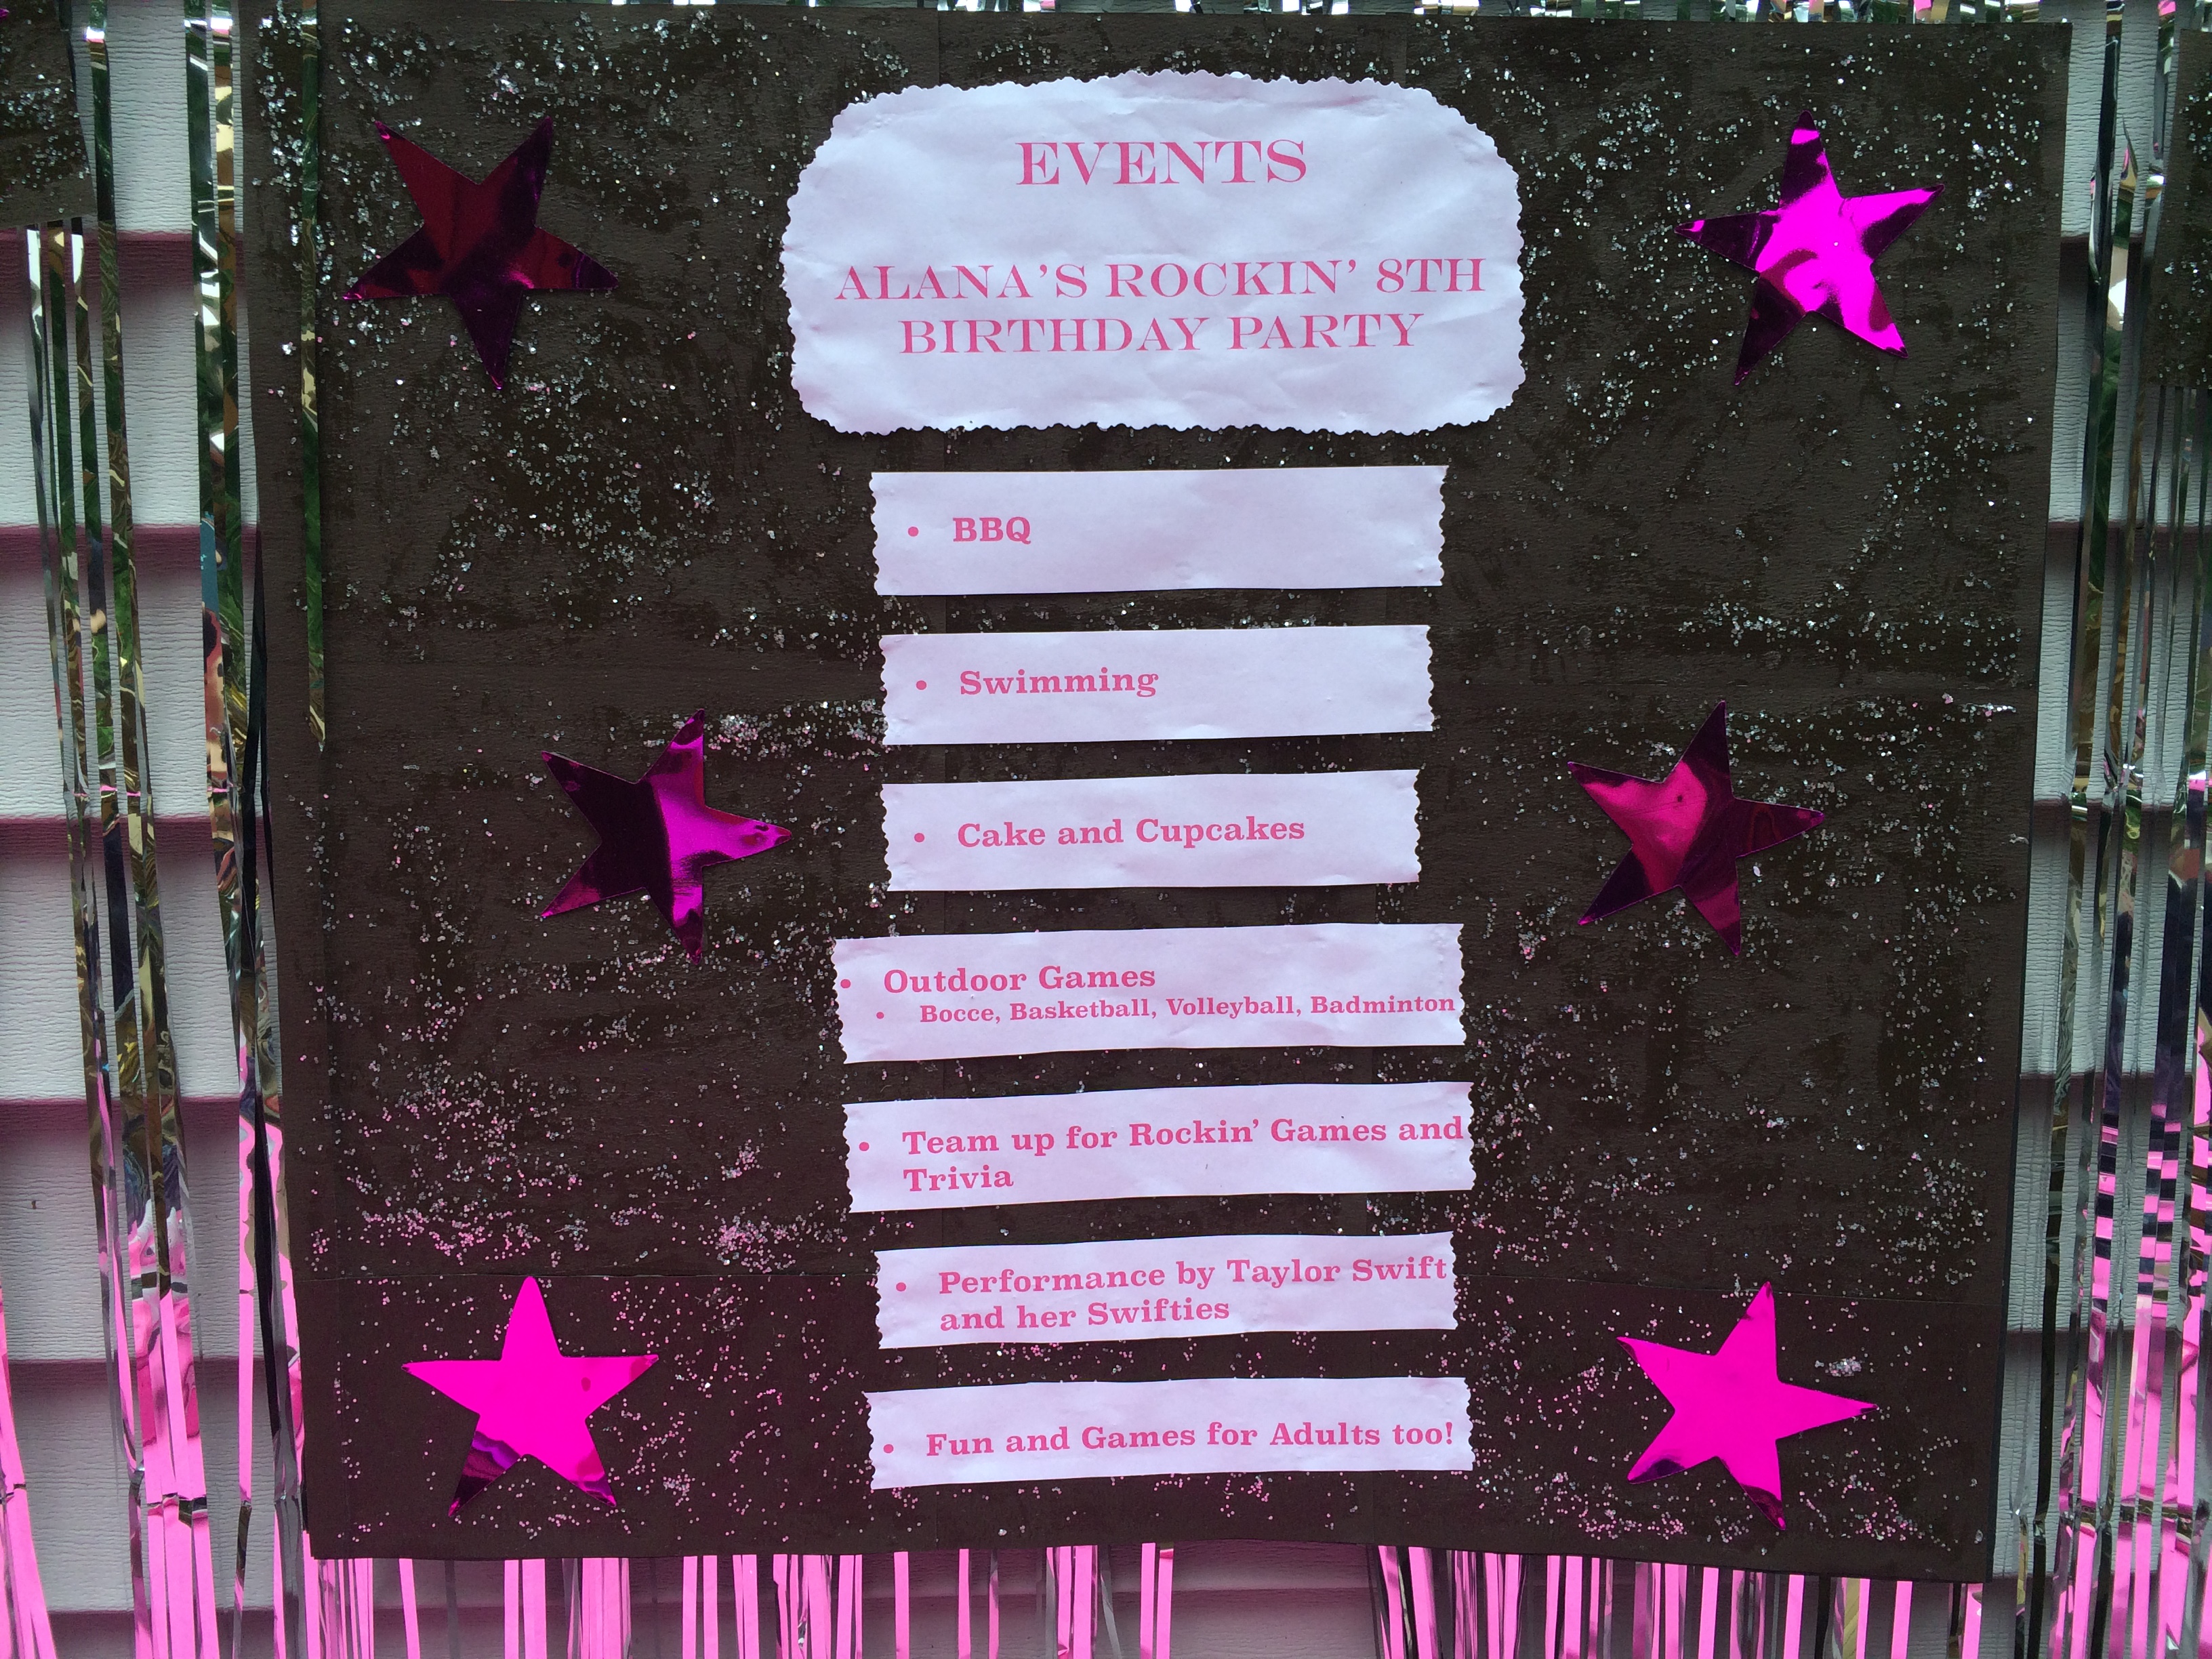
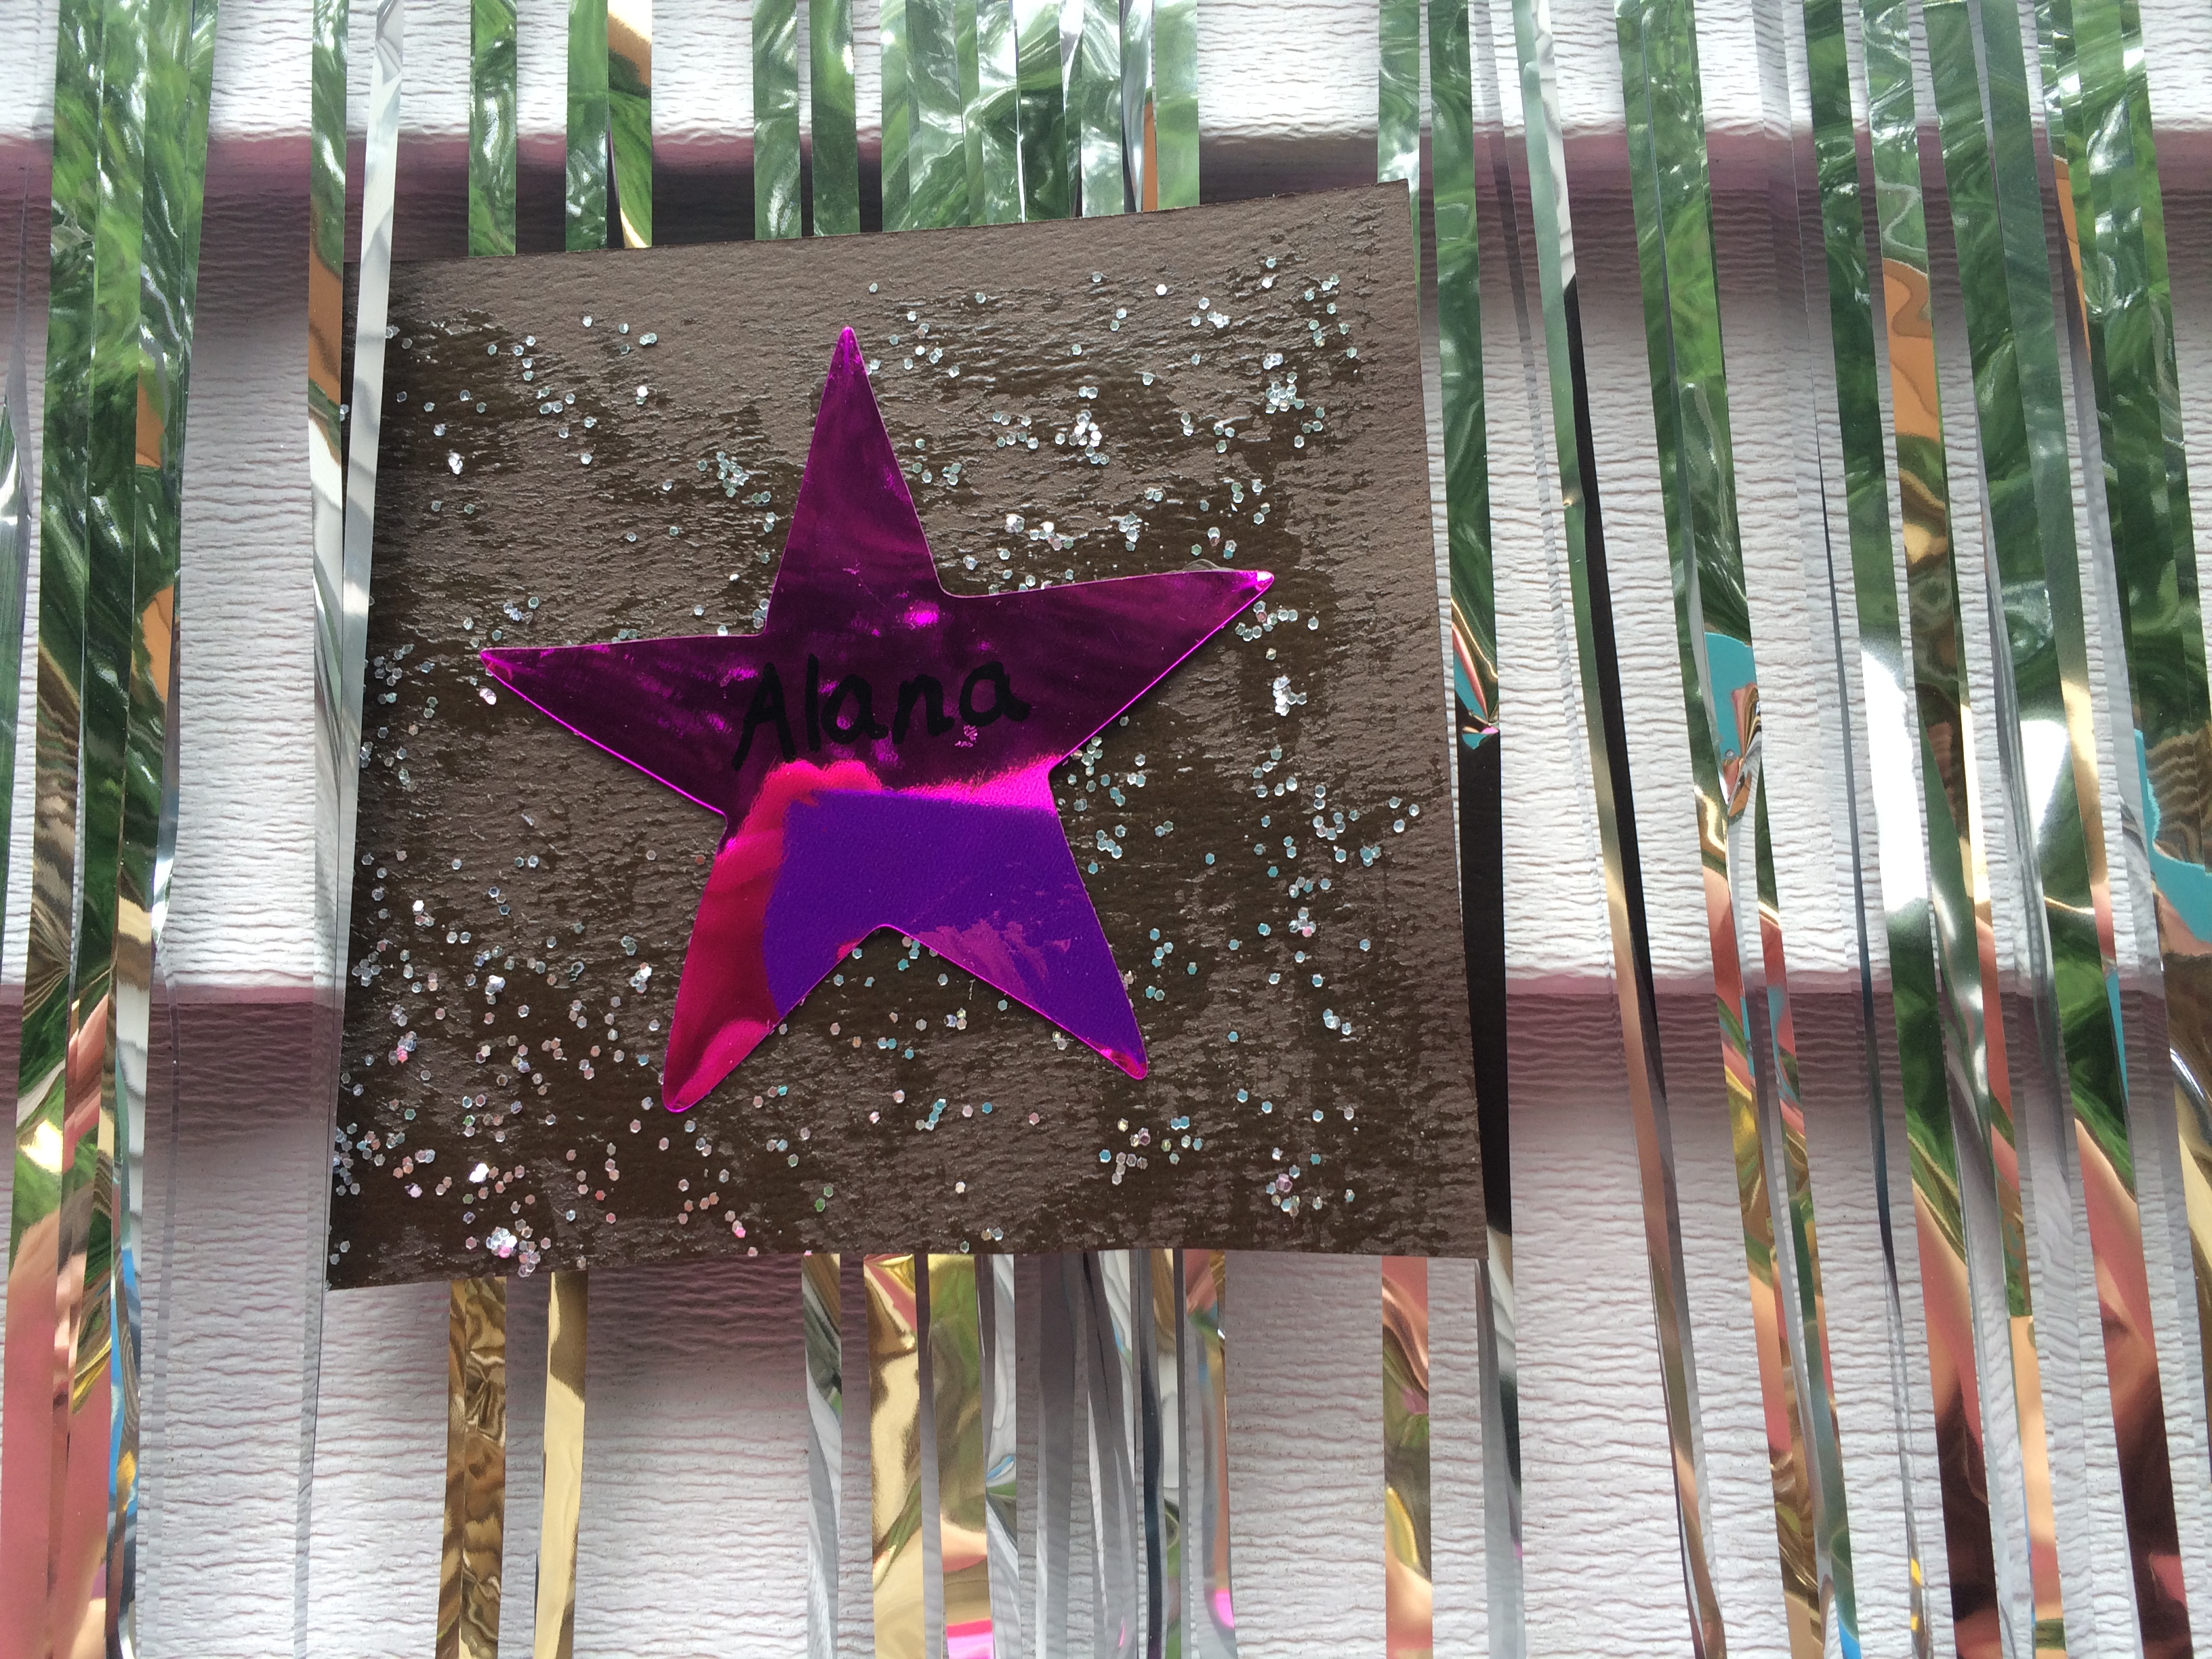
I didn’t like the paper goods selection for the Rock ‘n’ Roll theme that the party stores sold, so we went with pink, black and zebra stripe patterns on the decorations and paper goods. My daughter and I handmade a lot of the decorations. We made our own glitter paper and used it for mini Hollywood Walk of Fame Stars for each child attending the party and a list of the days events. We hung some of these decorations surrounding a Happy Birthday sign on a silver backdrop.
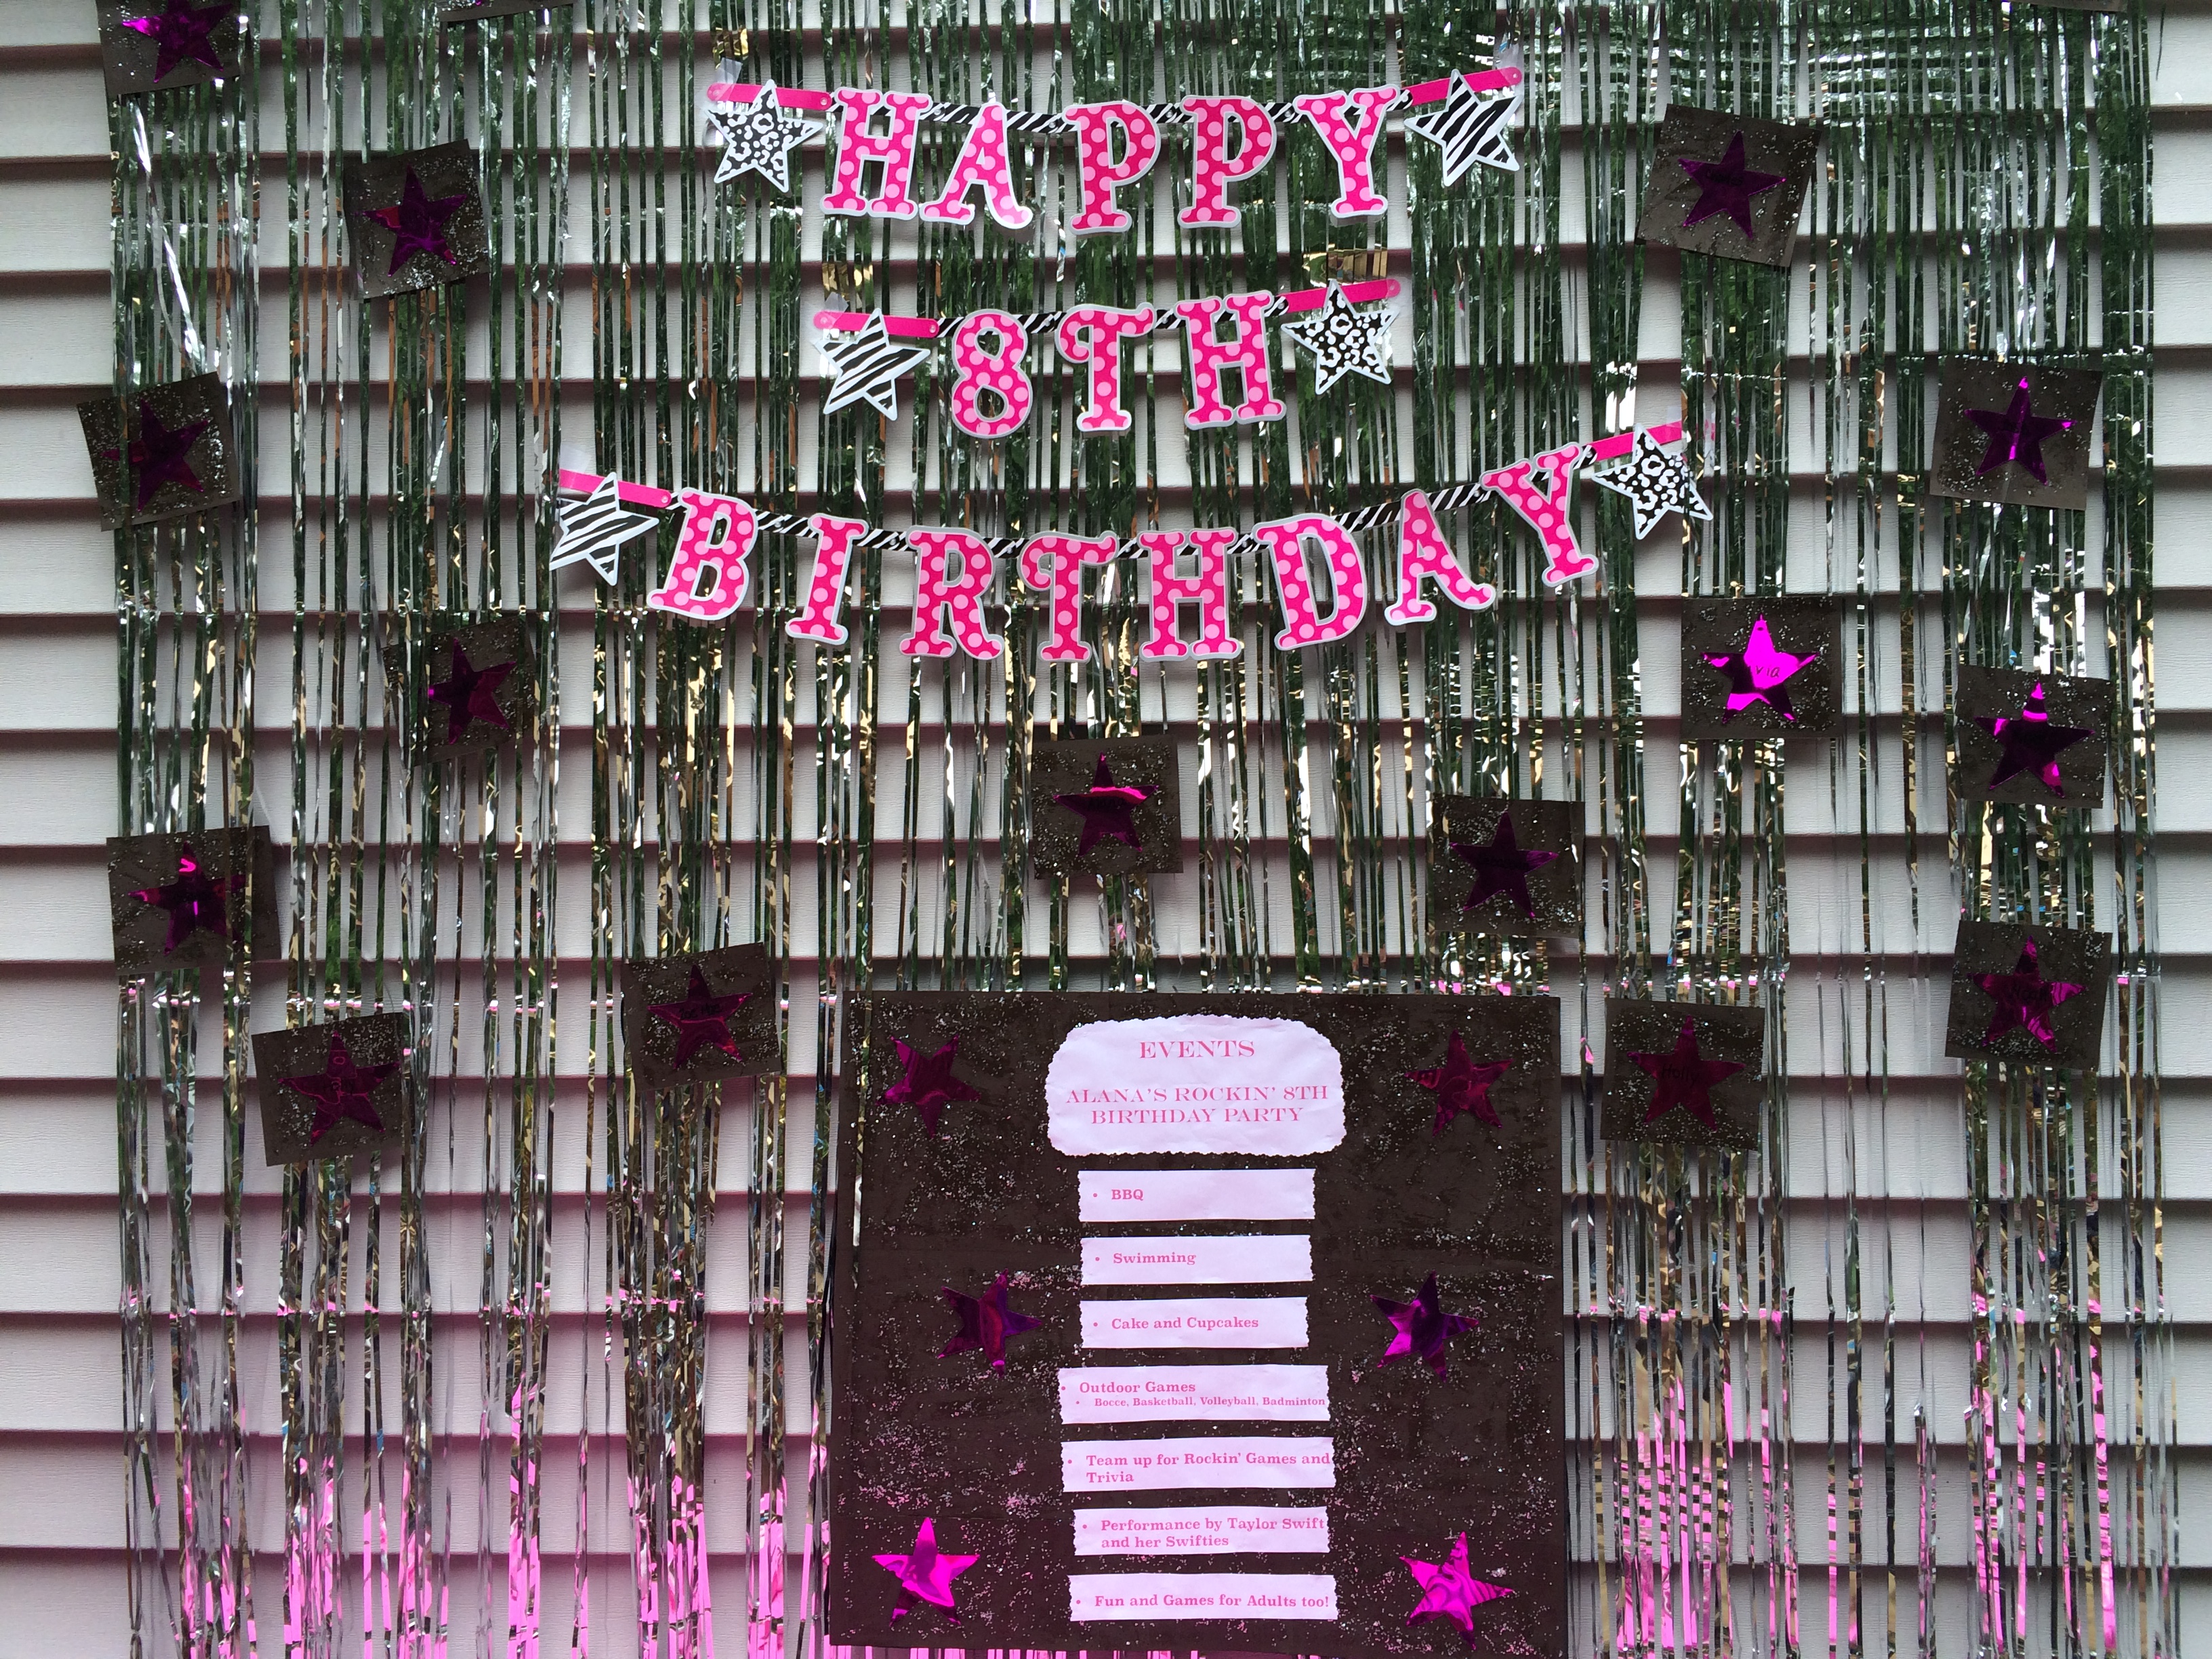

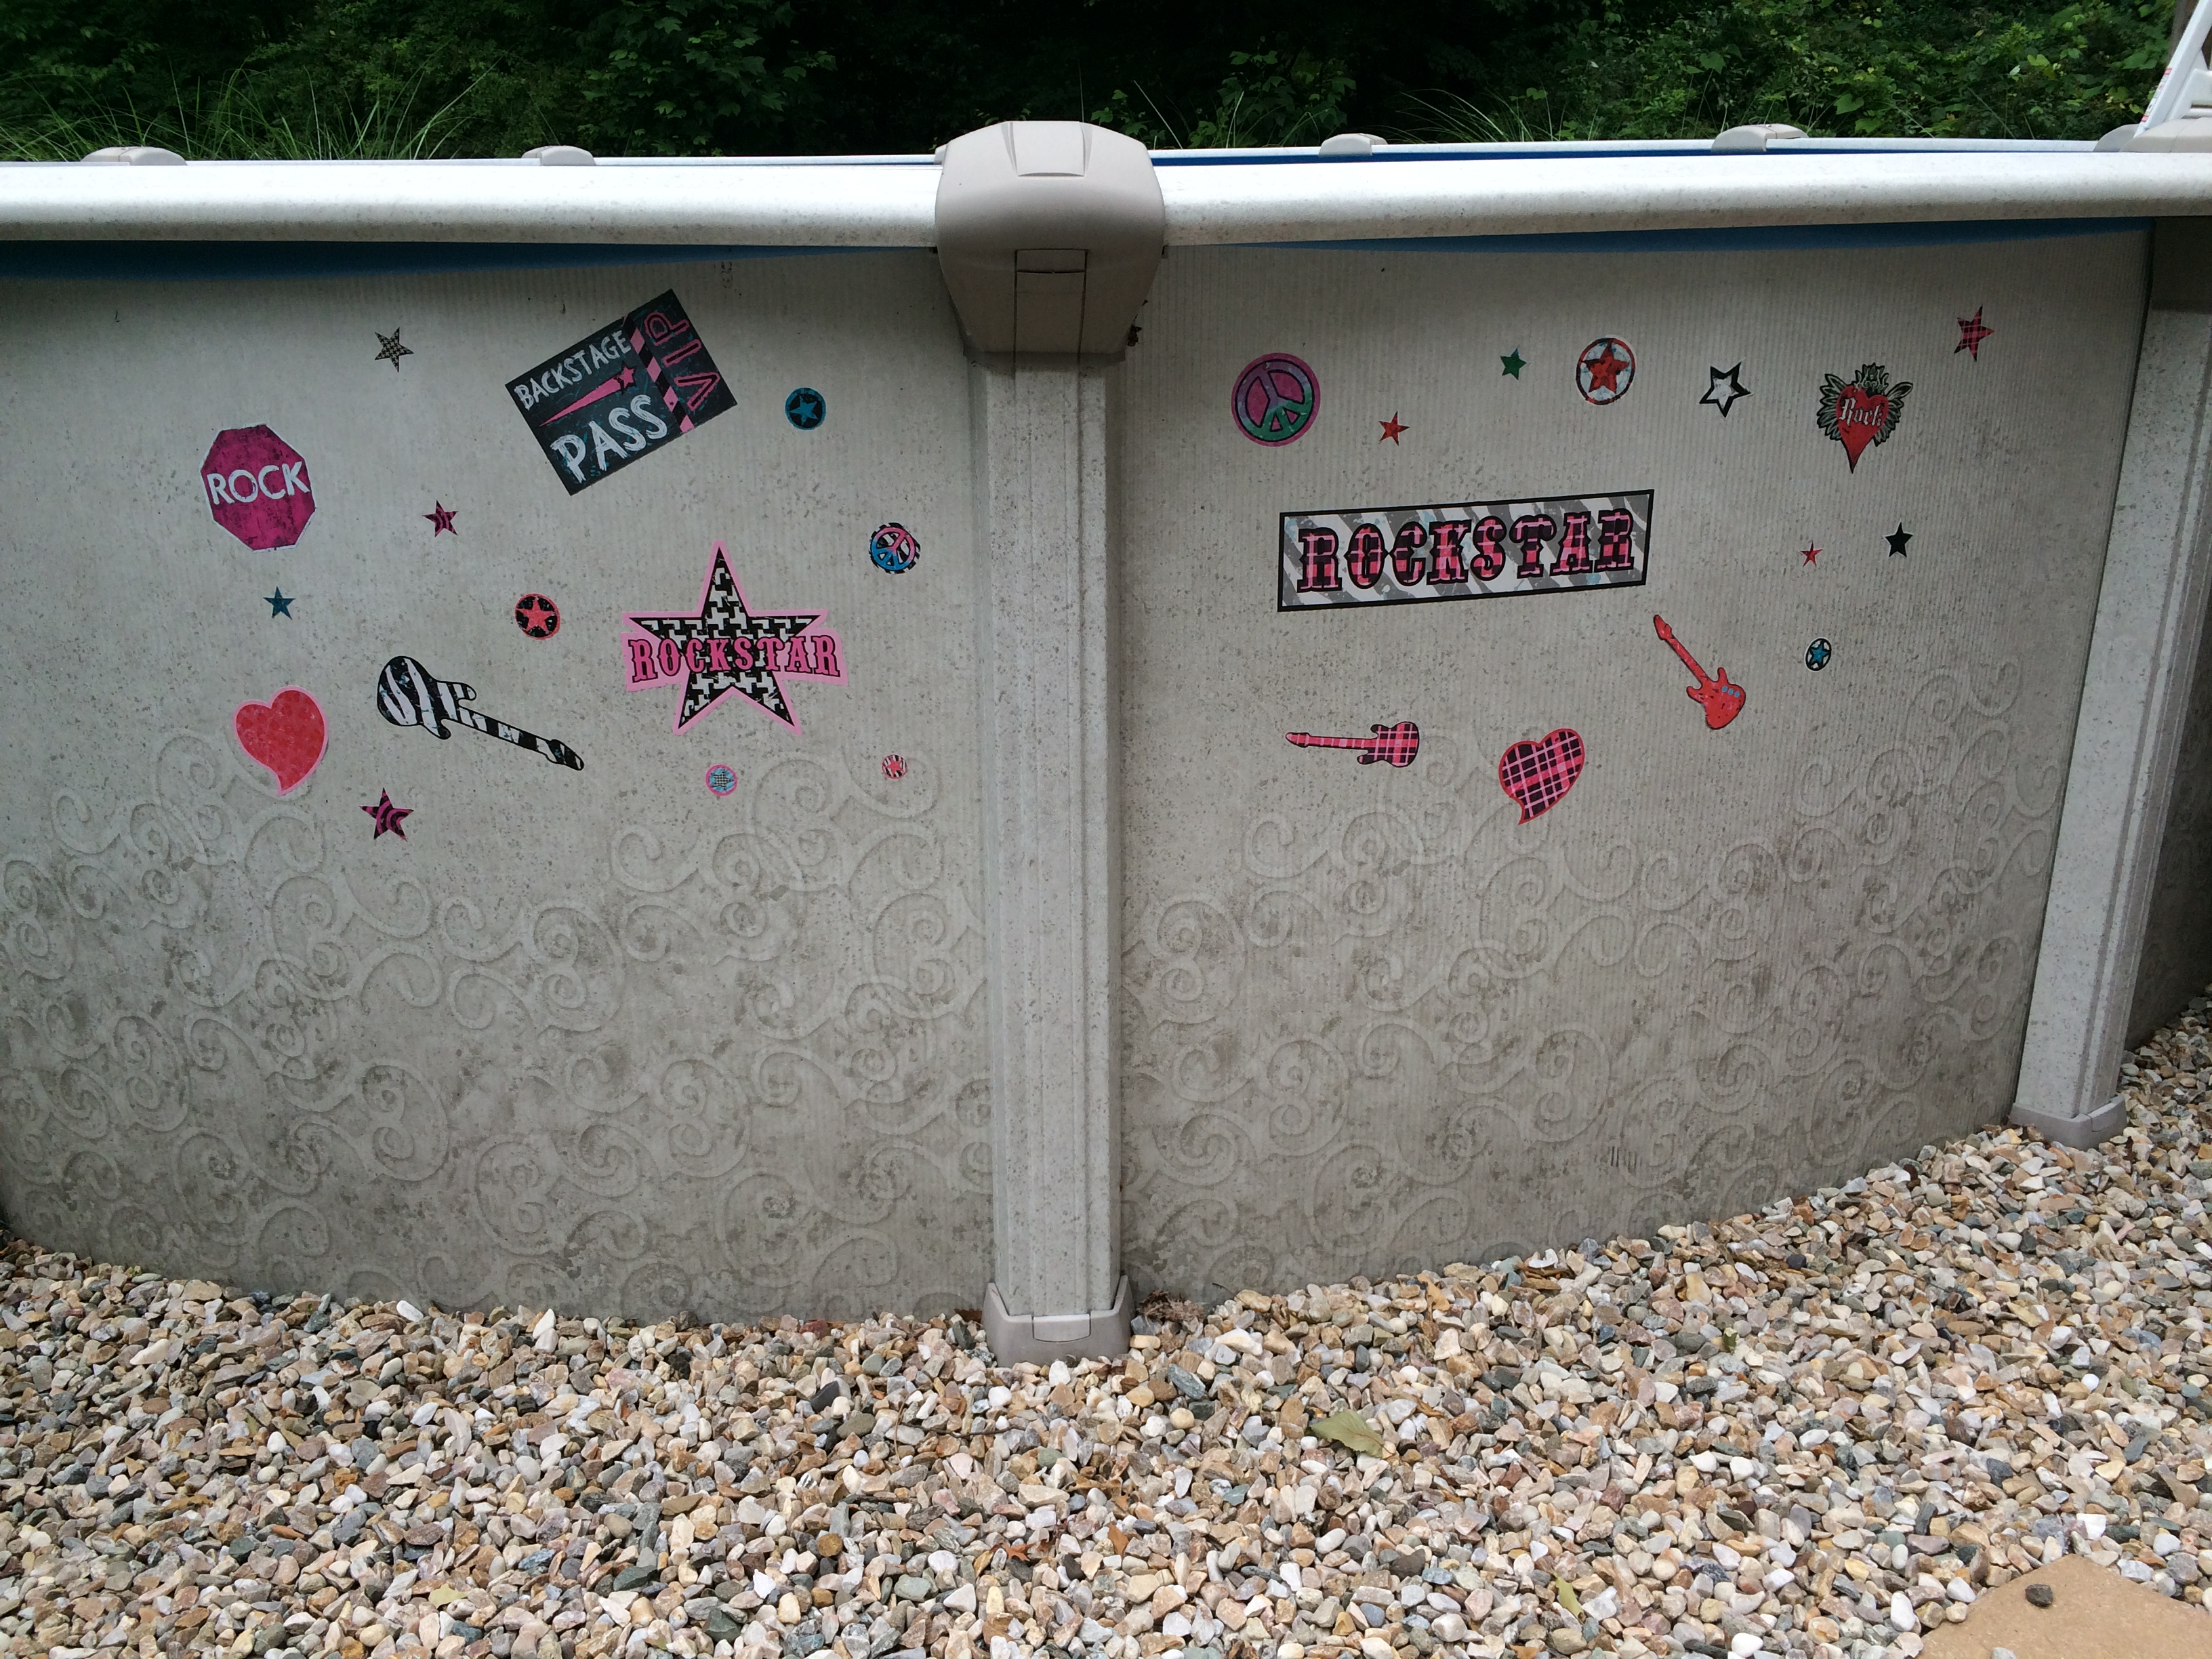
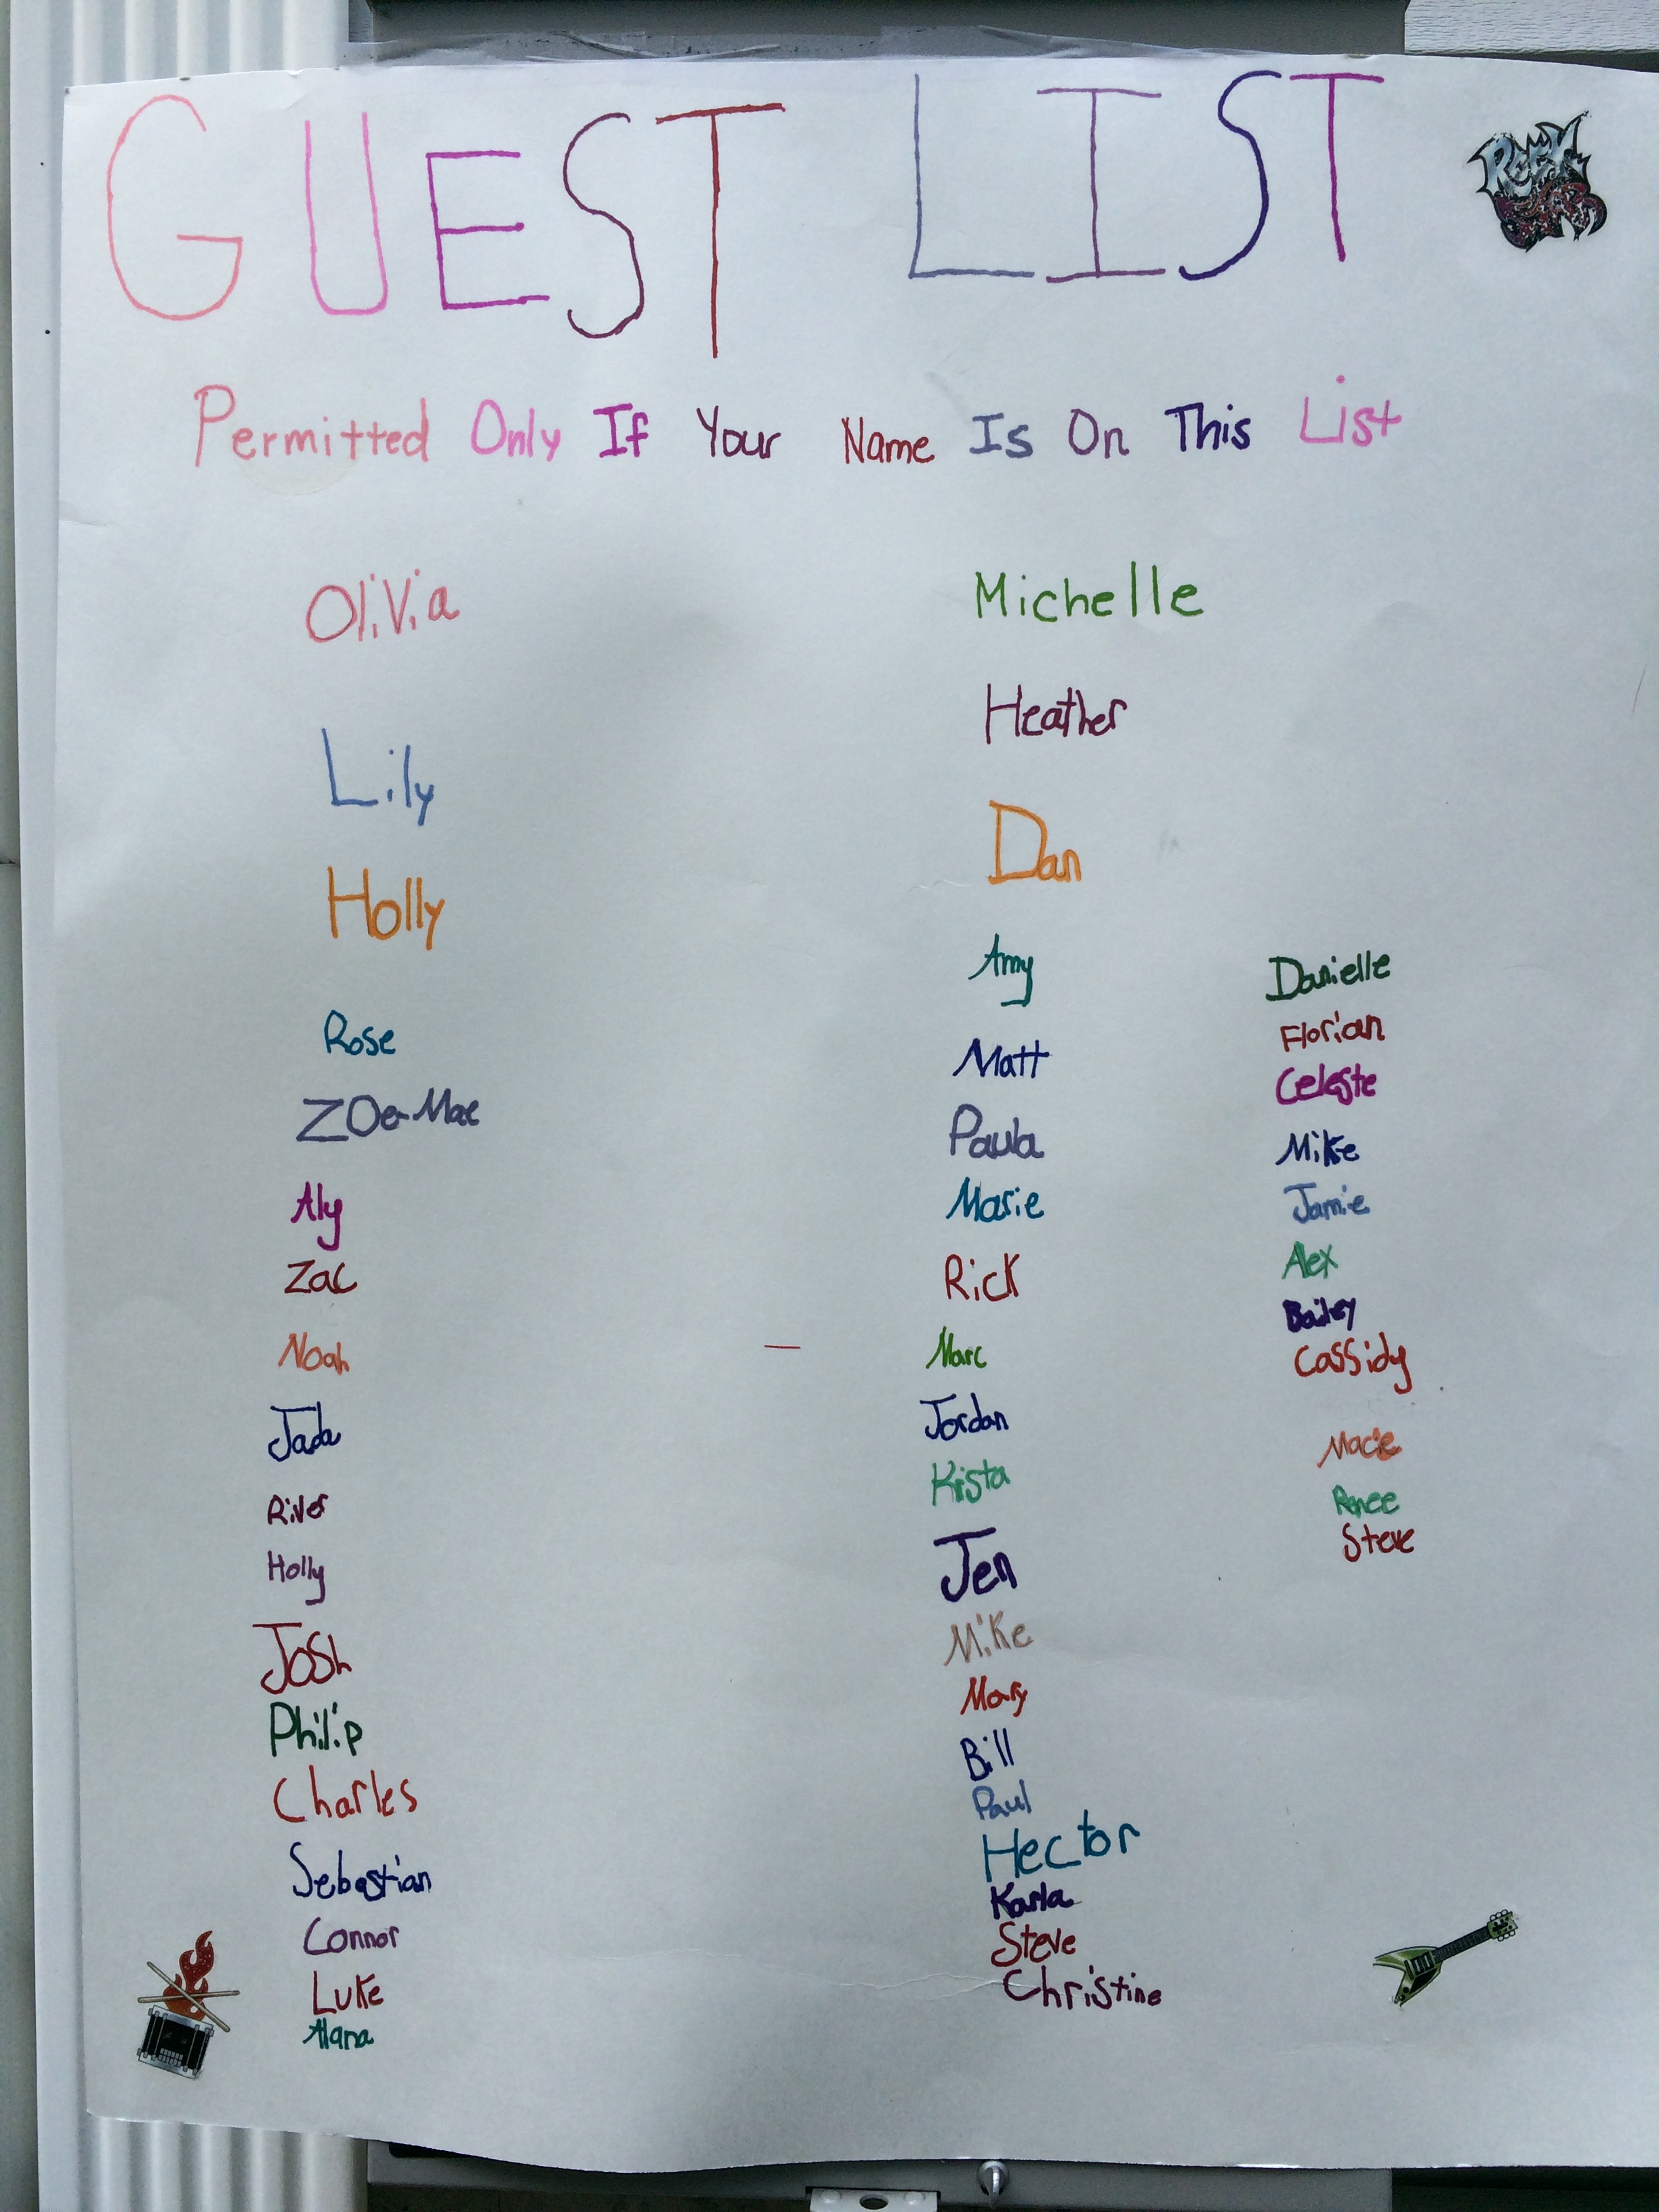
Some other decorations we used were streamers, balloons, wall stickers to decorate the pool, some fake rocks, a VIP Entrance sign, a VIP guest list and a Happy Birthday sign on the chalkboard in the kitchen.


Cake
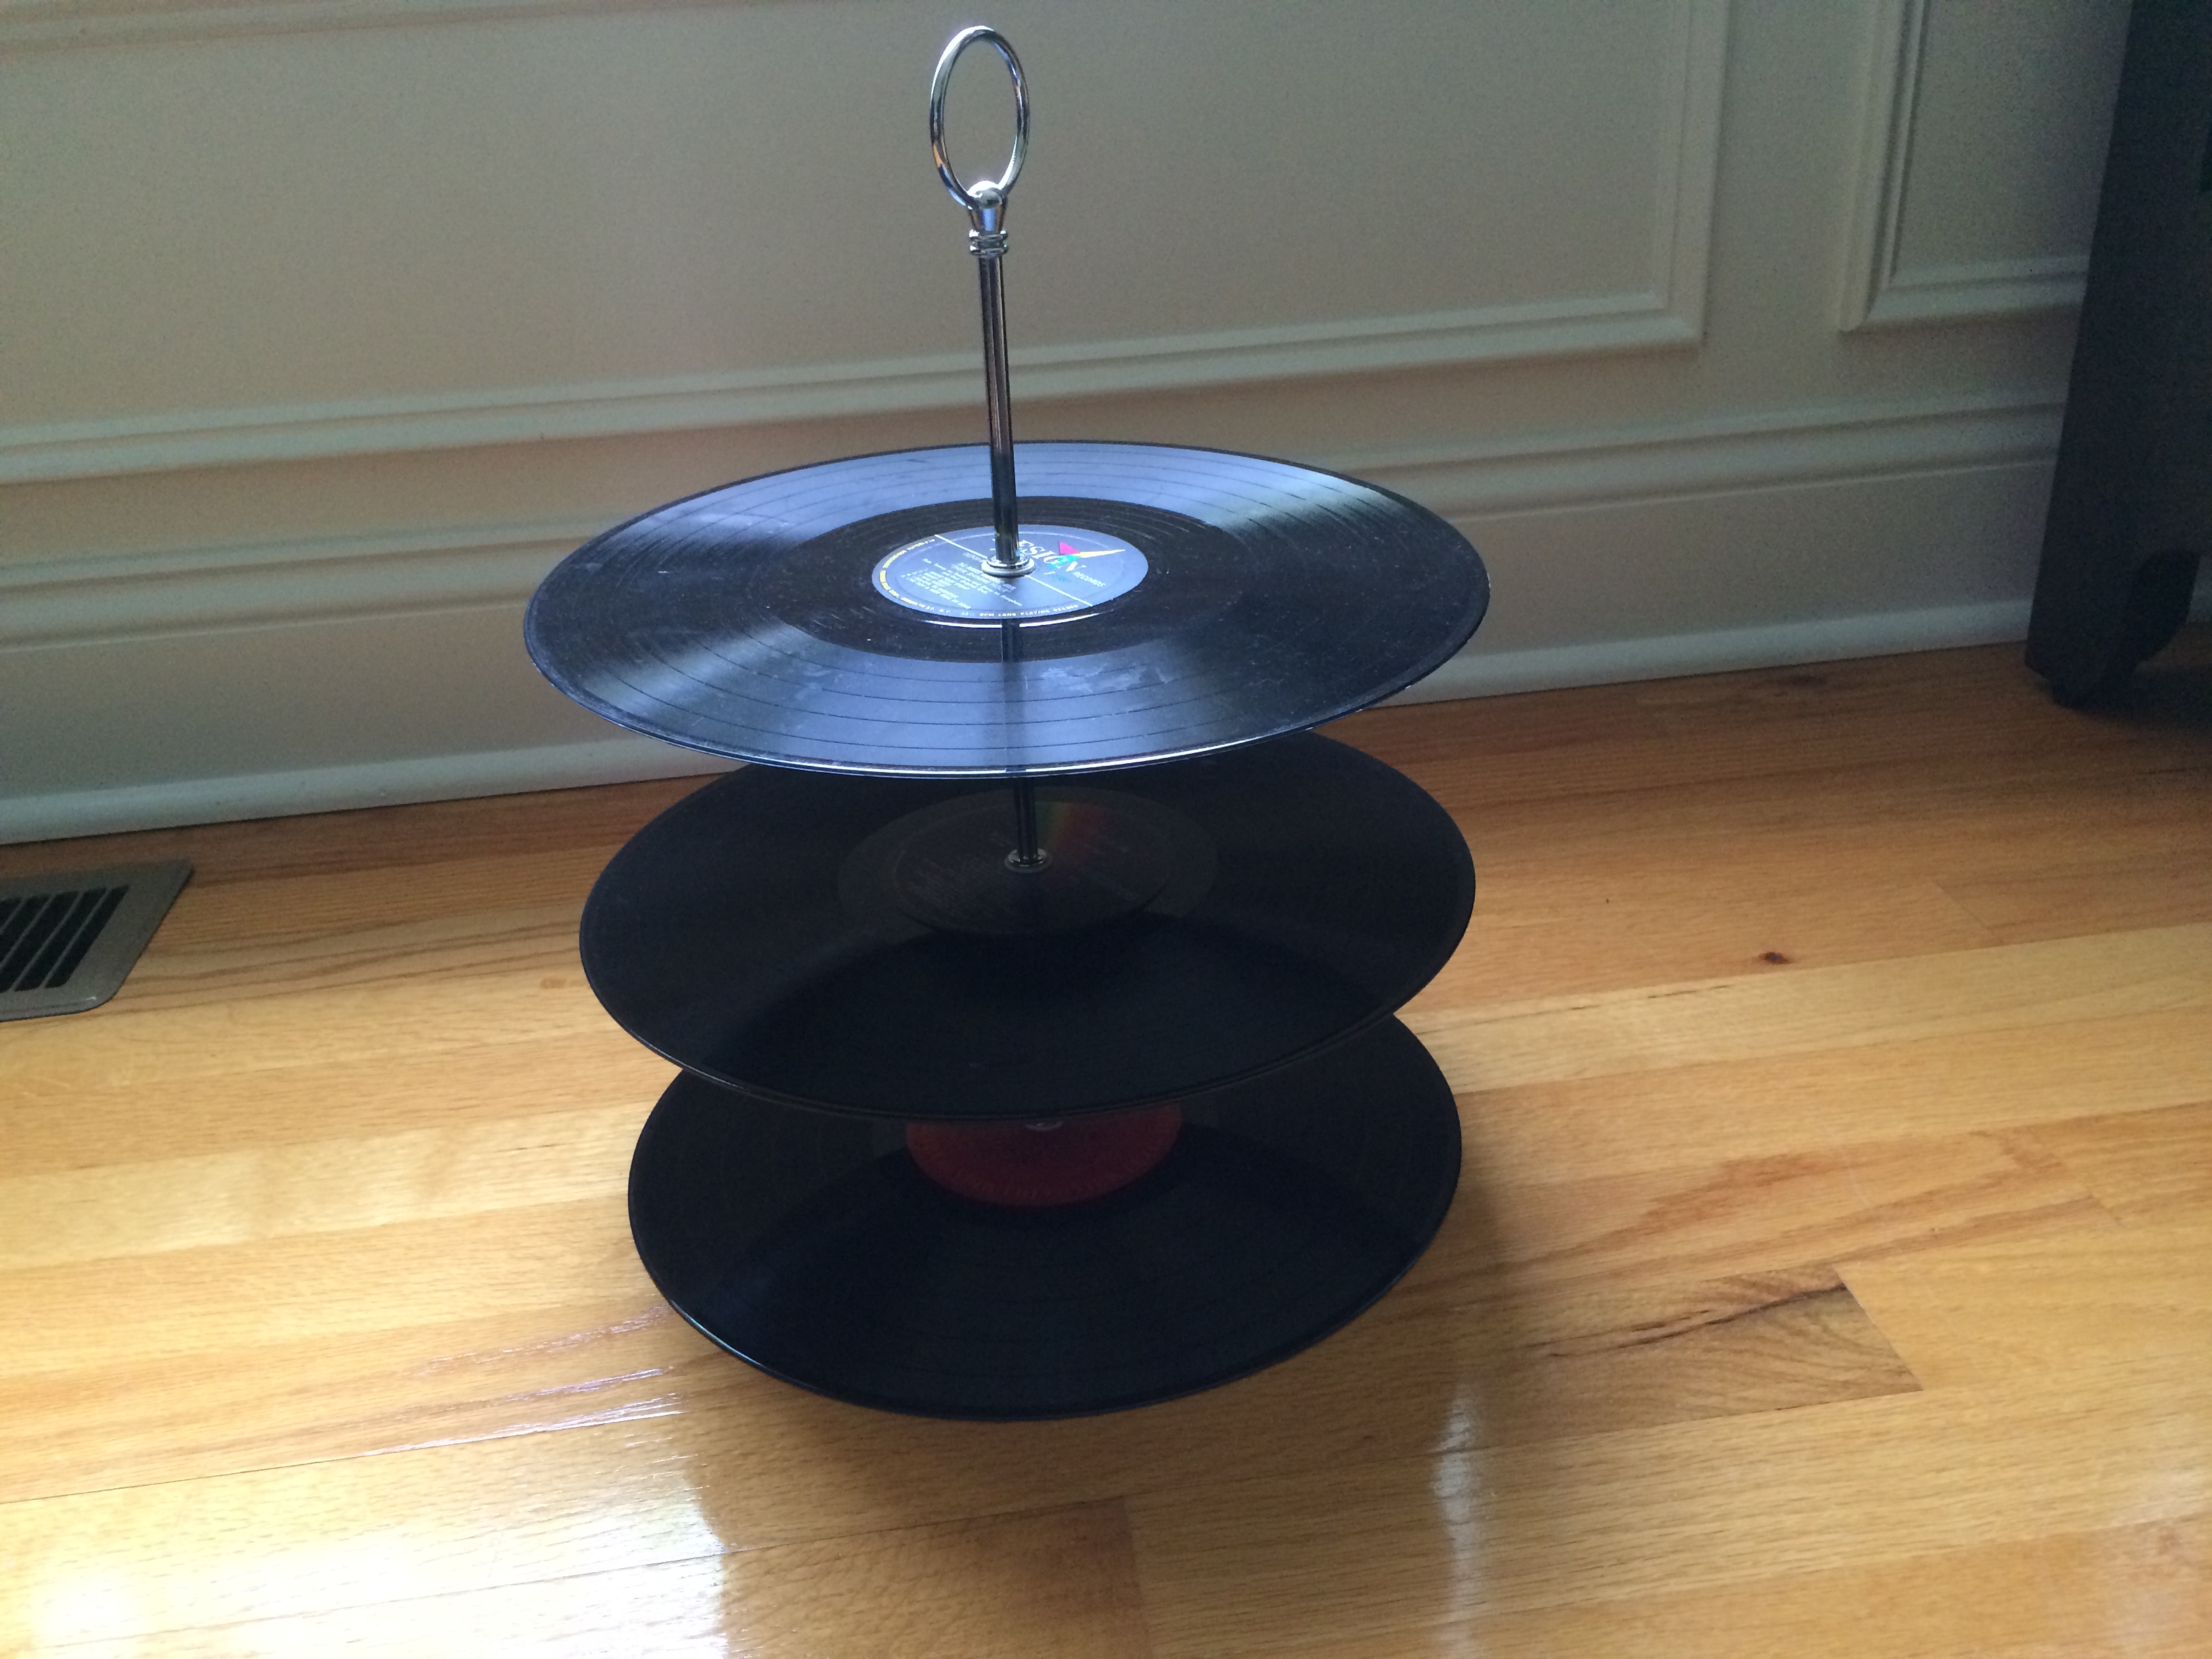
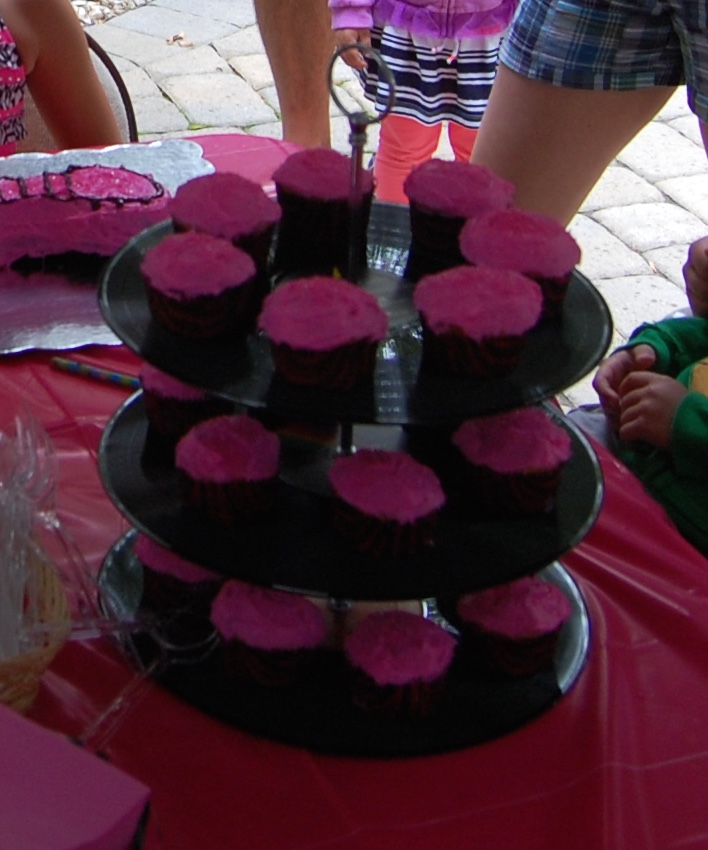
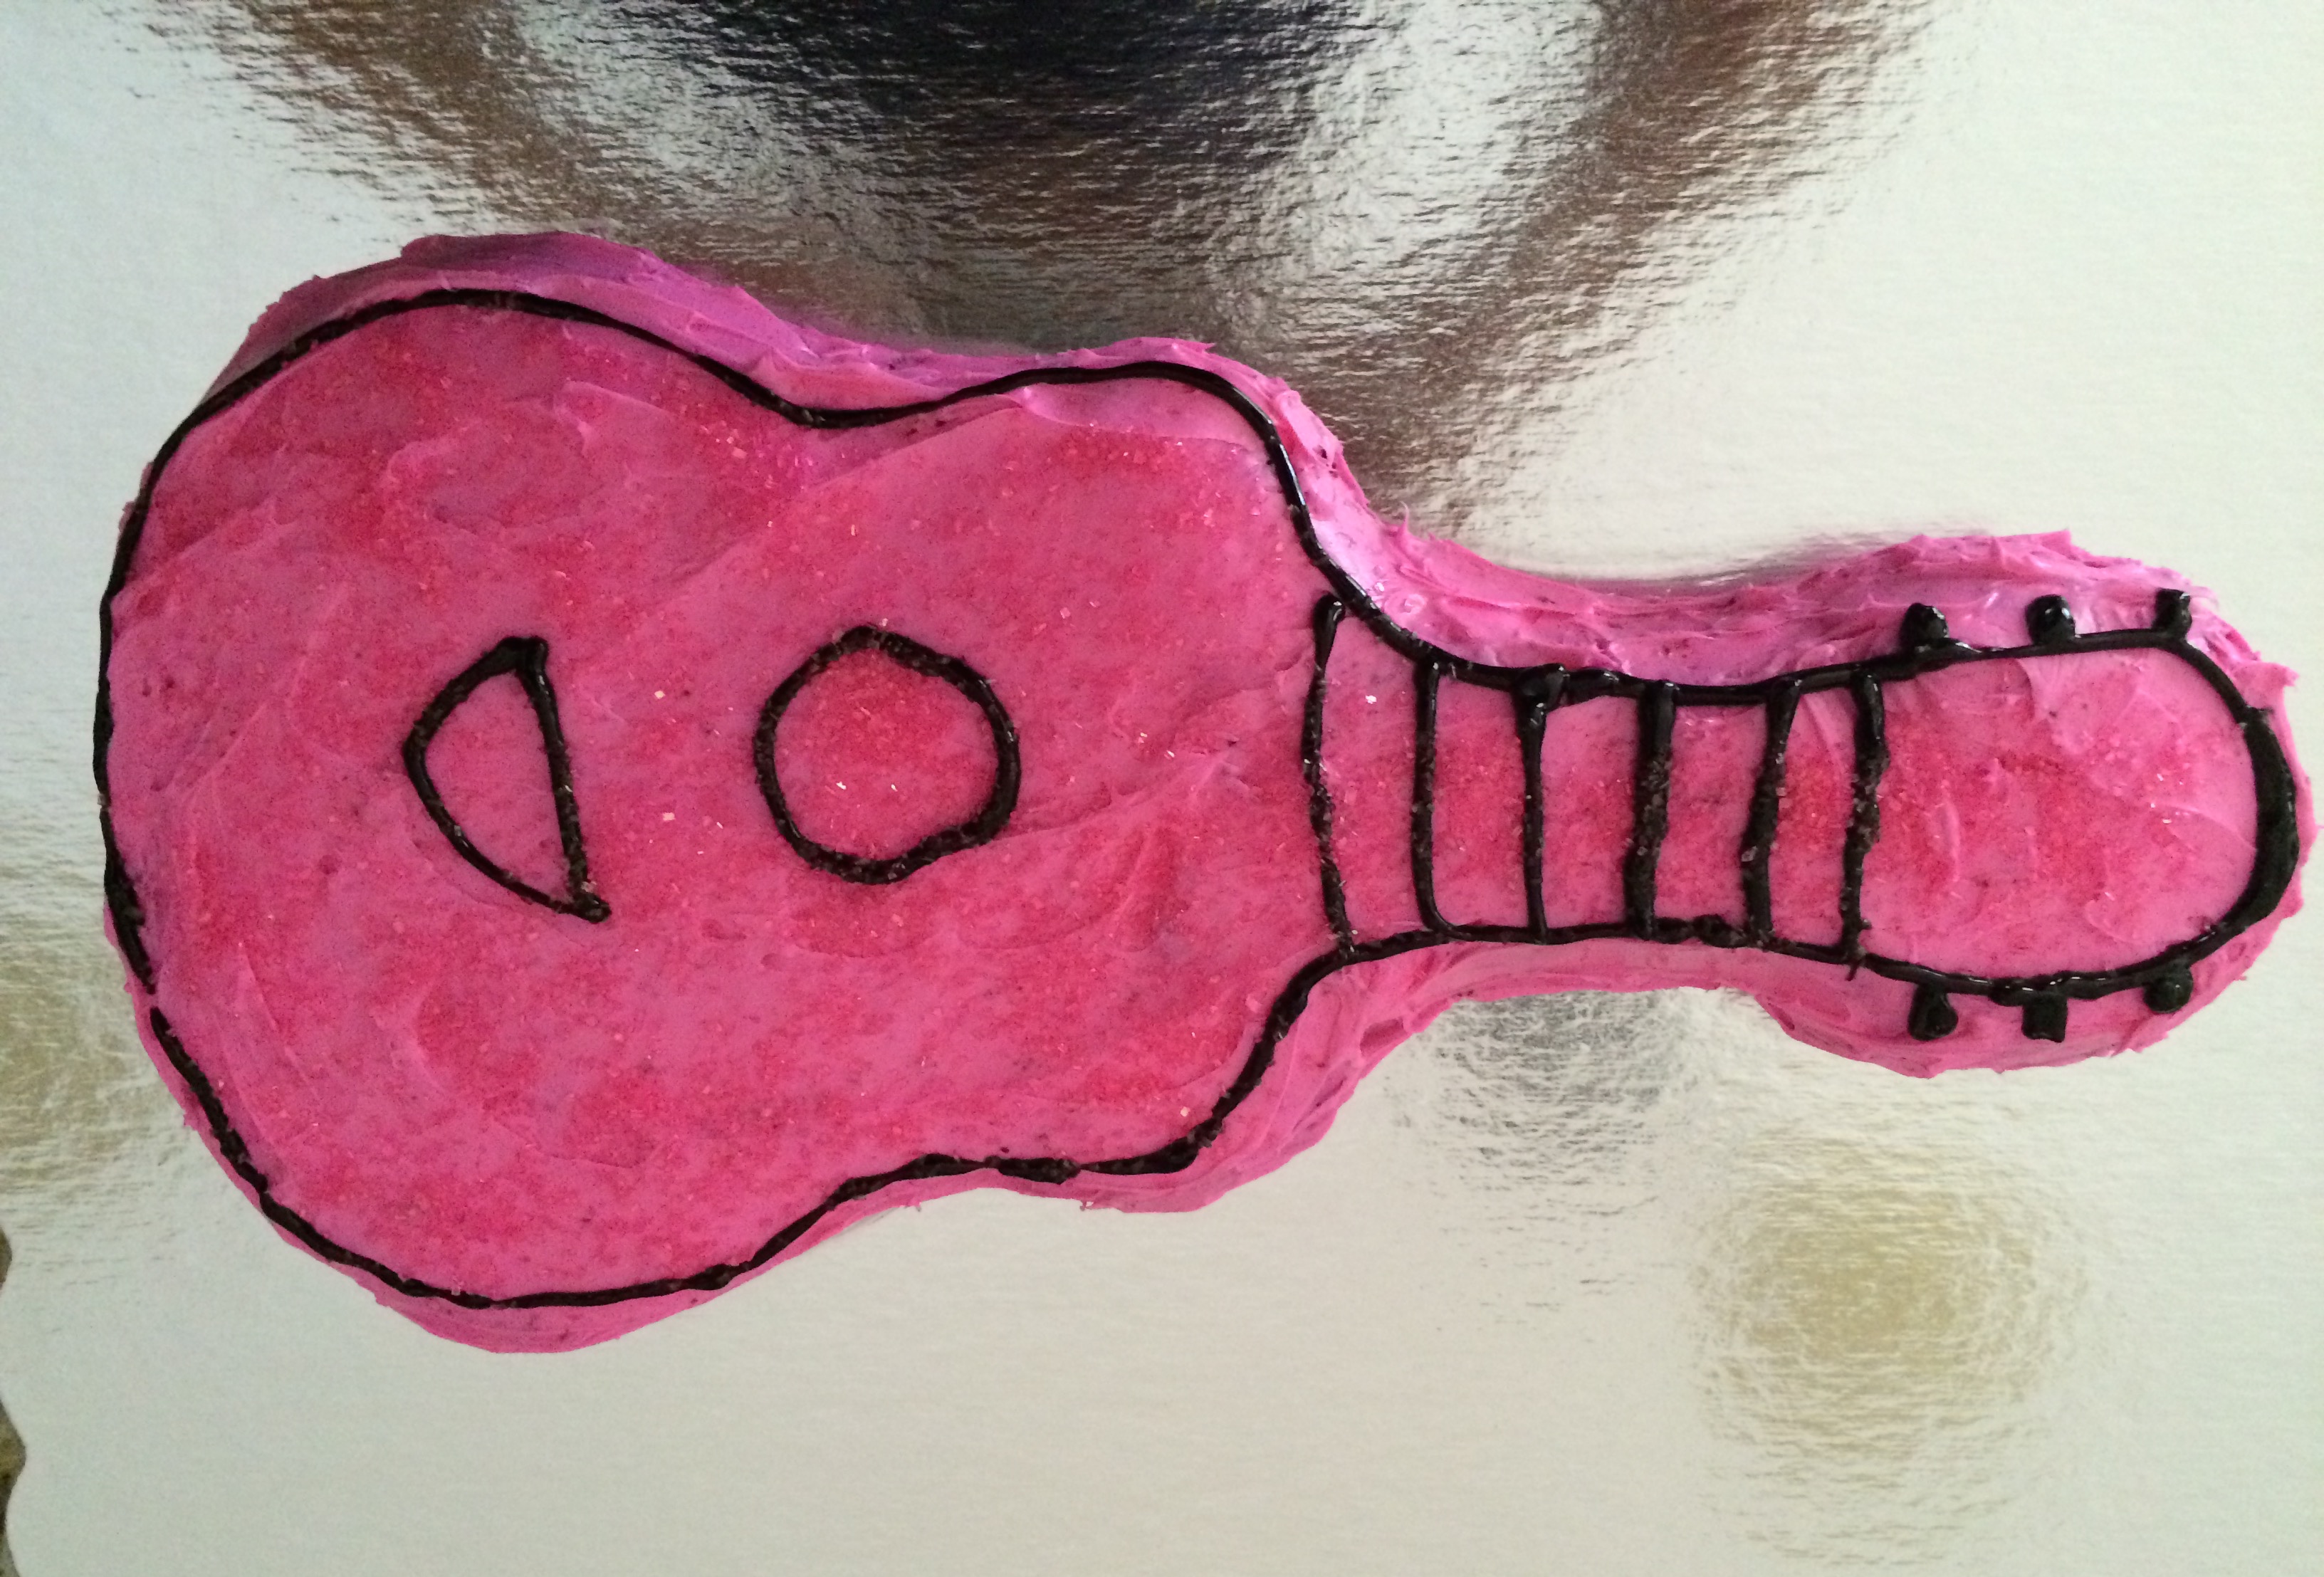
We went with chocolate cake and Funfetti cupcakes this year. The cake was in the shape of a guitar, I used a pan I had from one of my son’s previous birthdays. For the cupcakes, I bought a cake stand on Amazon and a lot of records on Ebay. I washed the records and used them as the tiers to hold the cupcakes. The cupcakes looked awesome. To me, the cake looked like a giant bowling pin and, of course, as with chocolate cake, the frosting ended in specks of cake mixed in.
Games and Prizes
We have a pool and had other outdoor games like basketball and volleyball, but I made up a few Taylor Swift themed games as well for the kids to play. I’m done with the piñata days. I also purchased replica Oscar trophies and gold medals for prizes.
- Guess the Song Based on a Lyric
- Taylor Swift Trivia
- Musical Records Played to Taylor Swift songs (Idea of Musical Chairs, except using records on the grass that the kids had to sit on when music stopped)
- Put the Taylor Swift albums in order of release


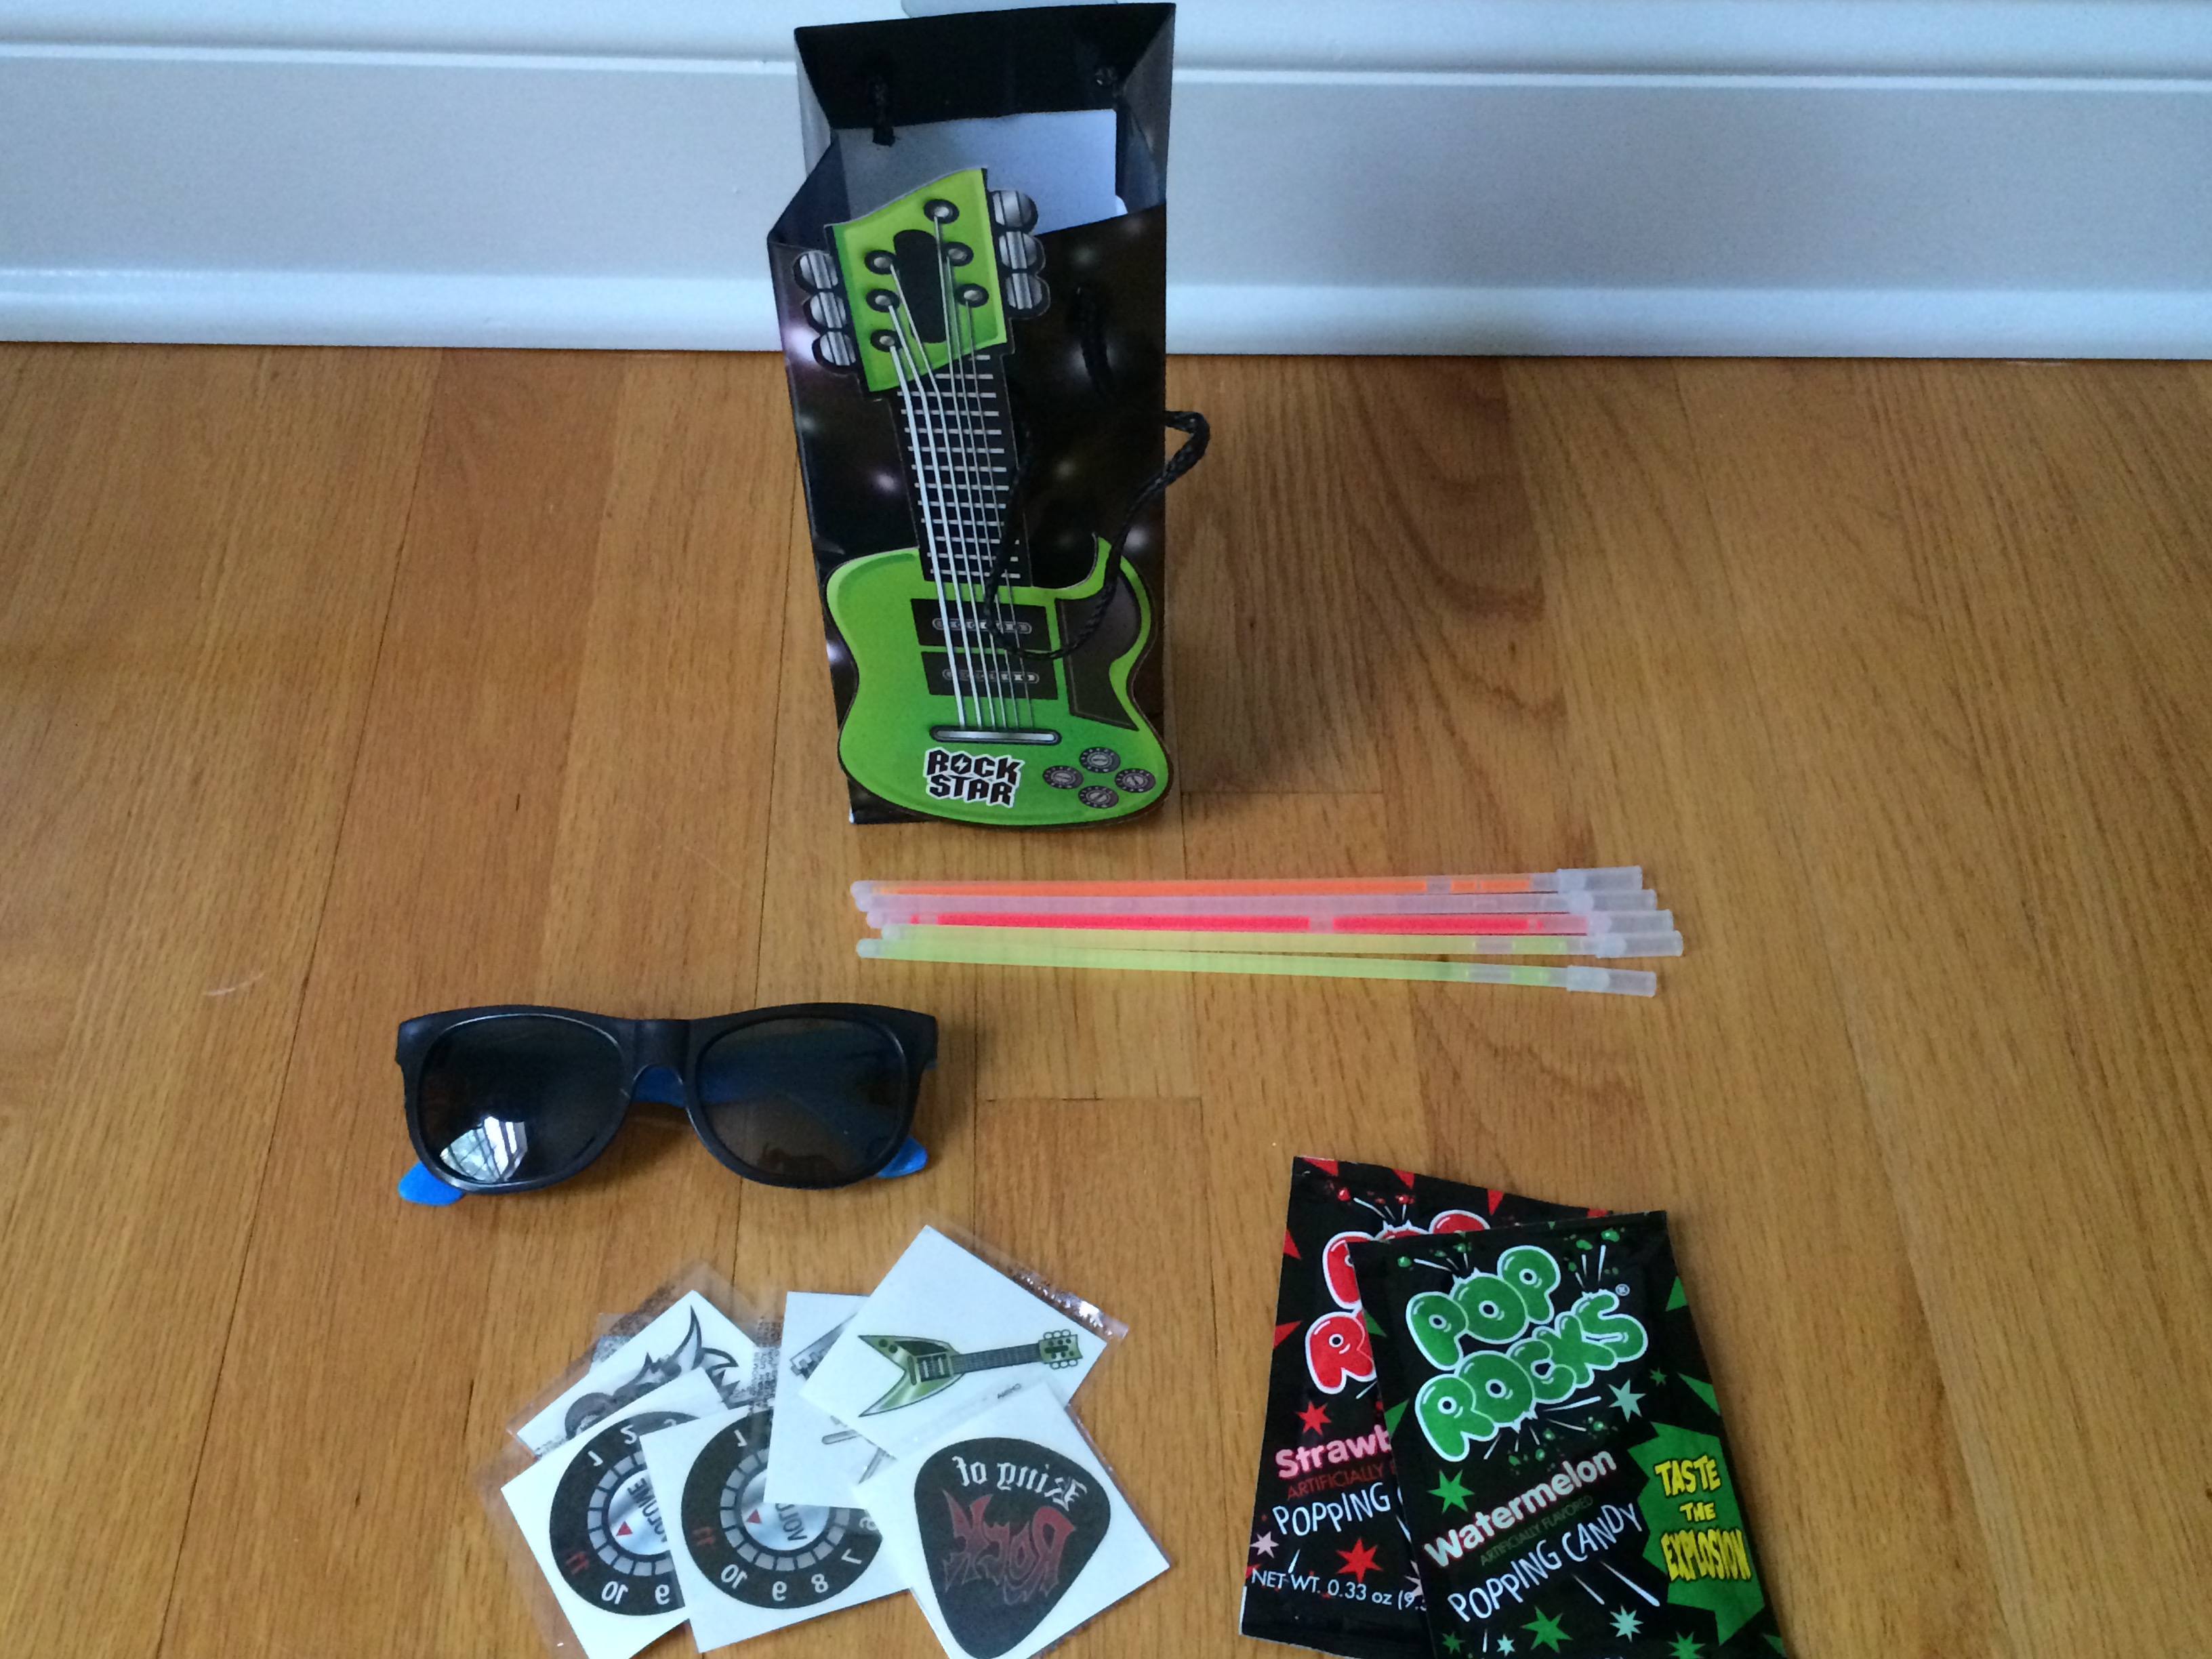
Goodie Bags
All the goodie bags had Pop Rocks candy, glow sticks and sunglasses. The boys’ bags also contained boy rockstar tattoos while the girls’ bags had a girl tattoo and a microphone lip gloss.

Performance
Finally “Taylor Swift and her Swifties”performed Shake It Off. You will have to excuse a few technical difficulties with the music in the beginning, but was still fun!!!
Links to Amazon Purchases for the Party


