
DIY
DIY- Repurposed Antique Store Items
We went to an “antique” store while we were on vacation in the Catskills. To me it was more like a hunt like Mike and Frank from American Pickers go on, which was awesome! I found some really great objects and refinished and repurposed them.
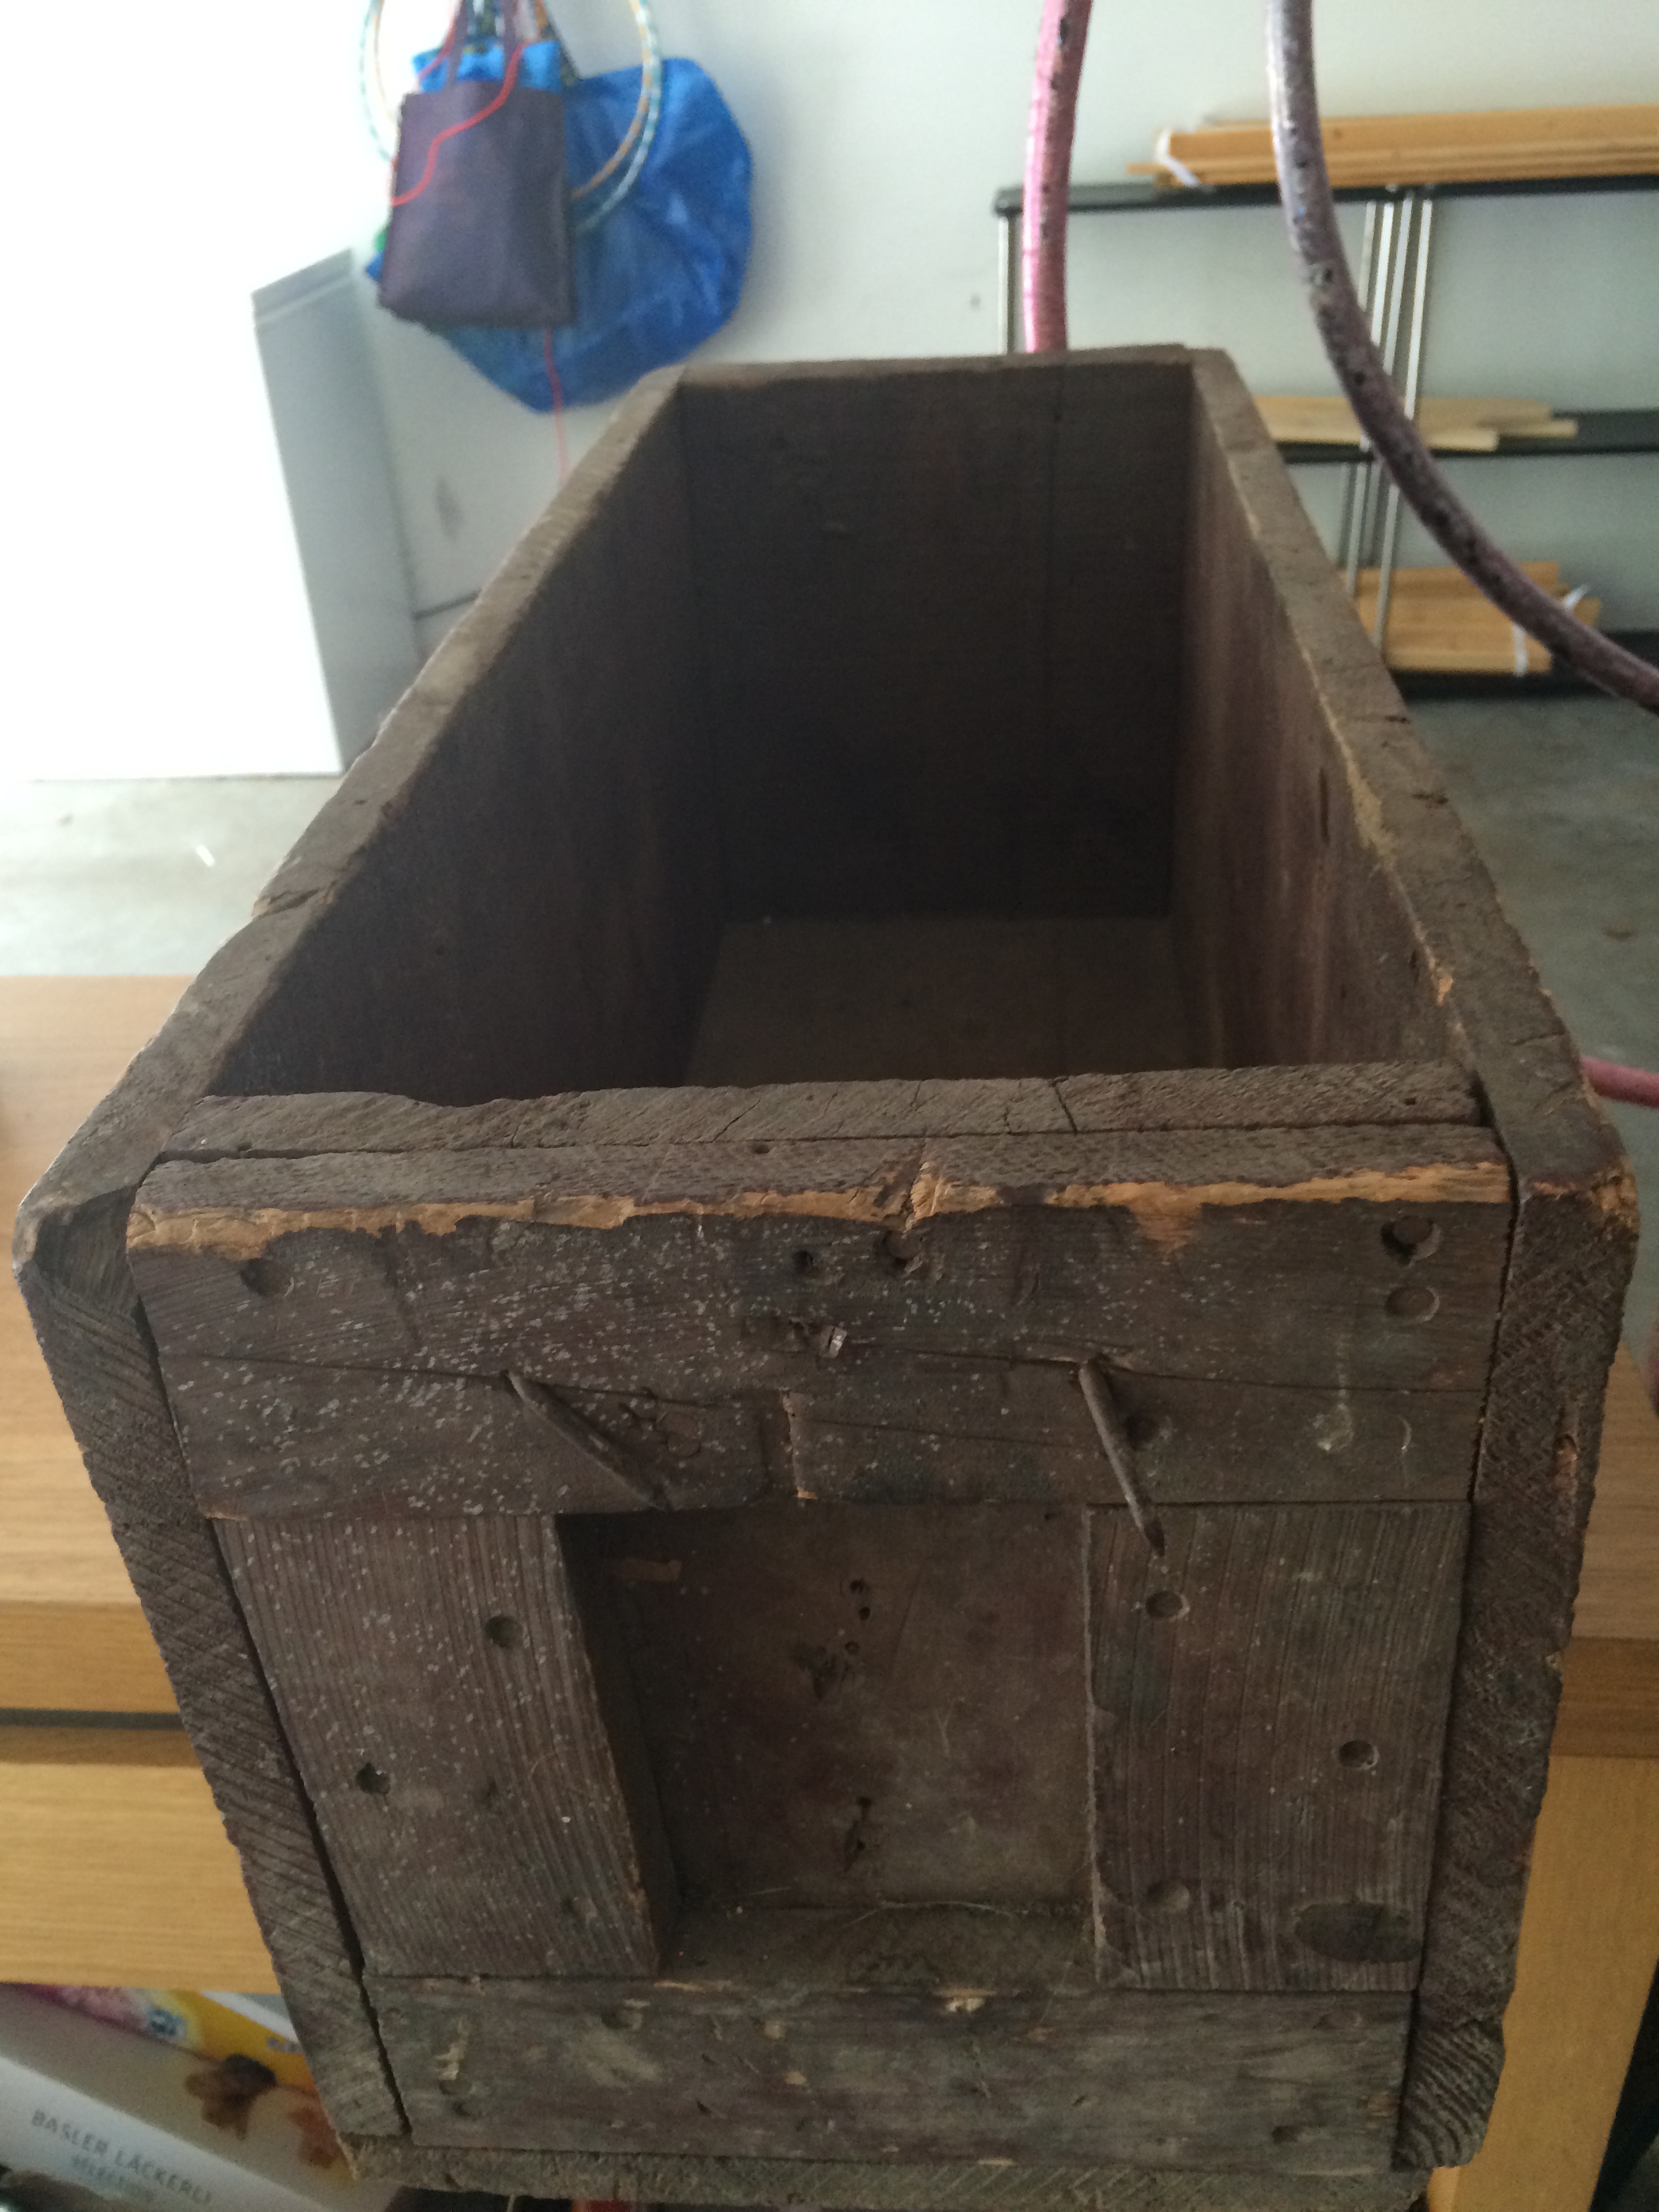
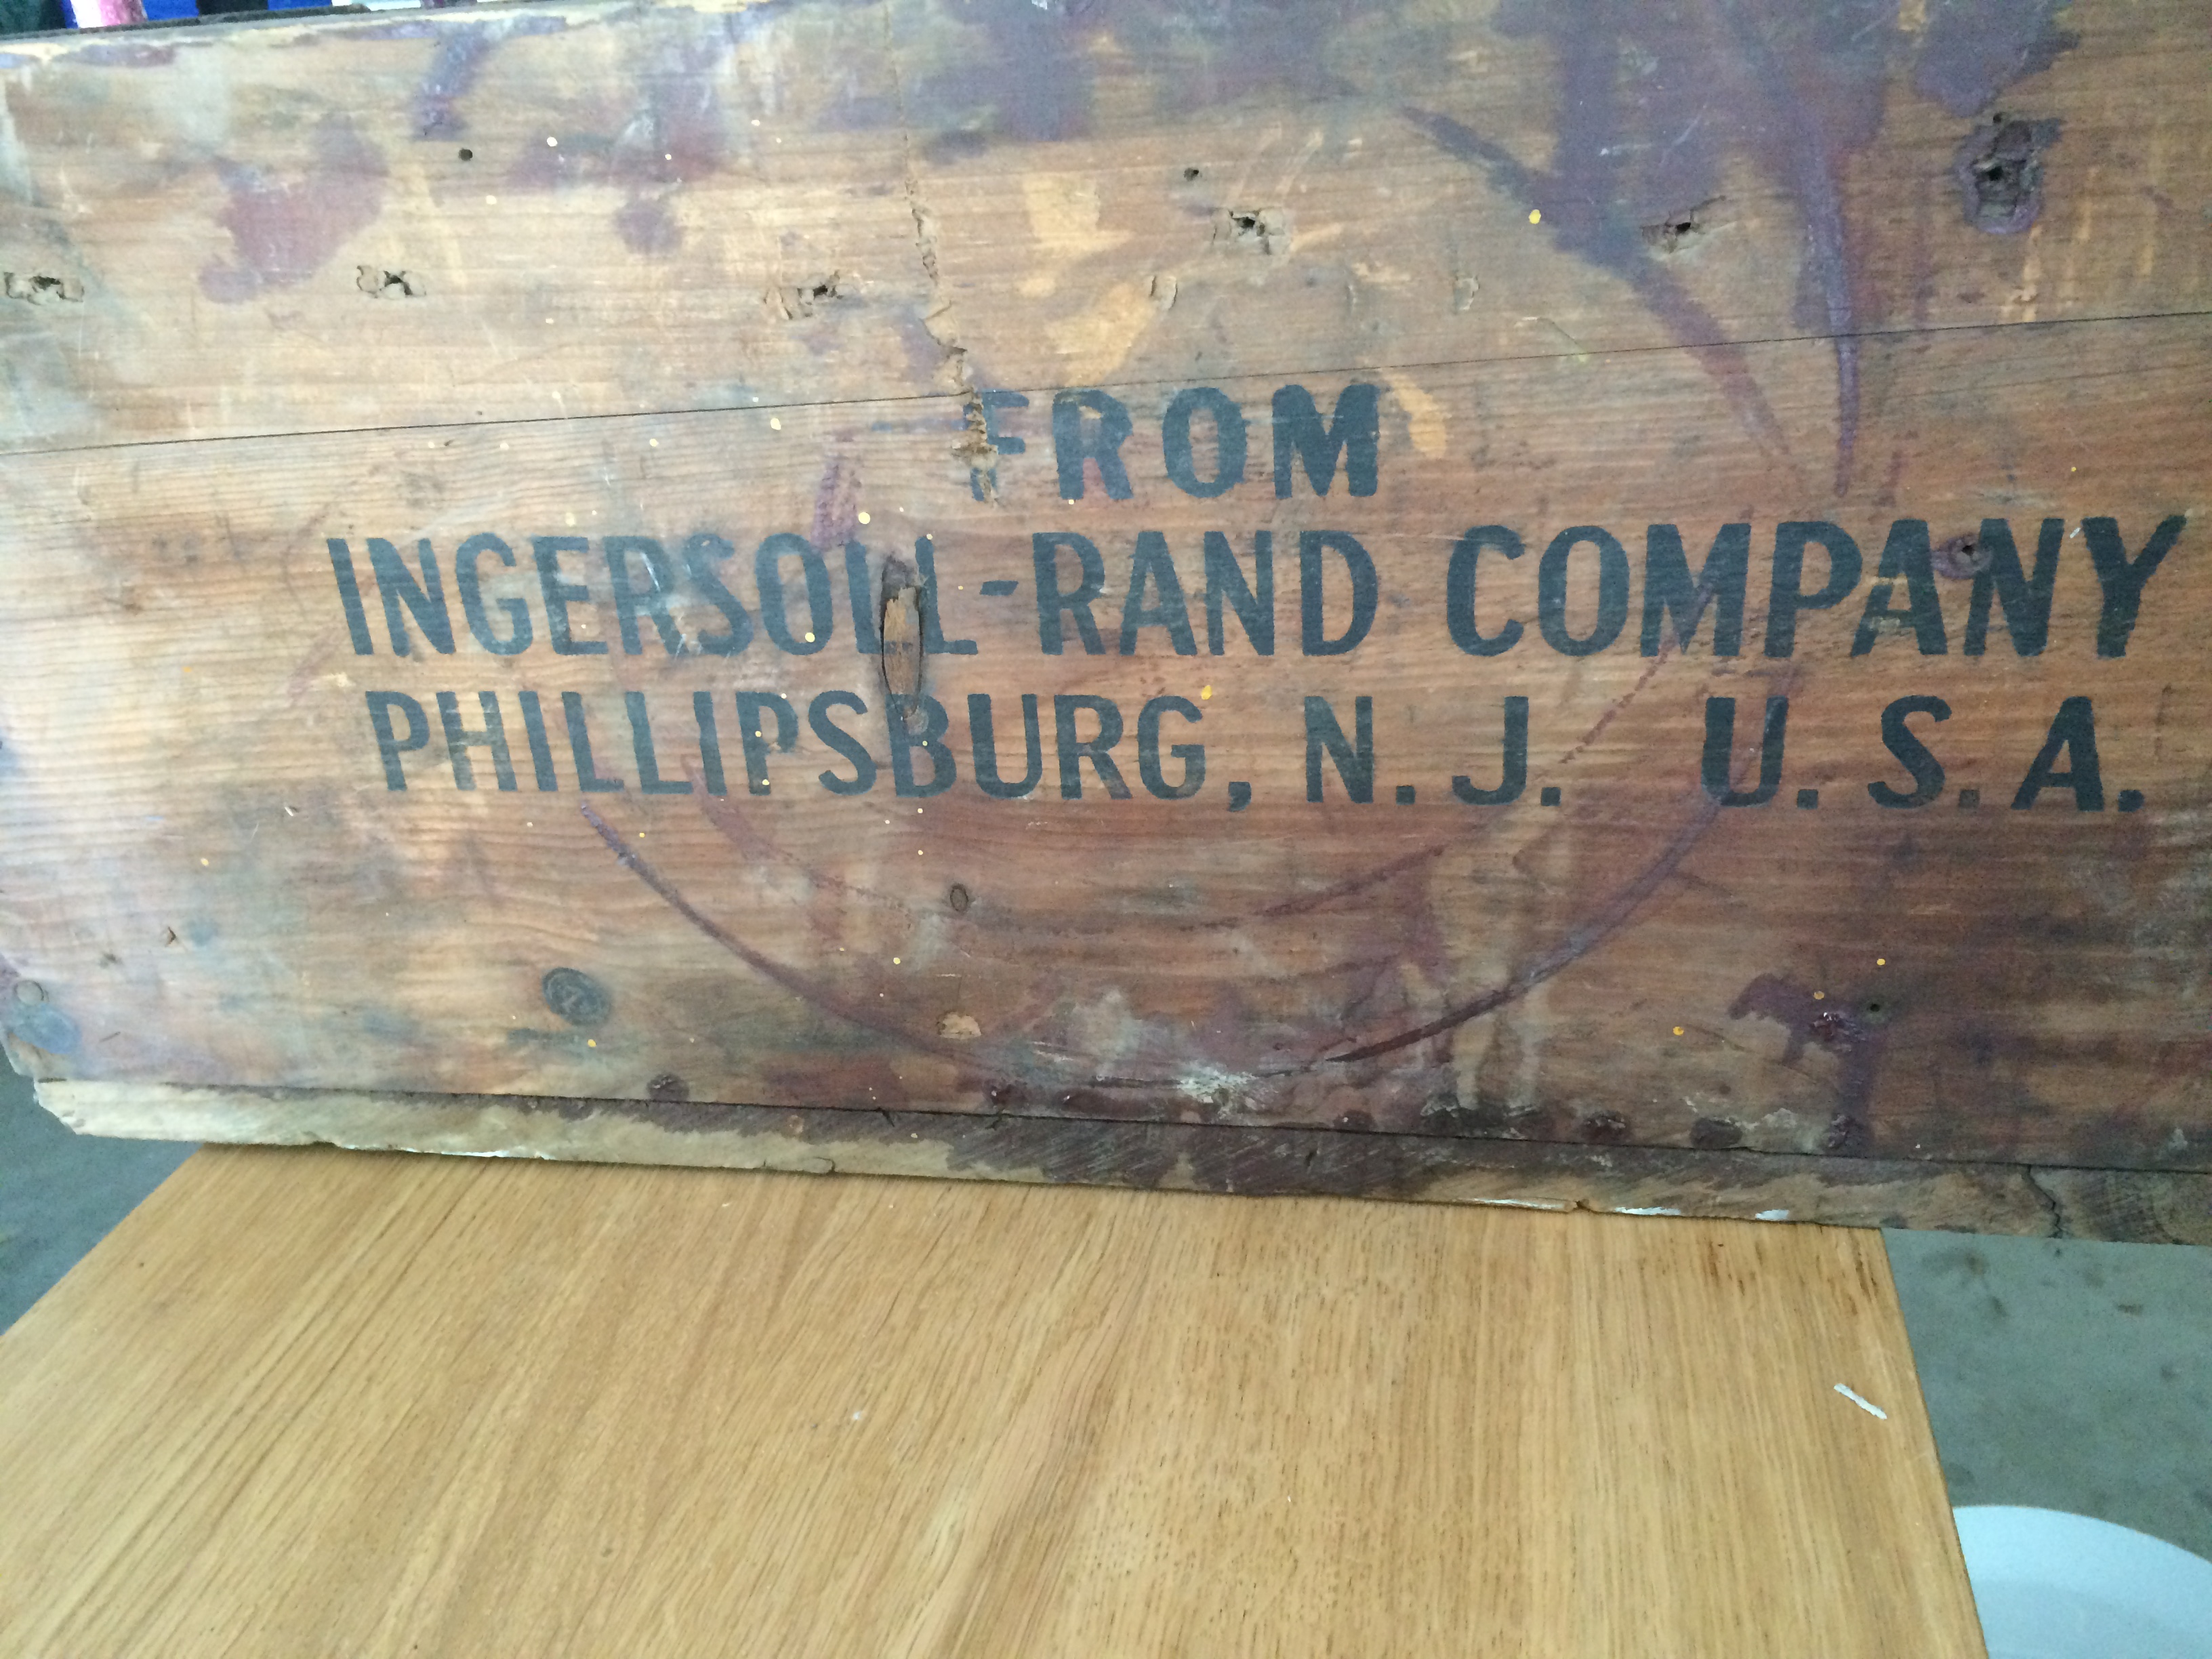
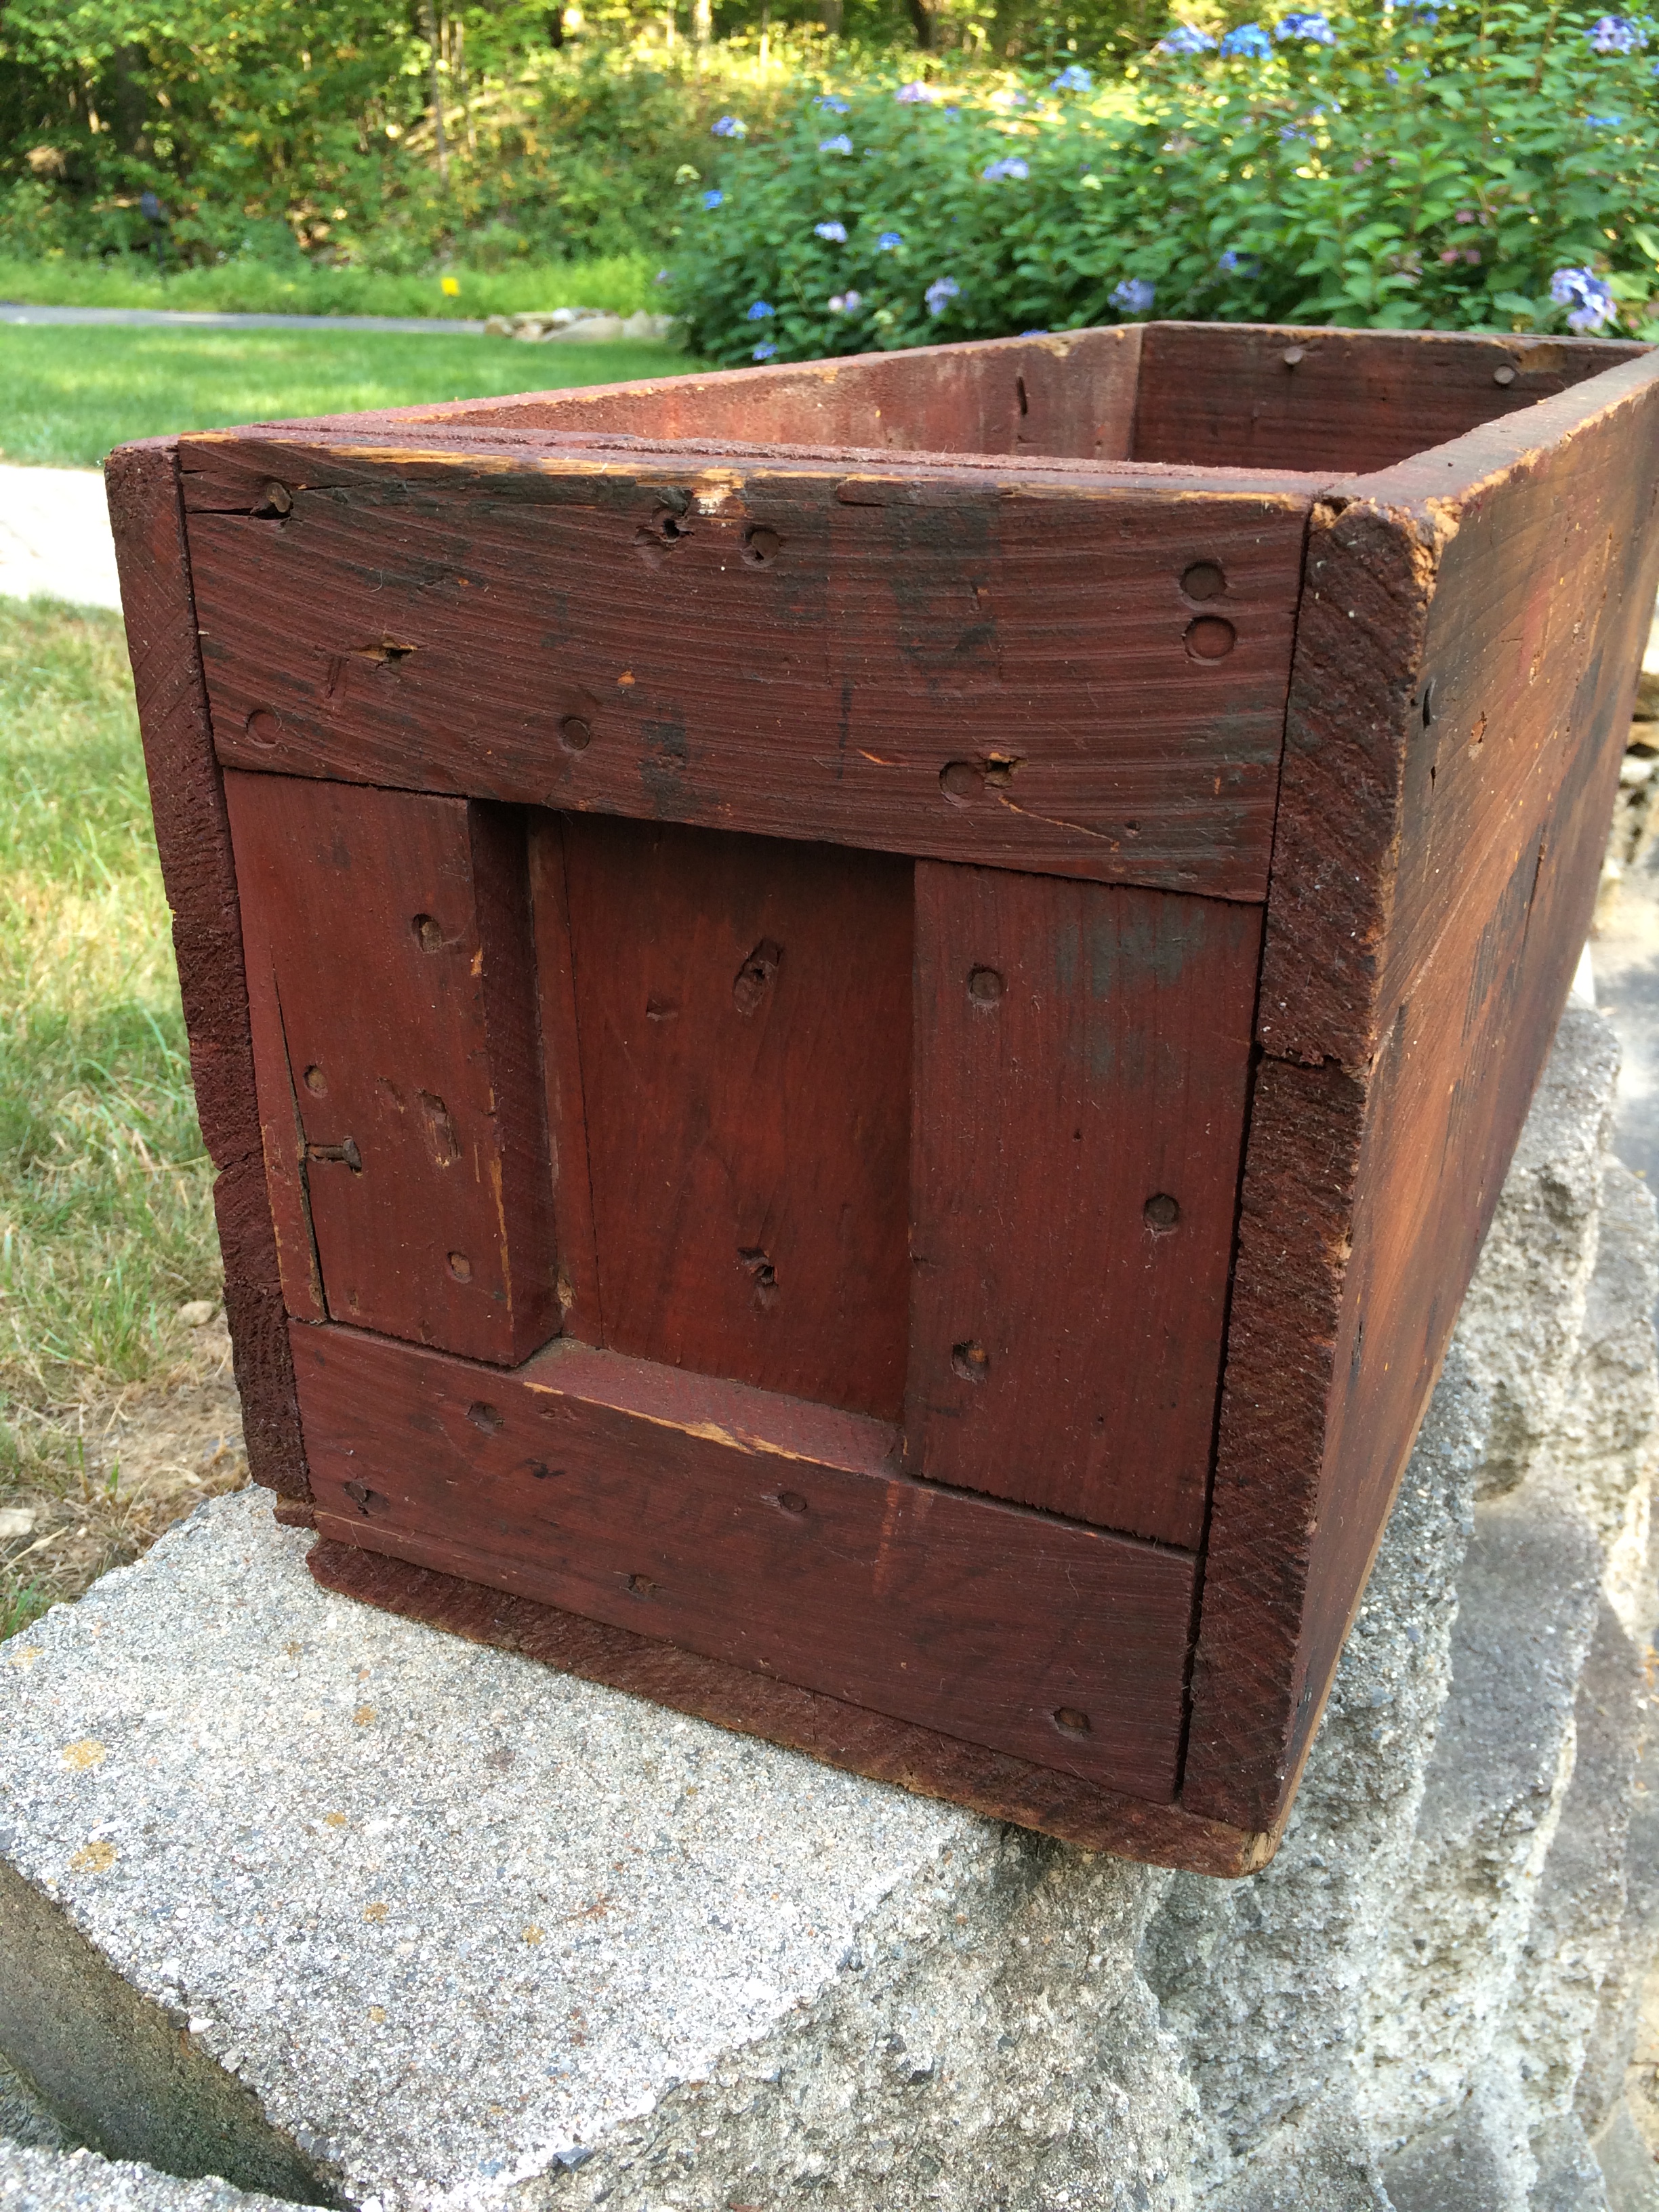
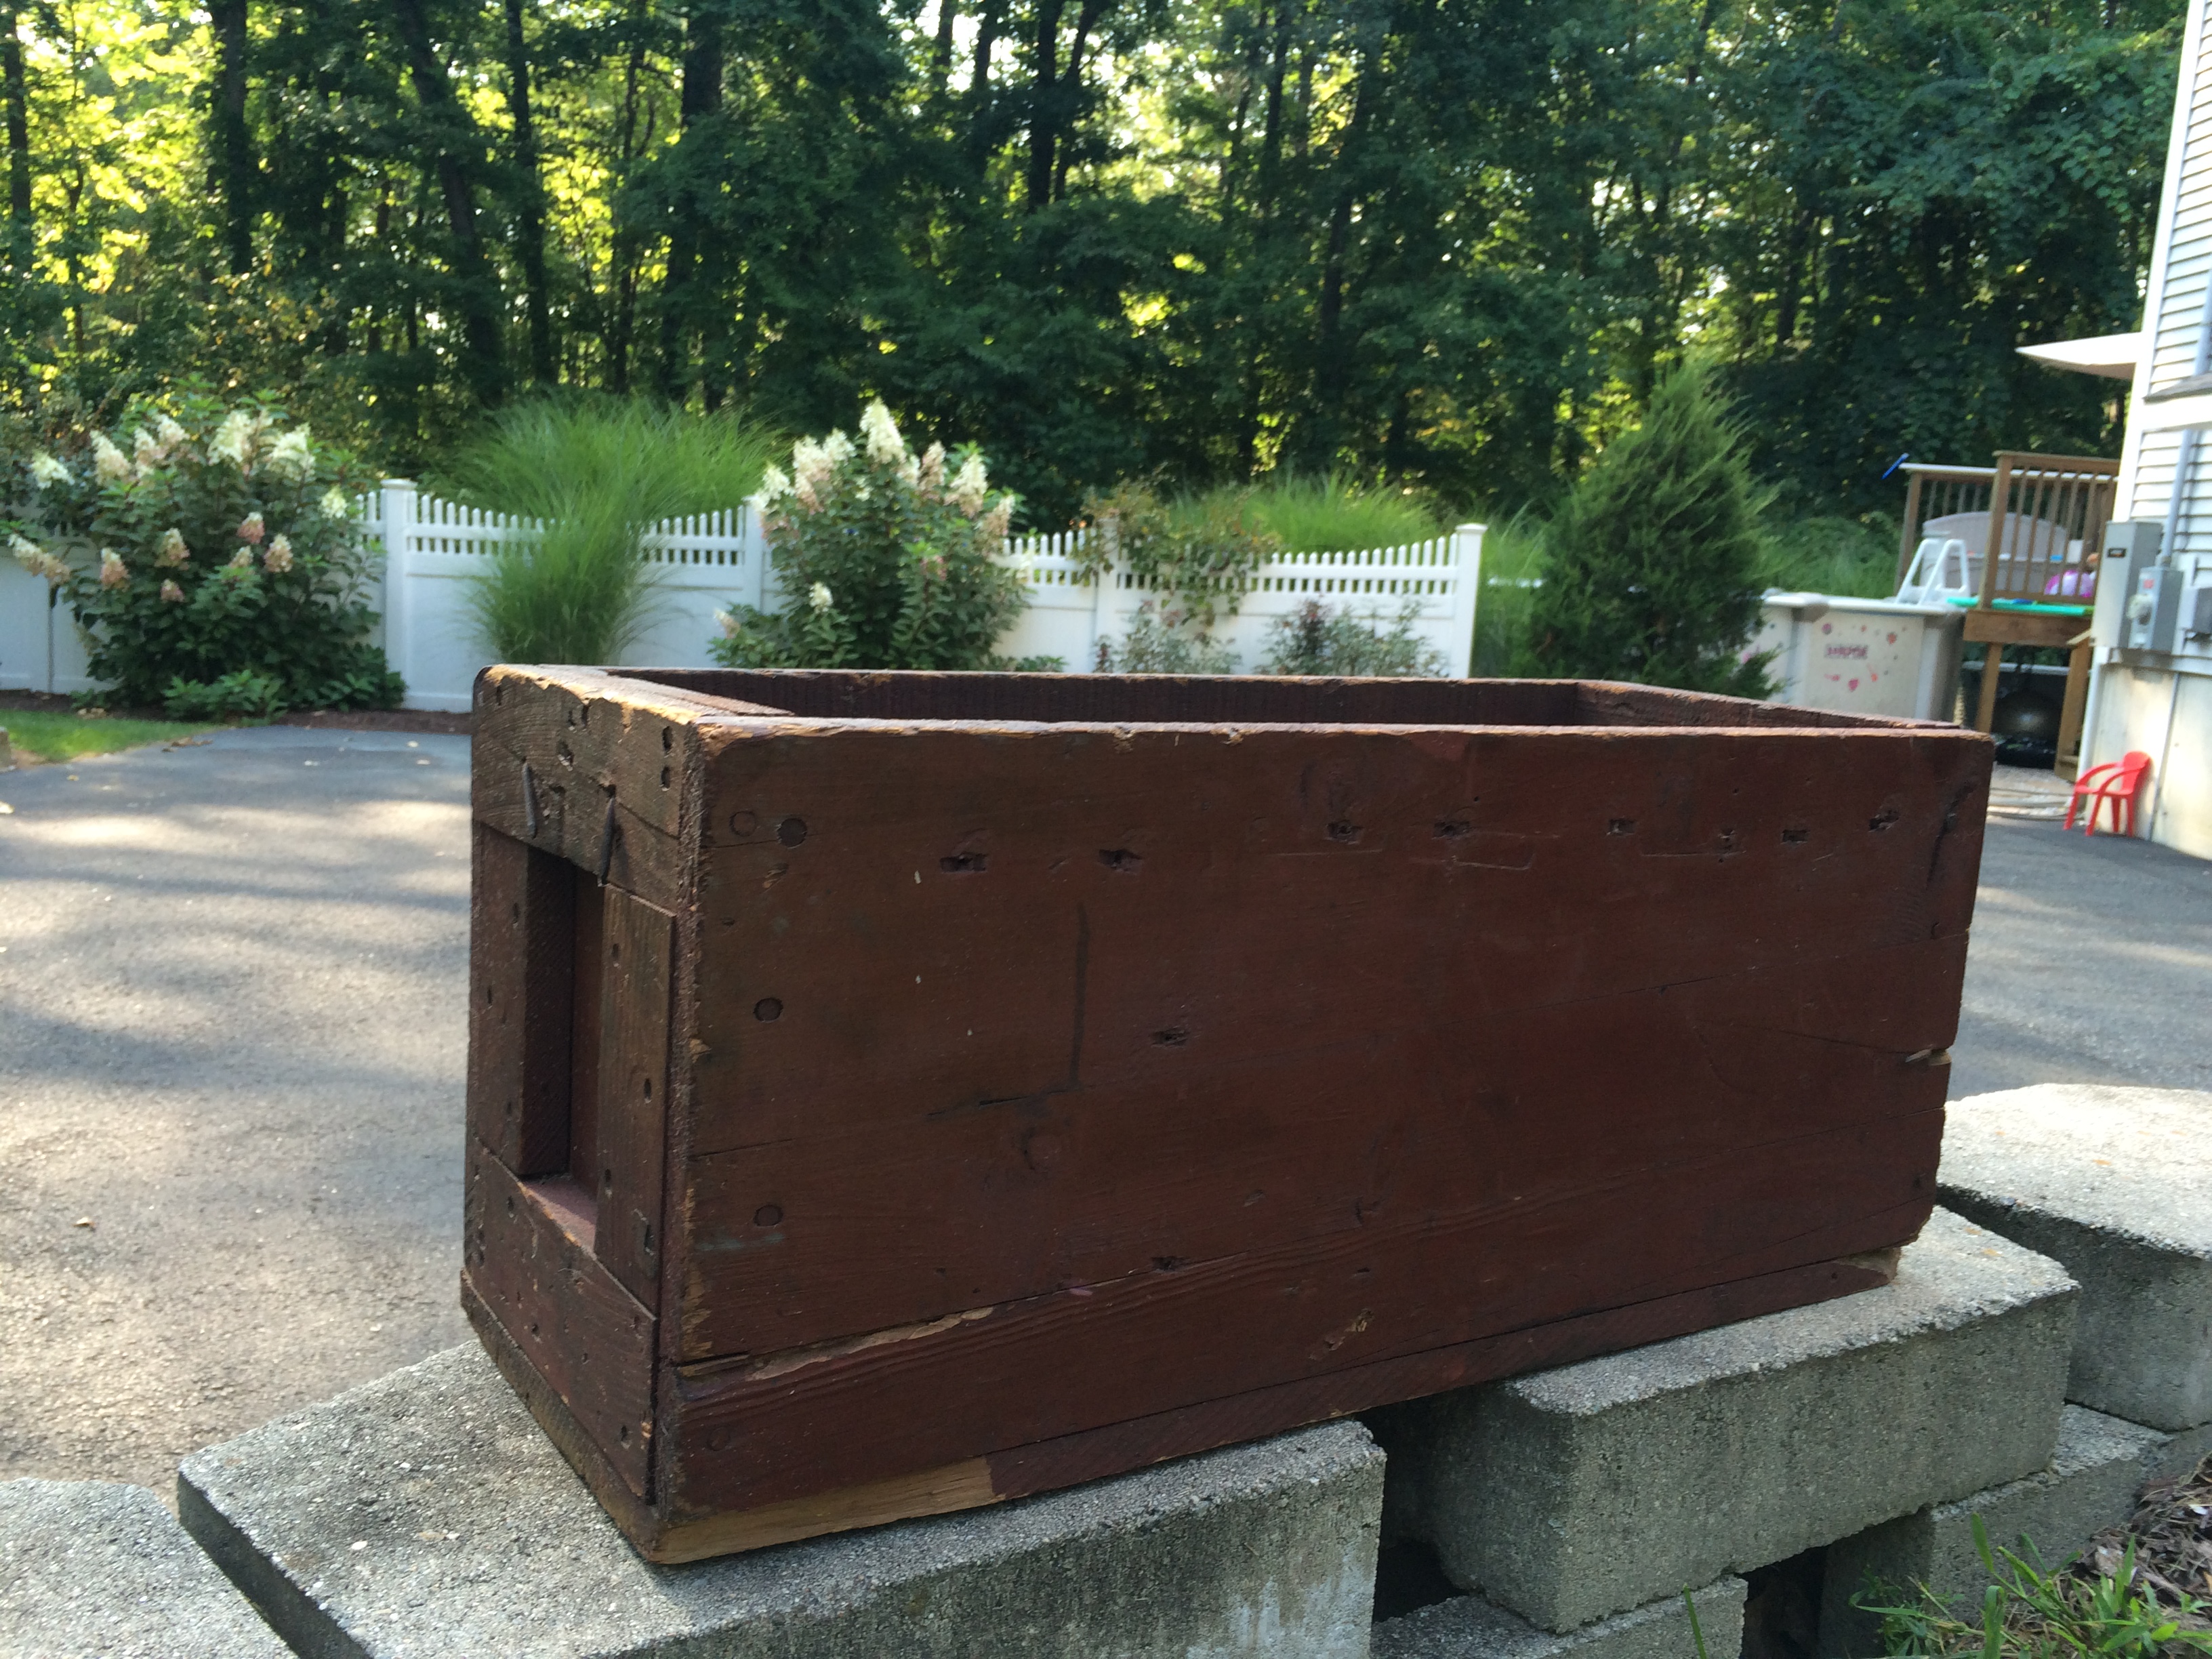
This wooden box appealed to me because as I’ve mentioned in another post, I am obsessed with wood. I liked the age and color of the box and it had some writing stamped on it which was cool. I cleaned it with soap and water and then wiped it down using a soft cloth with a mixture of olive oil and white vinegar and then again with coconut oil. Just by cleaning and oiling it, the natural red color of the box was exposed and everything on the box looked so much brighter and clear. I still haven’t made up my mind, but I think I will use it outside as a planter.
BEFORE:
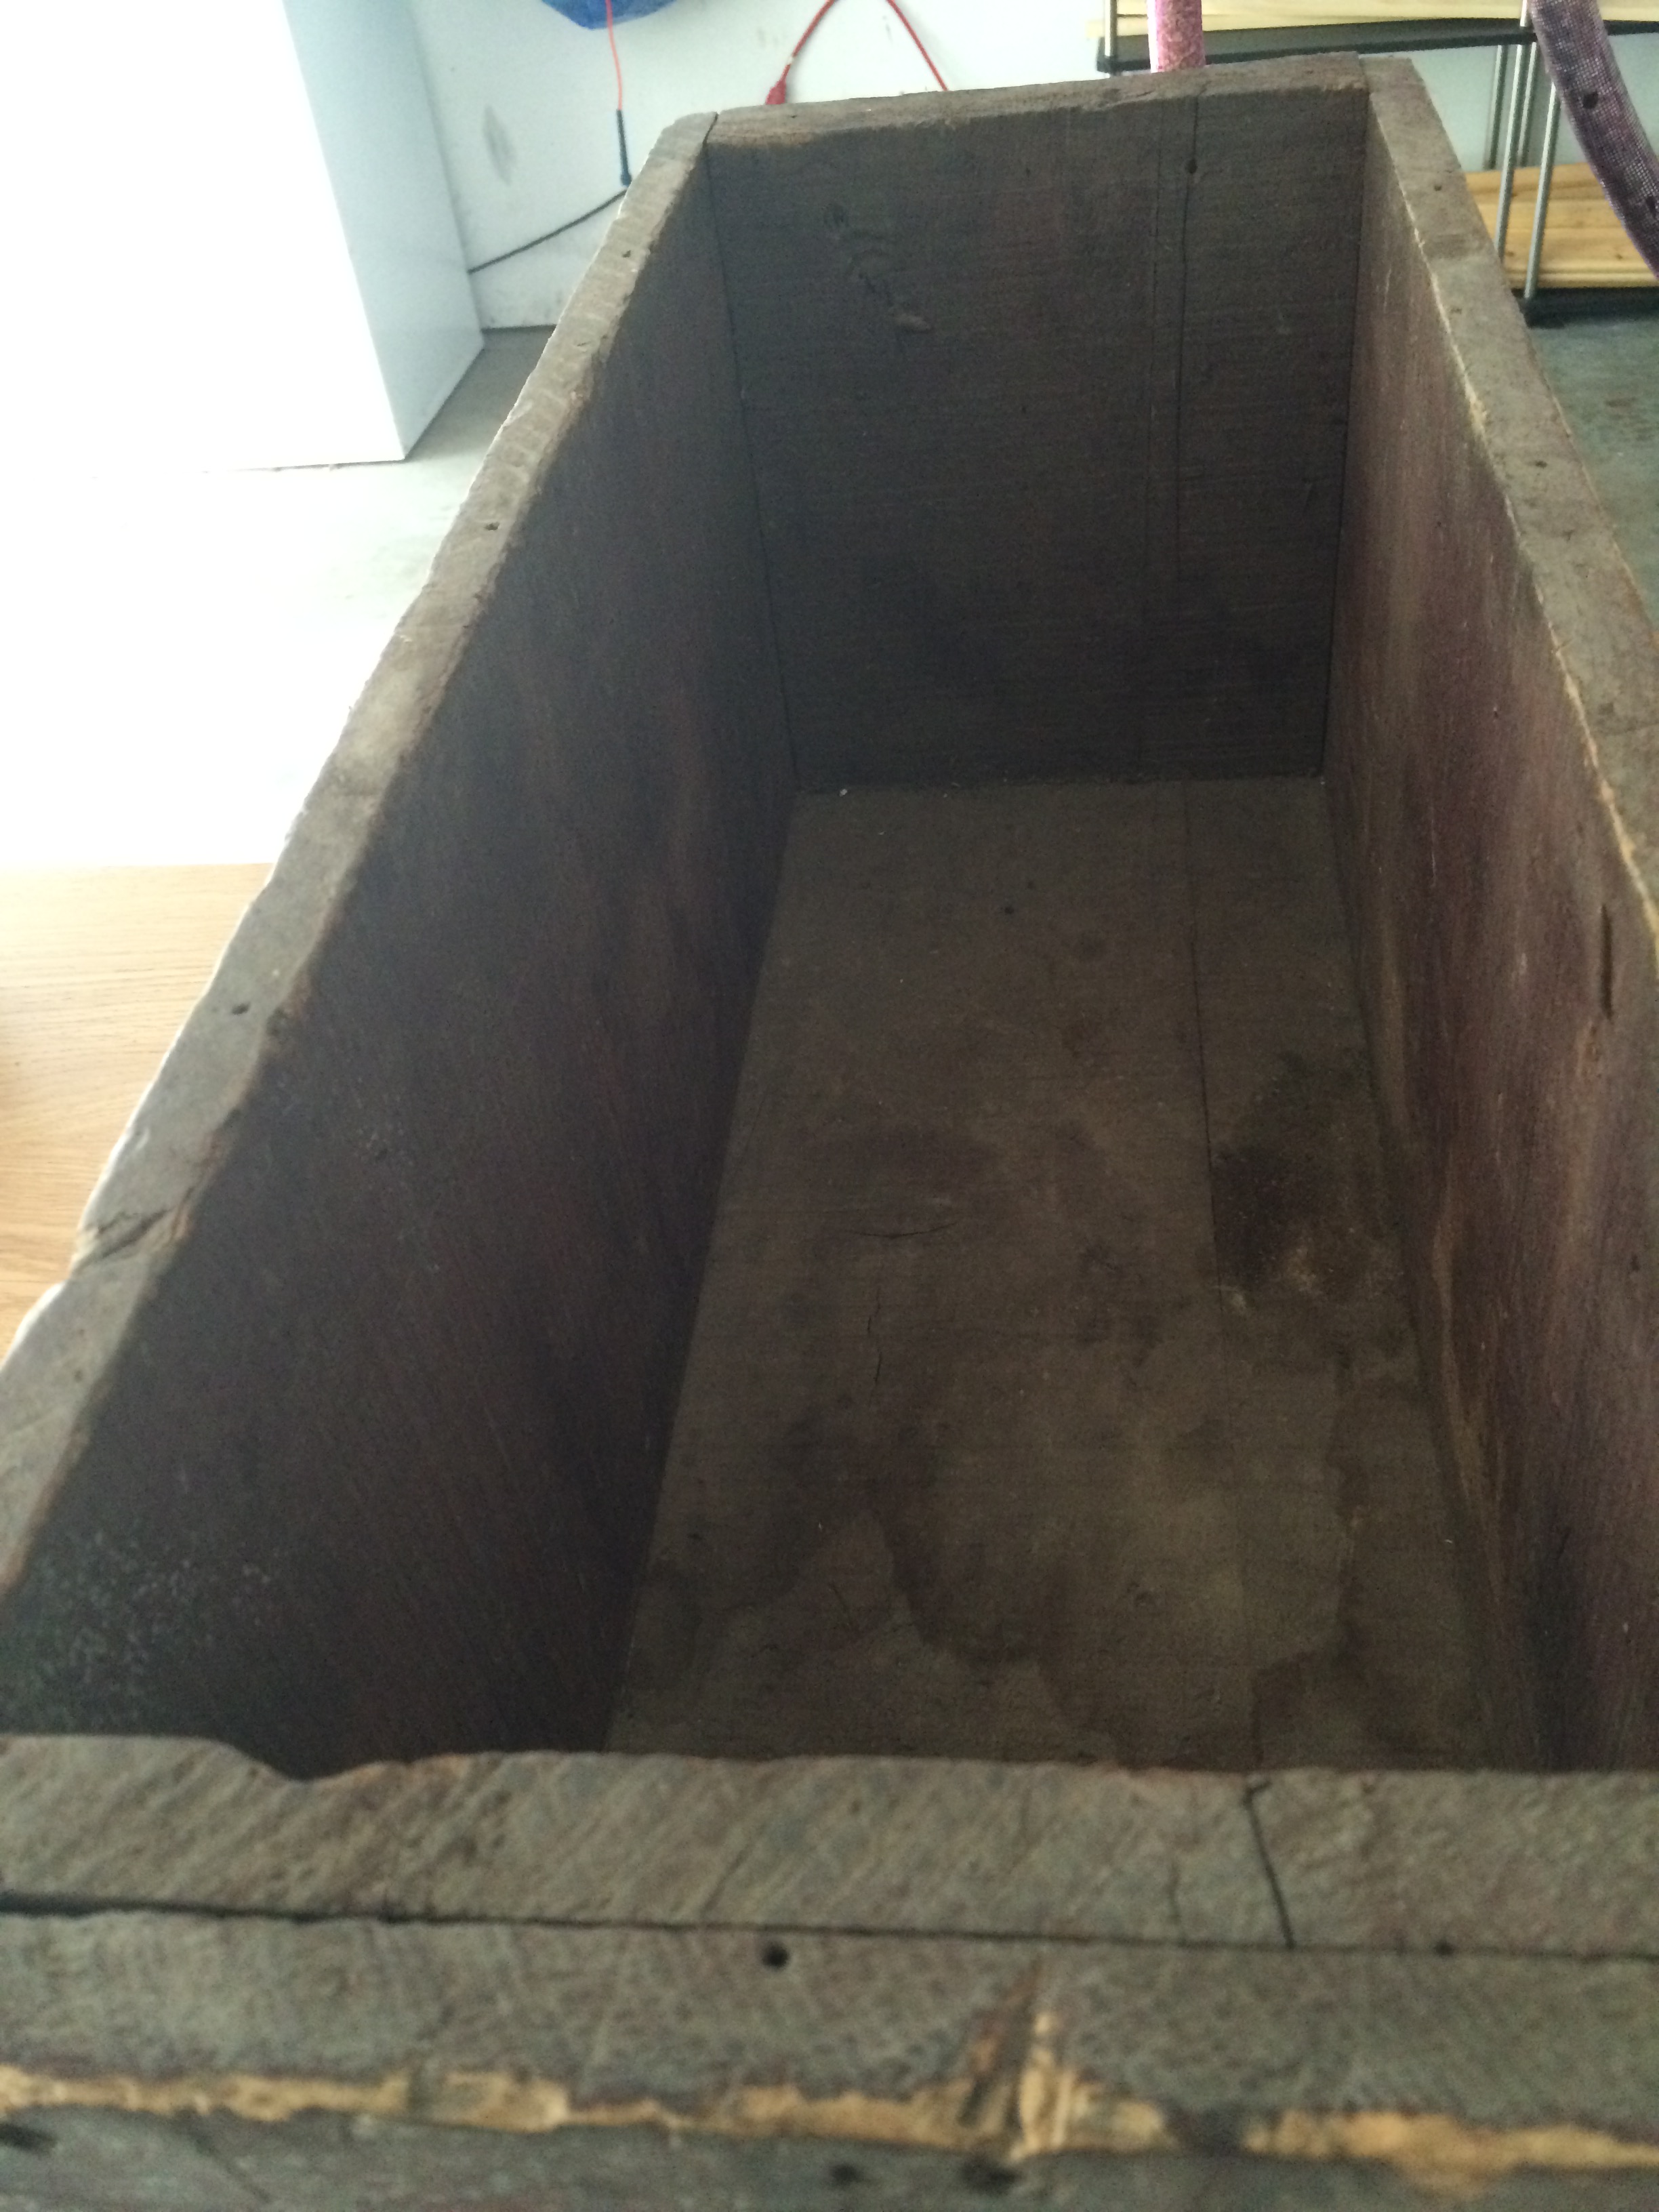
AFTER:

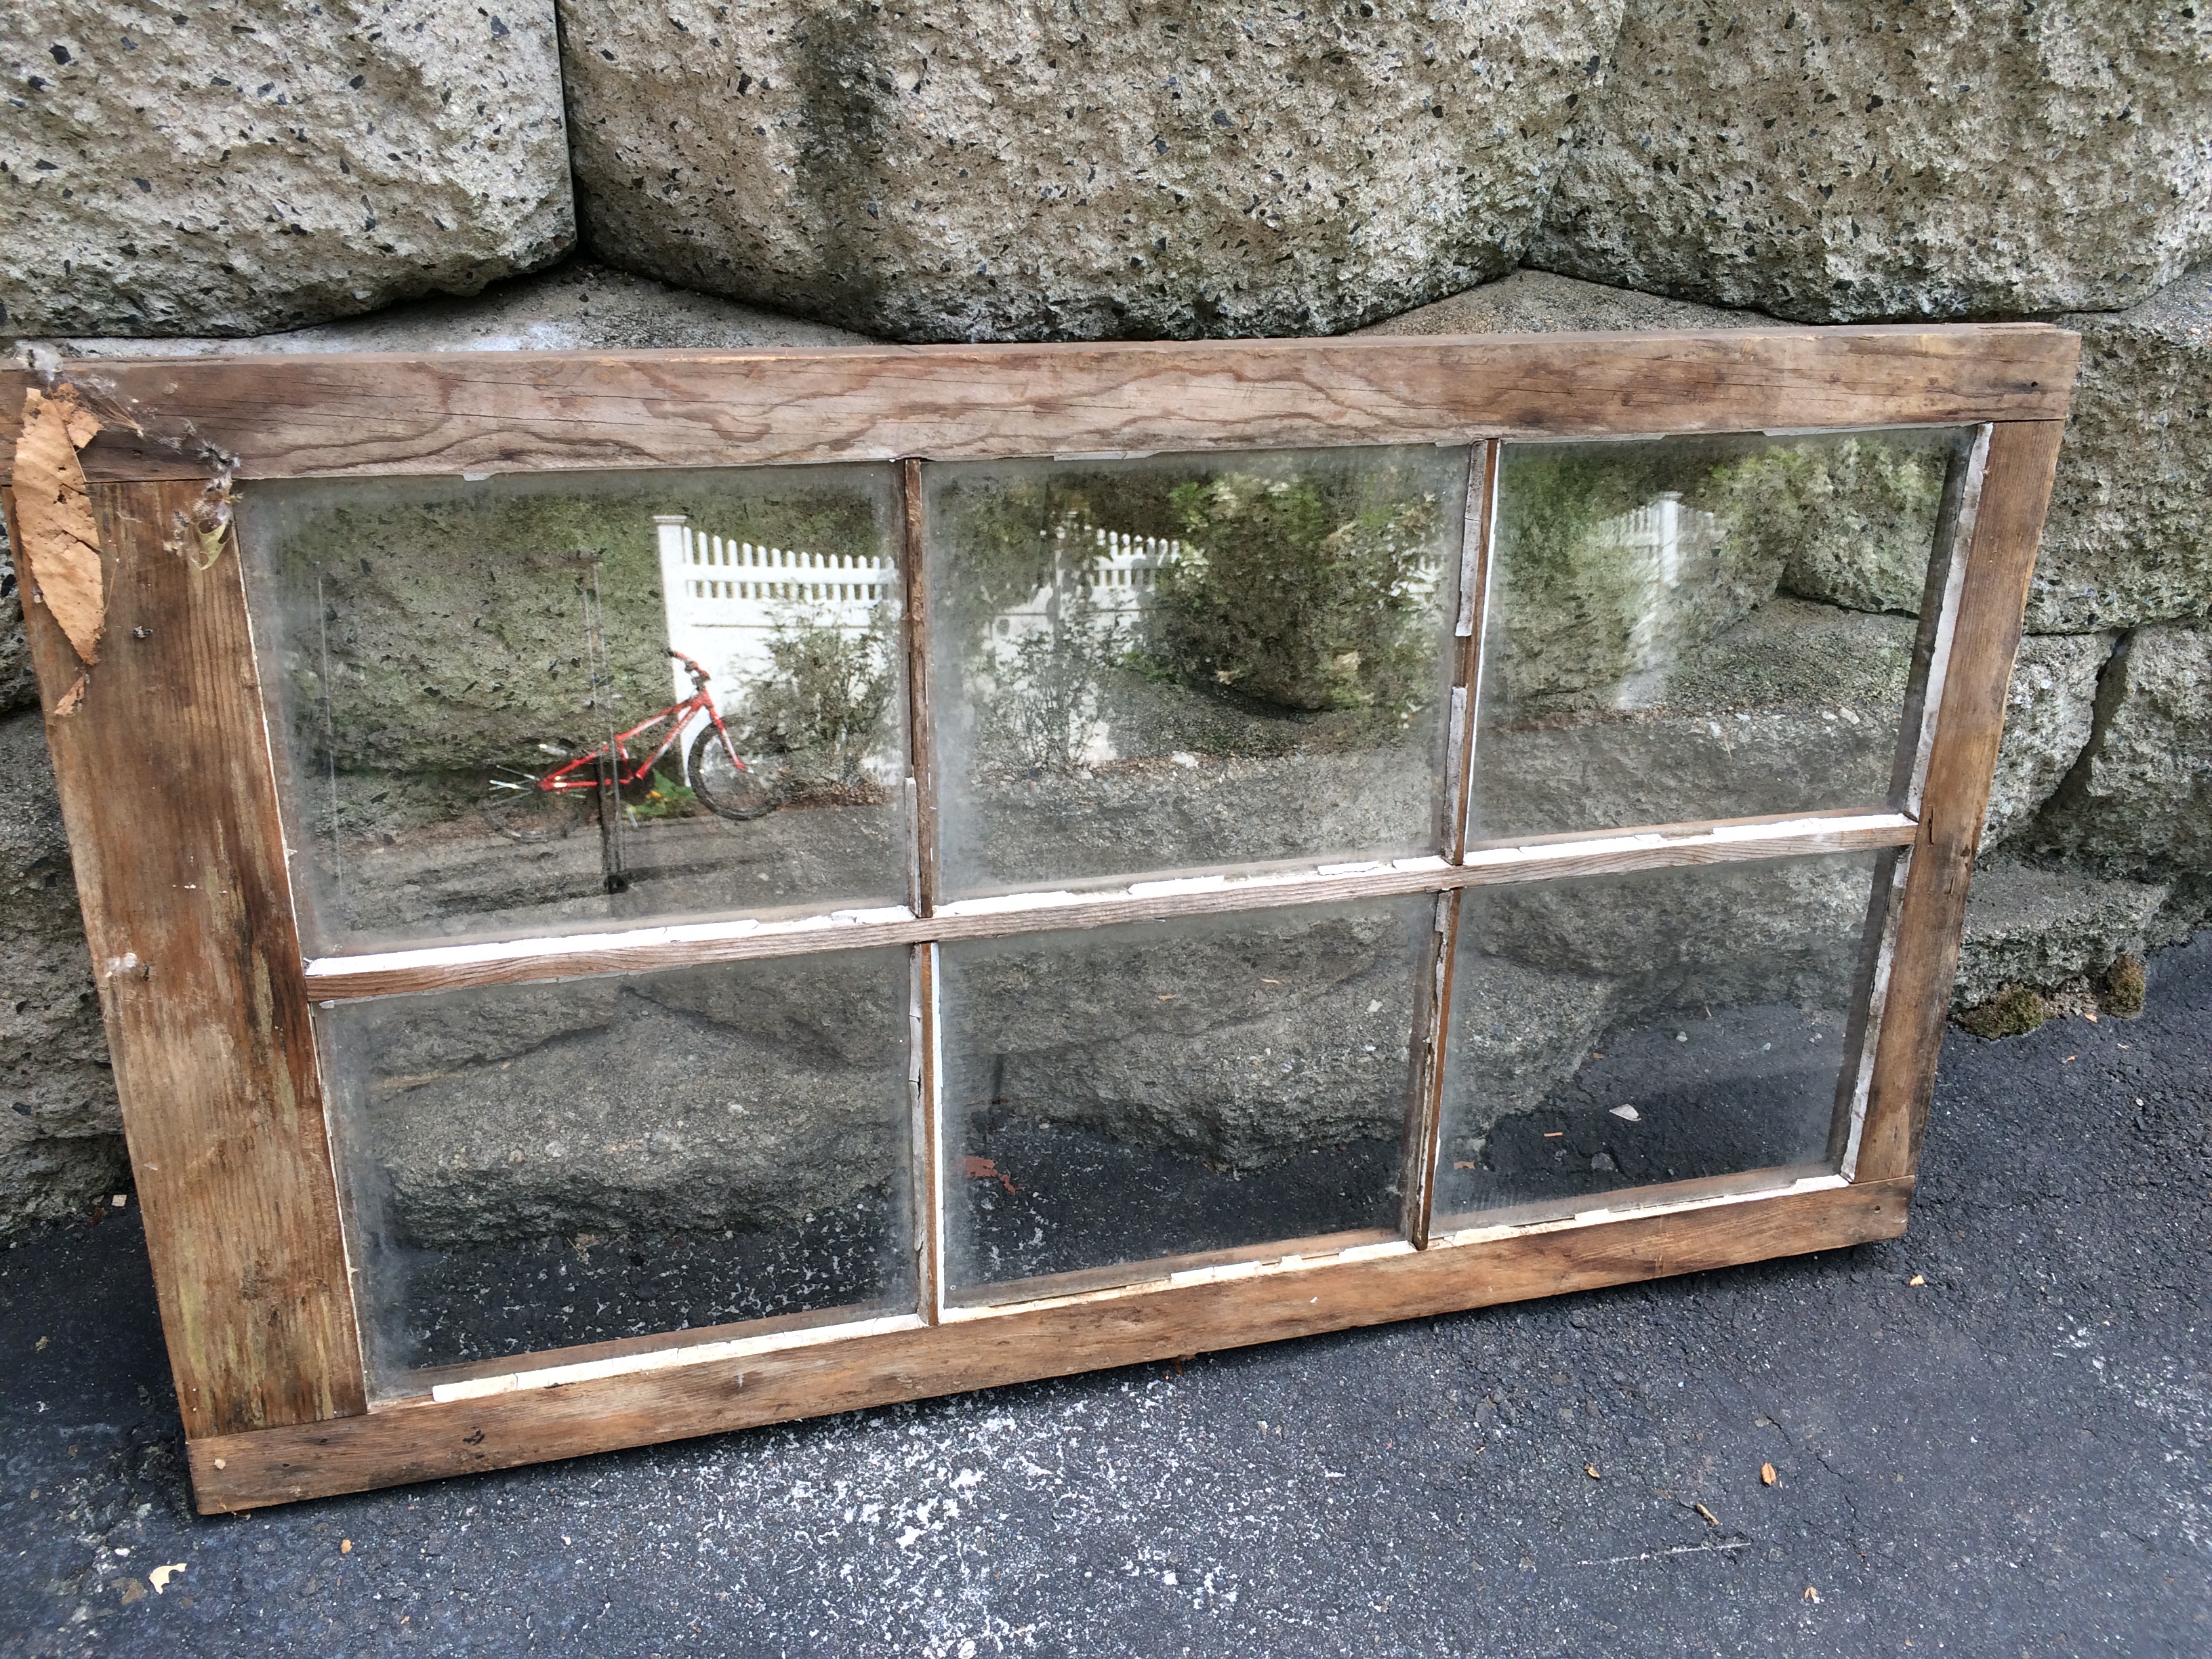
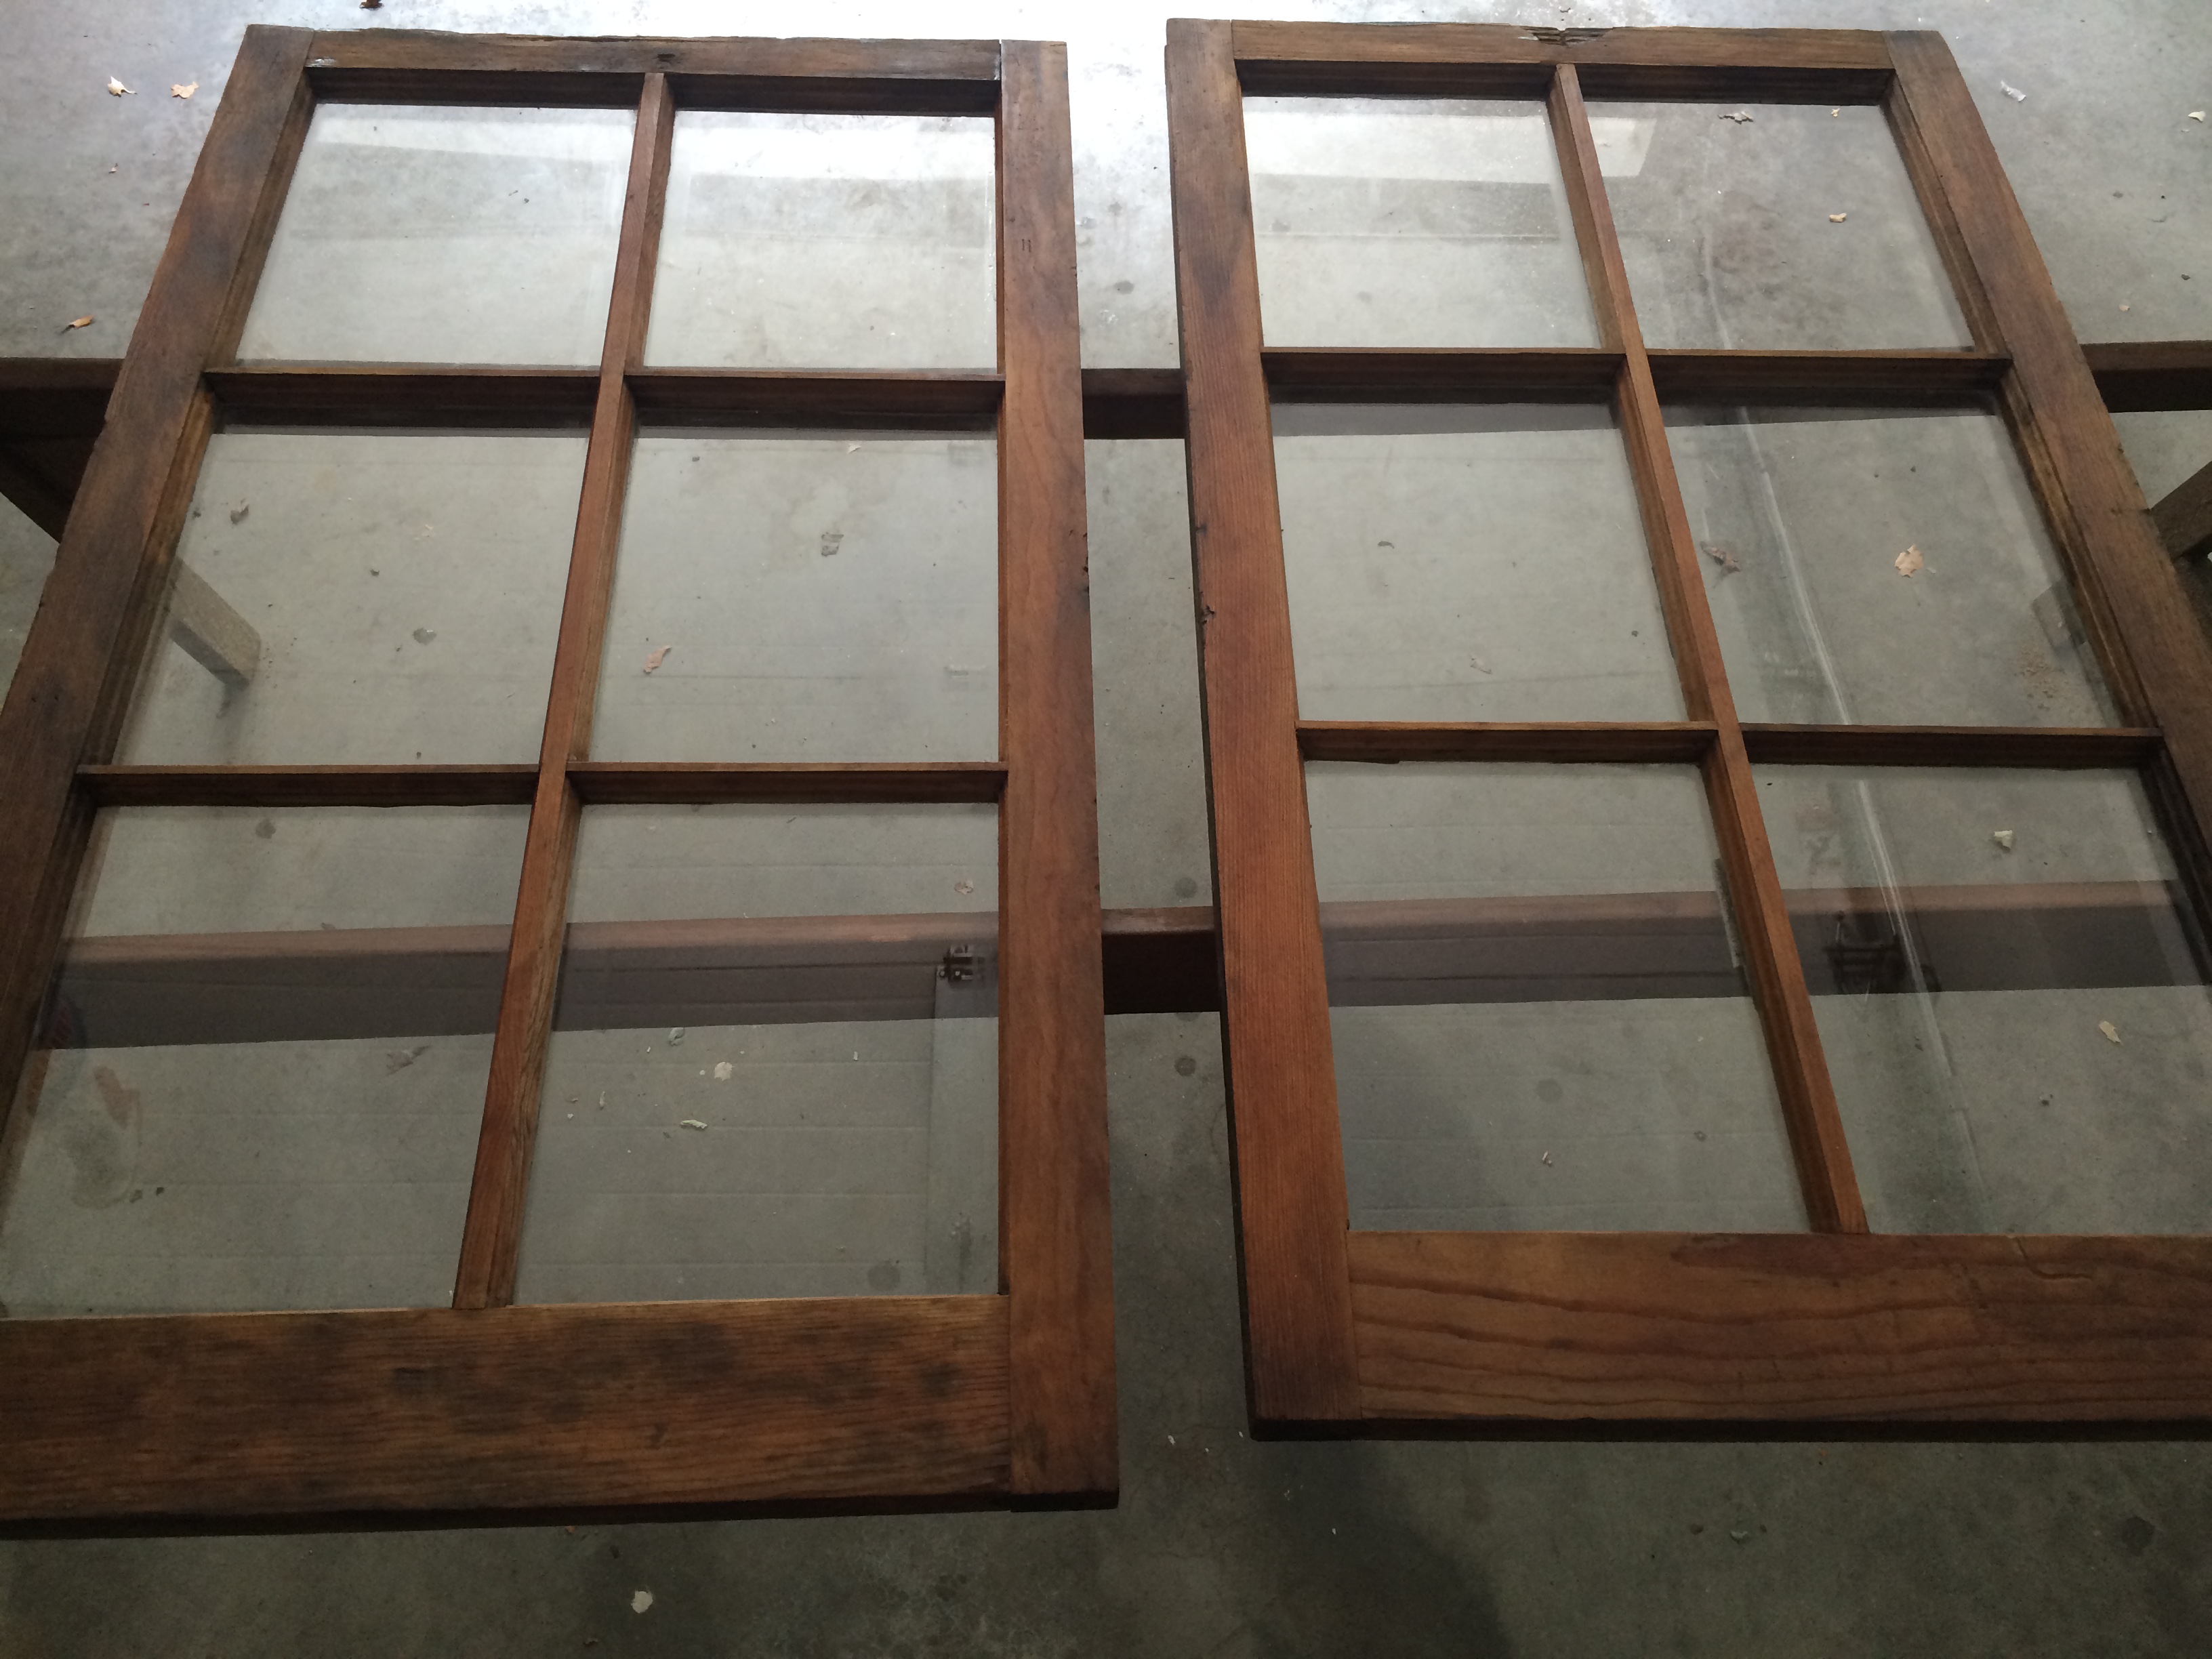
I’ve always wanted some old windows or an old door to do something with and I found these windows in pretty good shape, but really dirty. I cleaned them, oiled them using the same method as with the box and then I painted on two coats of clear polyurethane. The windows are heavy, so in order to hang them properly on the wall, I bought hooks that came in a set of a d-ring and picture hanger. I attached hooks to the back of the window and the wall and used the windows as frames on the wall in our family room. I attached the pictures with a small piece of double sided tape.
BEFORE:

AFTER:


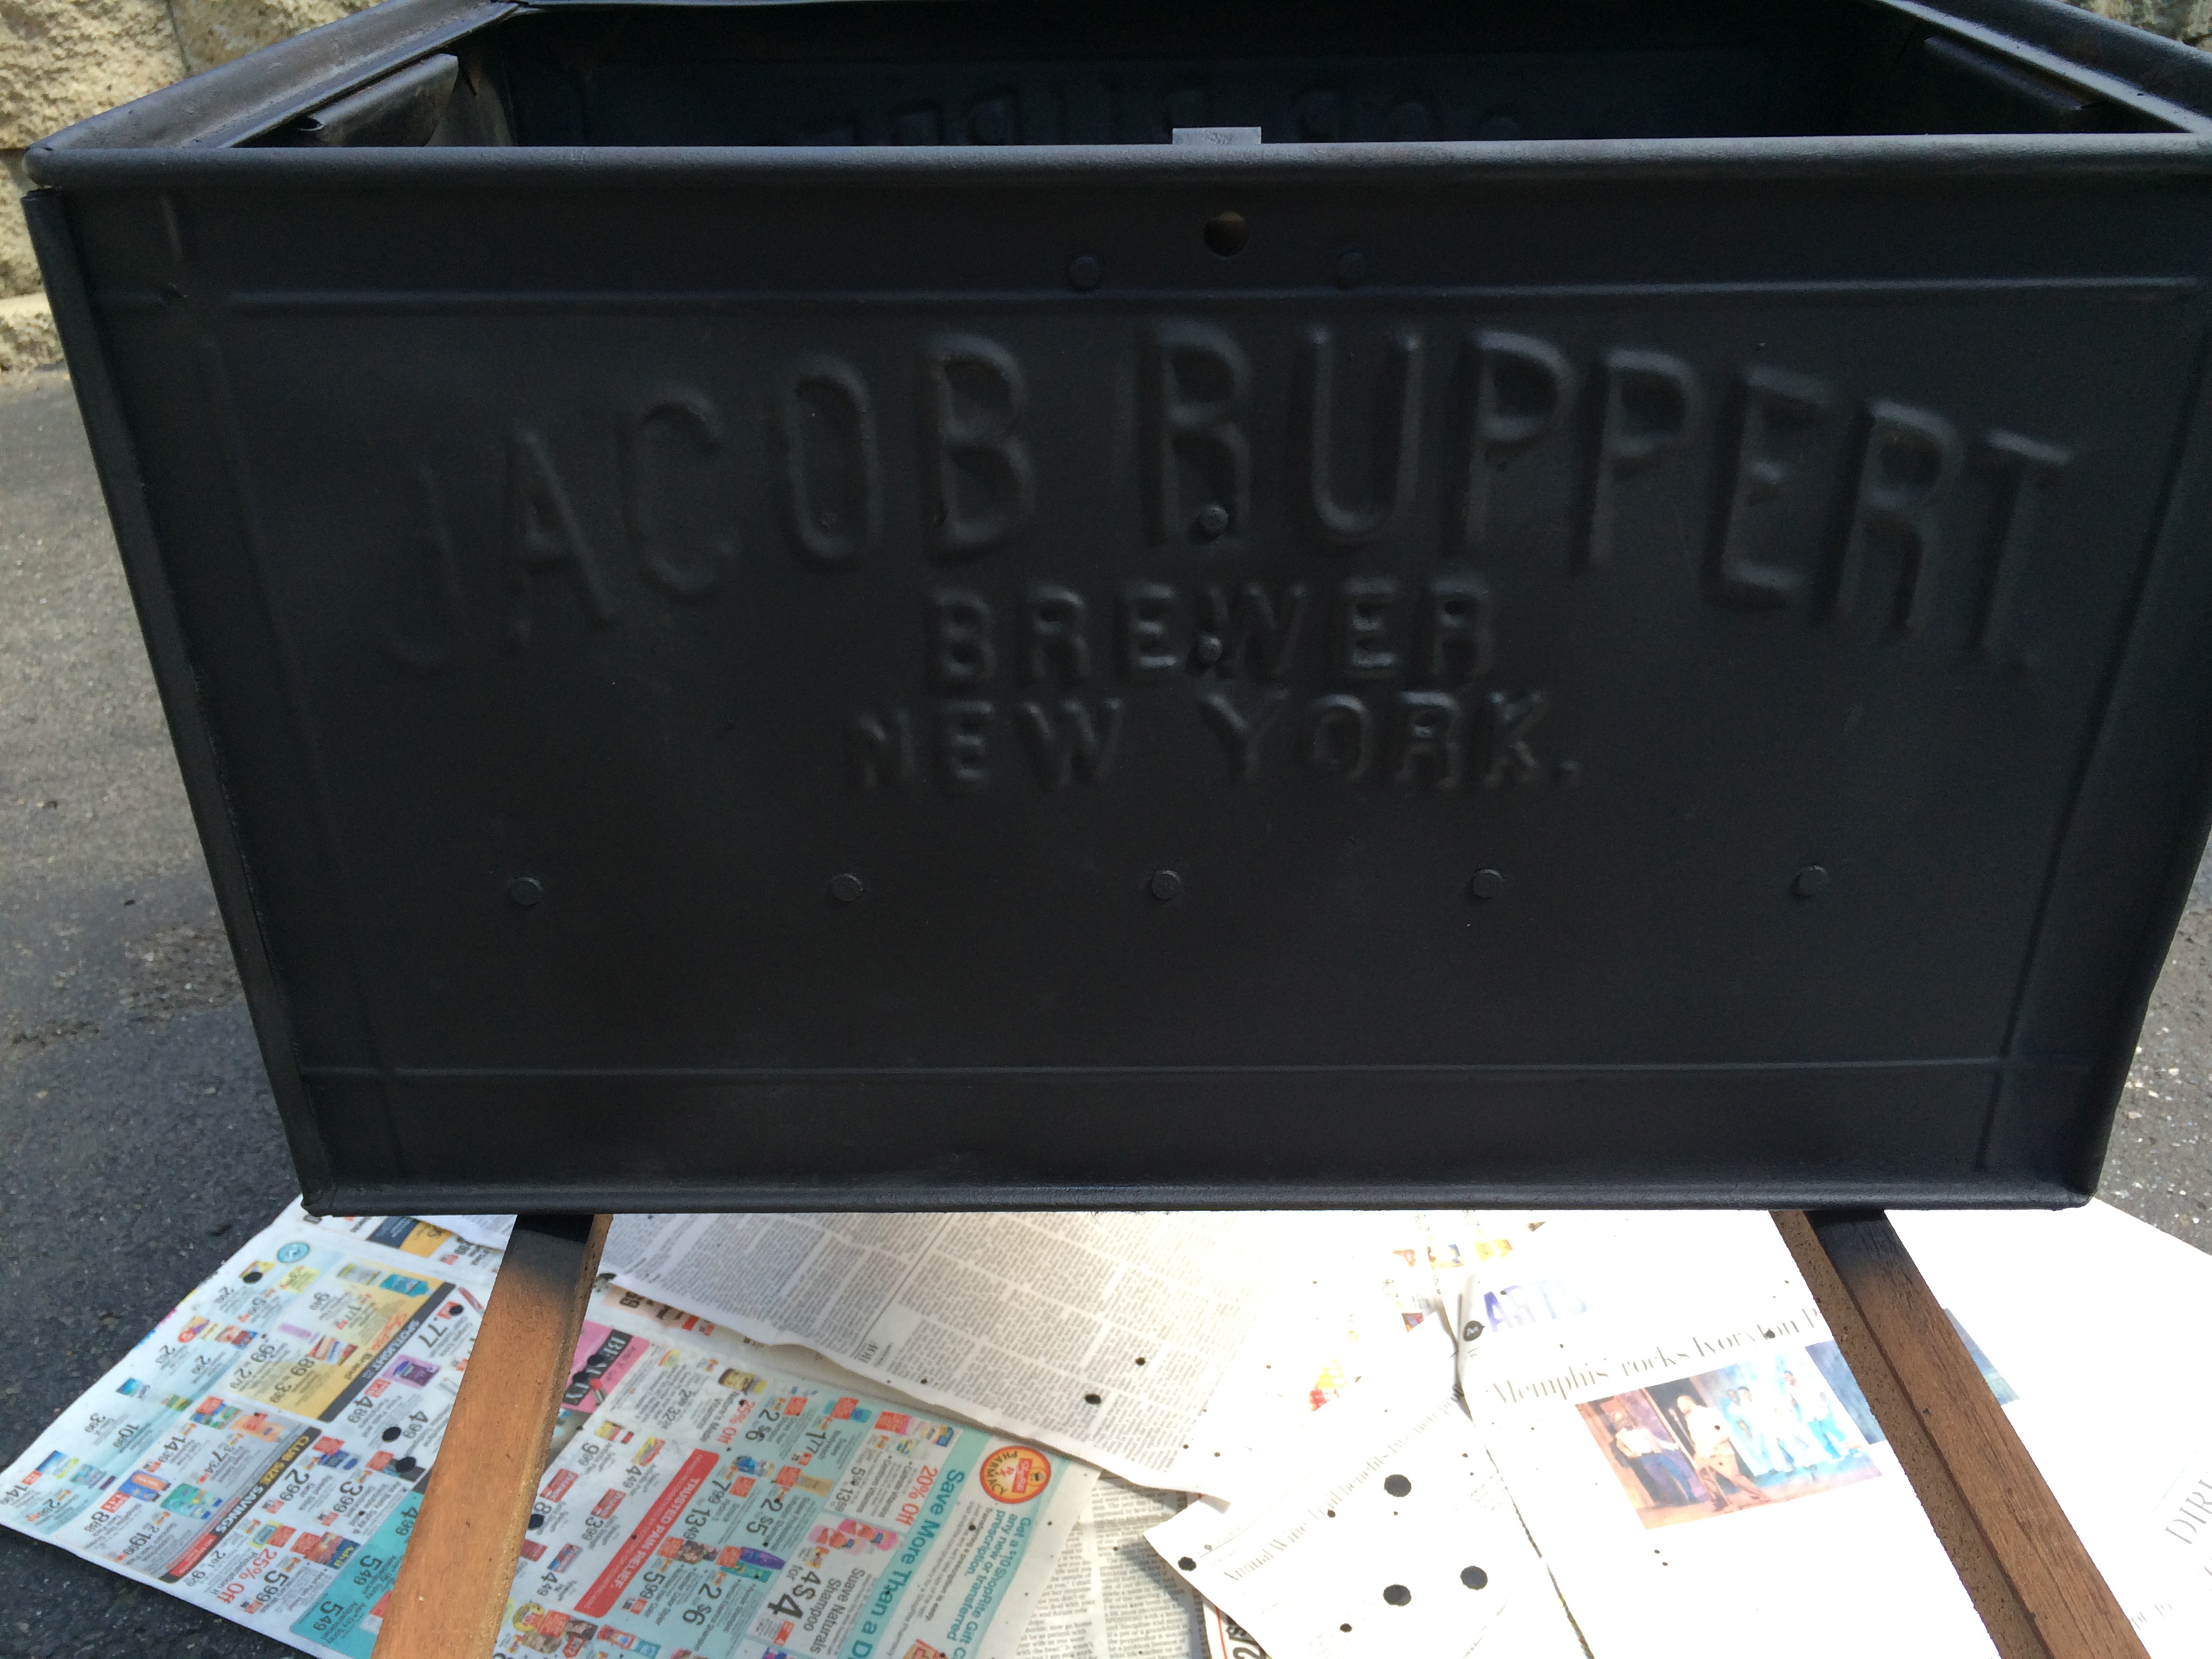
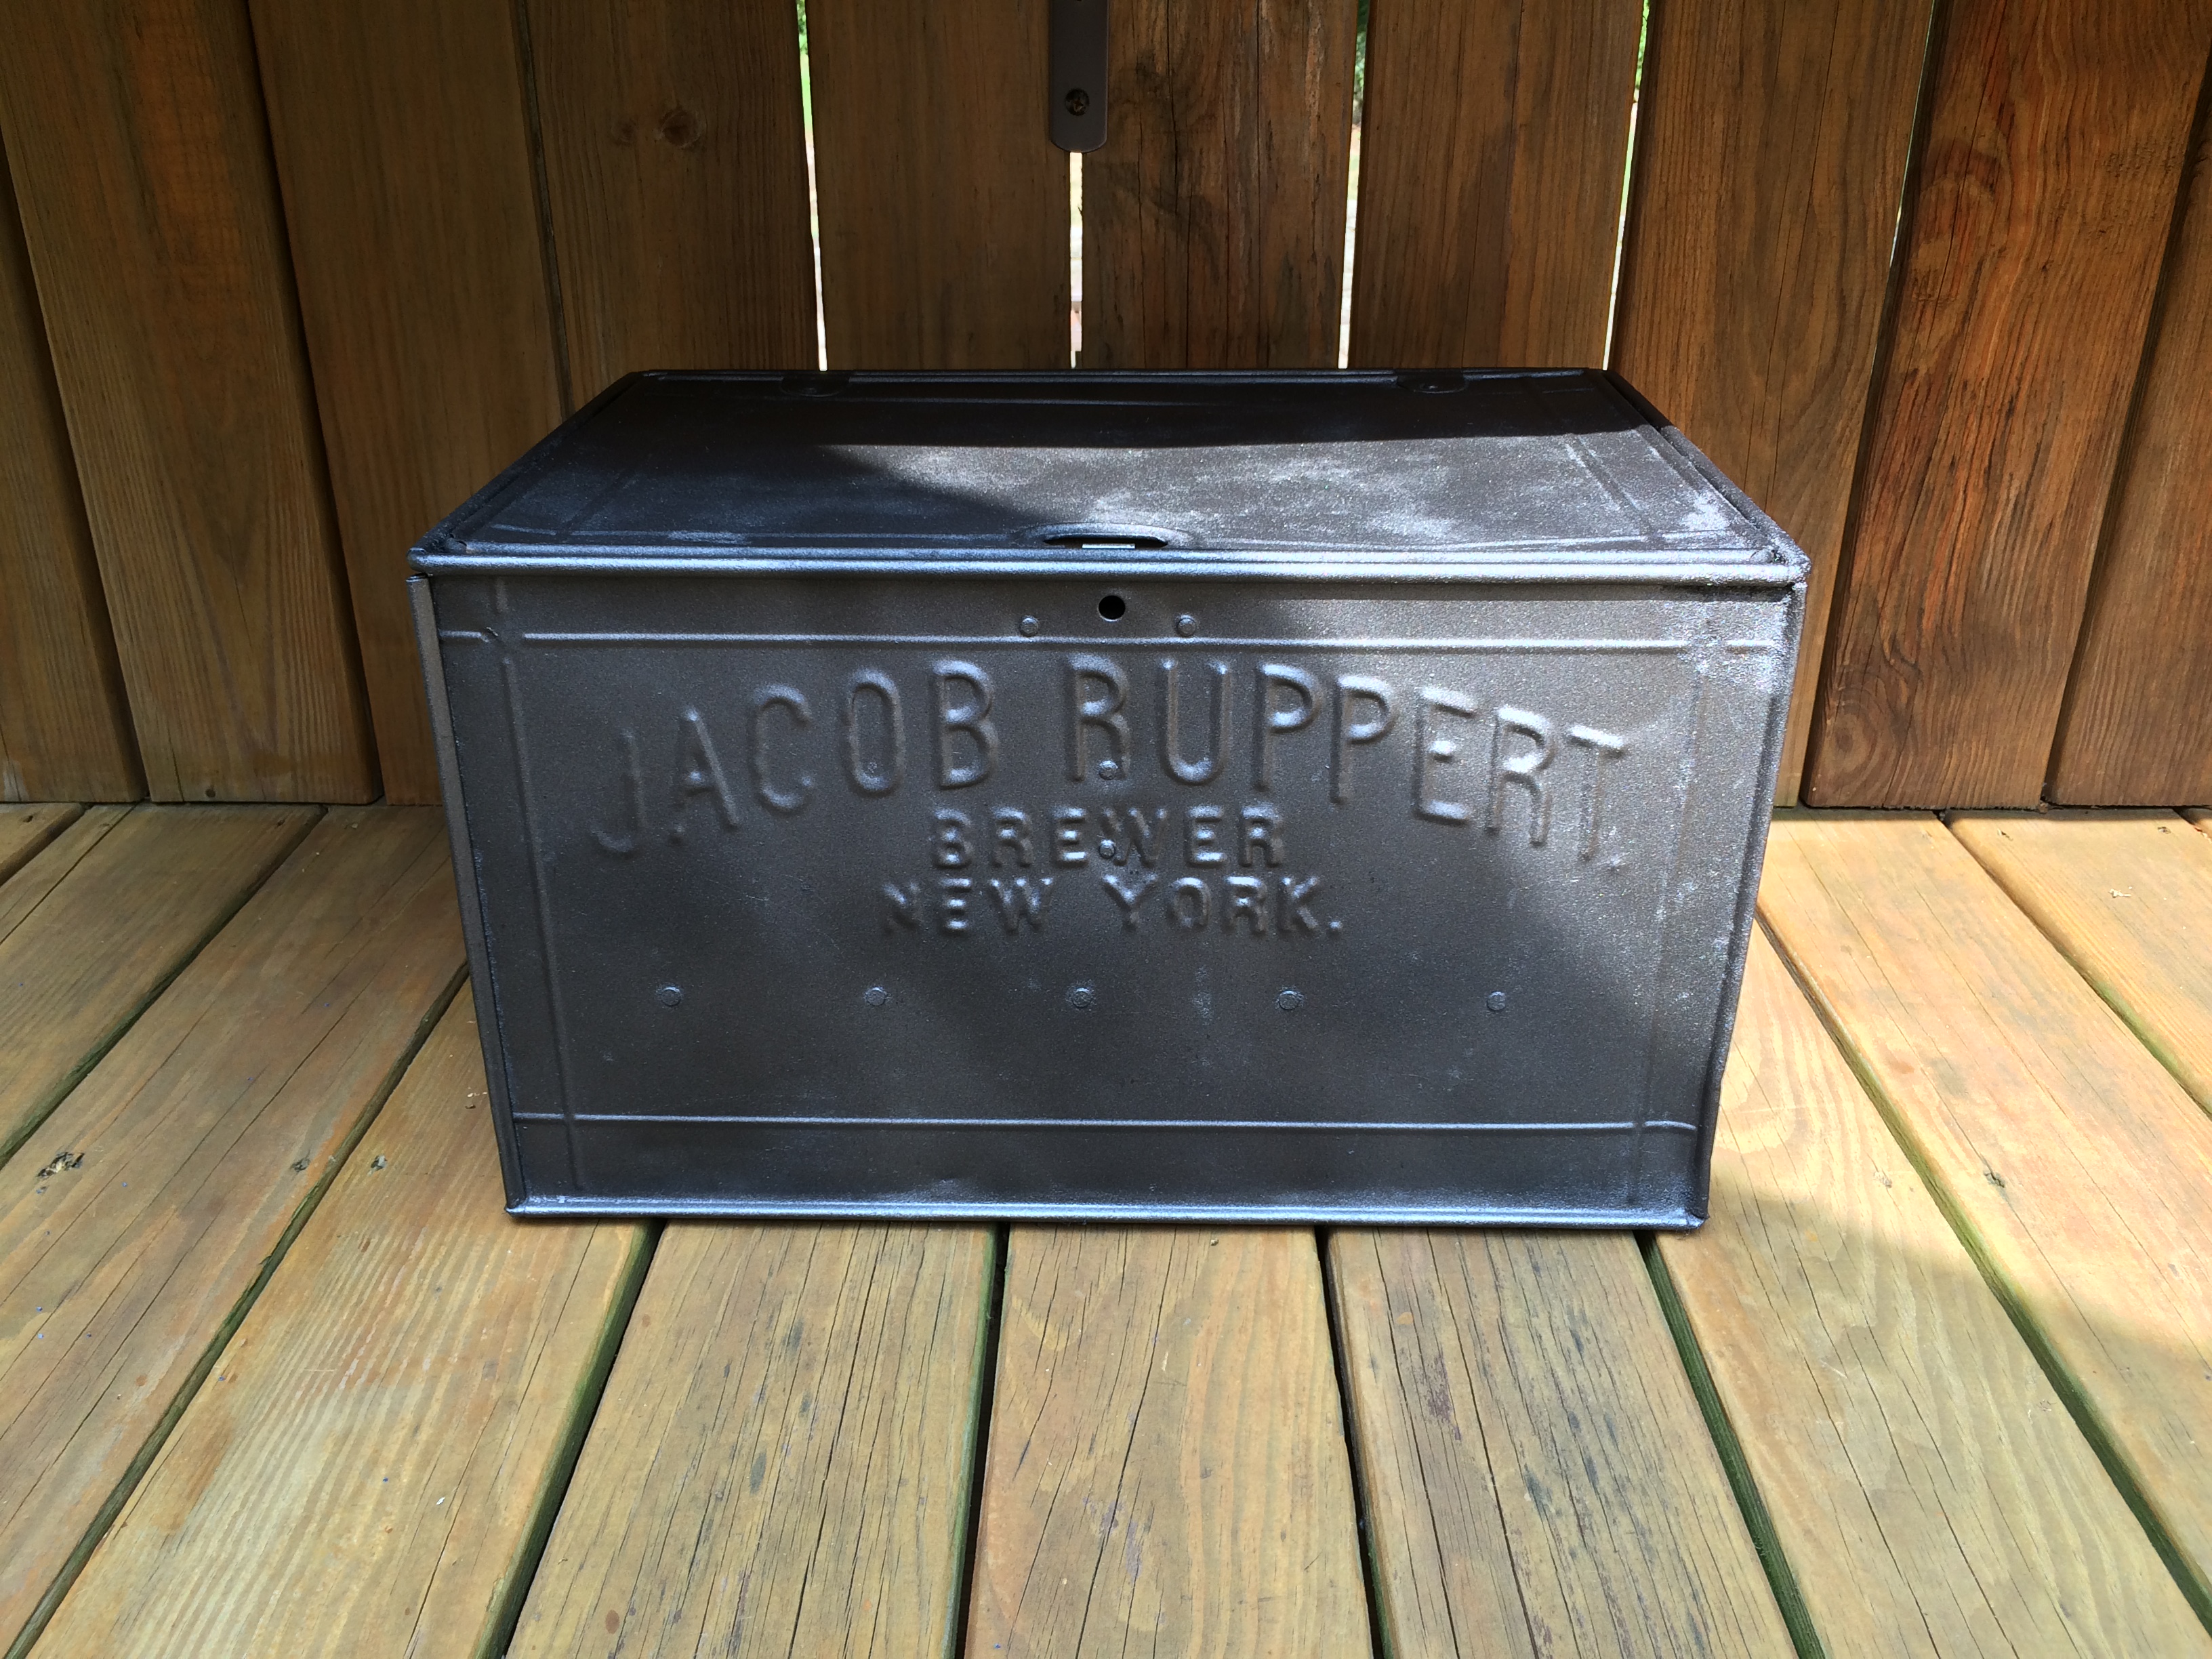
As we were walking back up to the front of the store, I had to take one more walk through the area and as I was approaching the cash register, I saw this metal box. When I opened it, it was full of old glass bottles. The owner told me that the beer box was from a company that served beer to Yankee Stadium. We thought it was really cool and it was from 1918! The beer box is from a company called Jacob Ruppert Brewery. When I got home I did a search on the company and it turns out that the beer wasn’t just sold at Yankee Stadium, the owner of the brewery was the second owner of the New York Yankees and was the one responsible for turning them into a successful franchise and acquiring players like Babe Ruth. That made this item even better!
BEFORE:
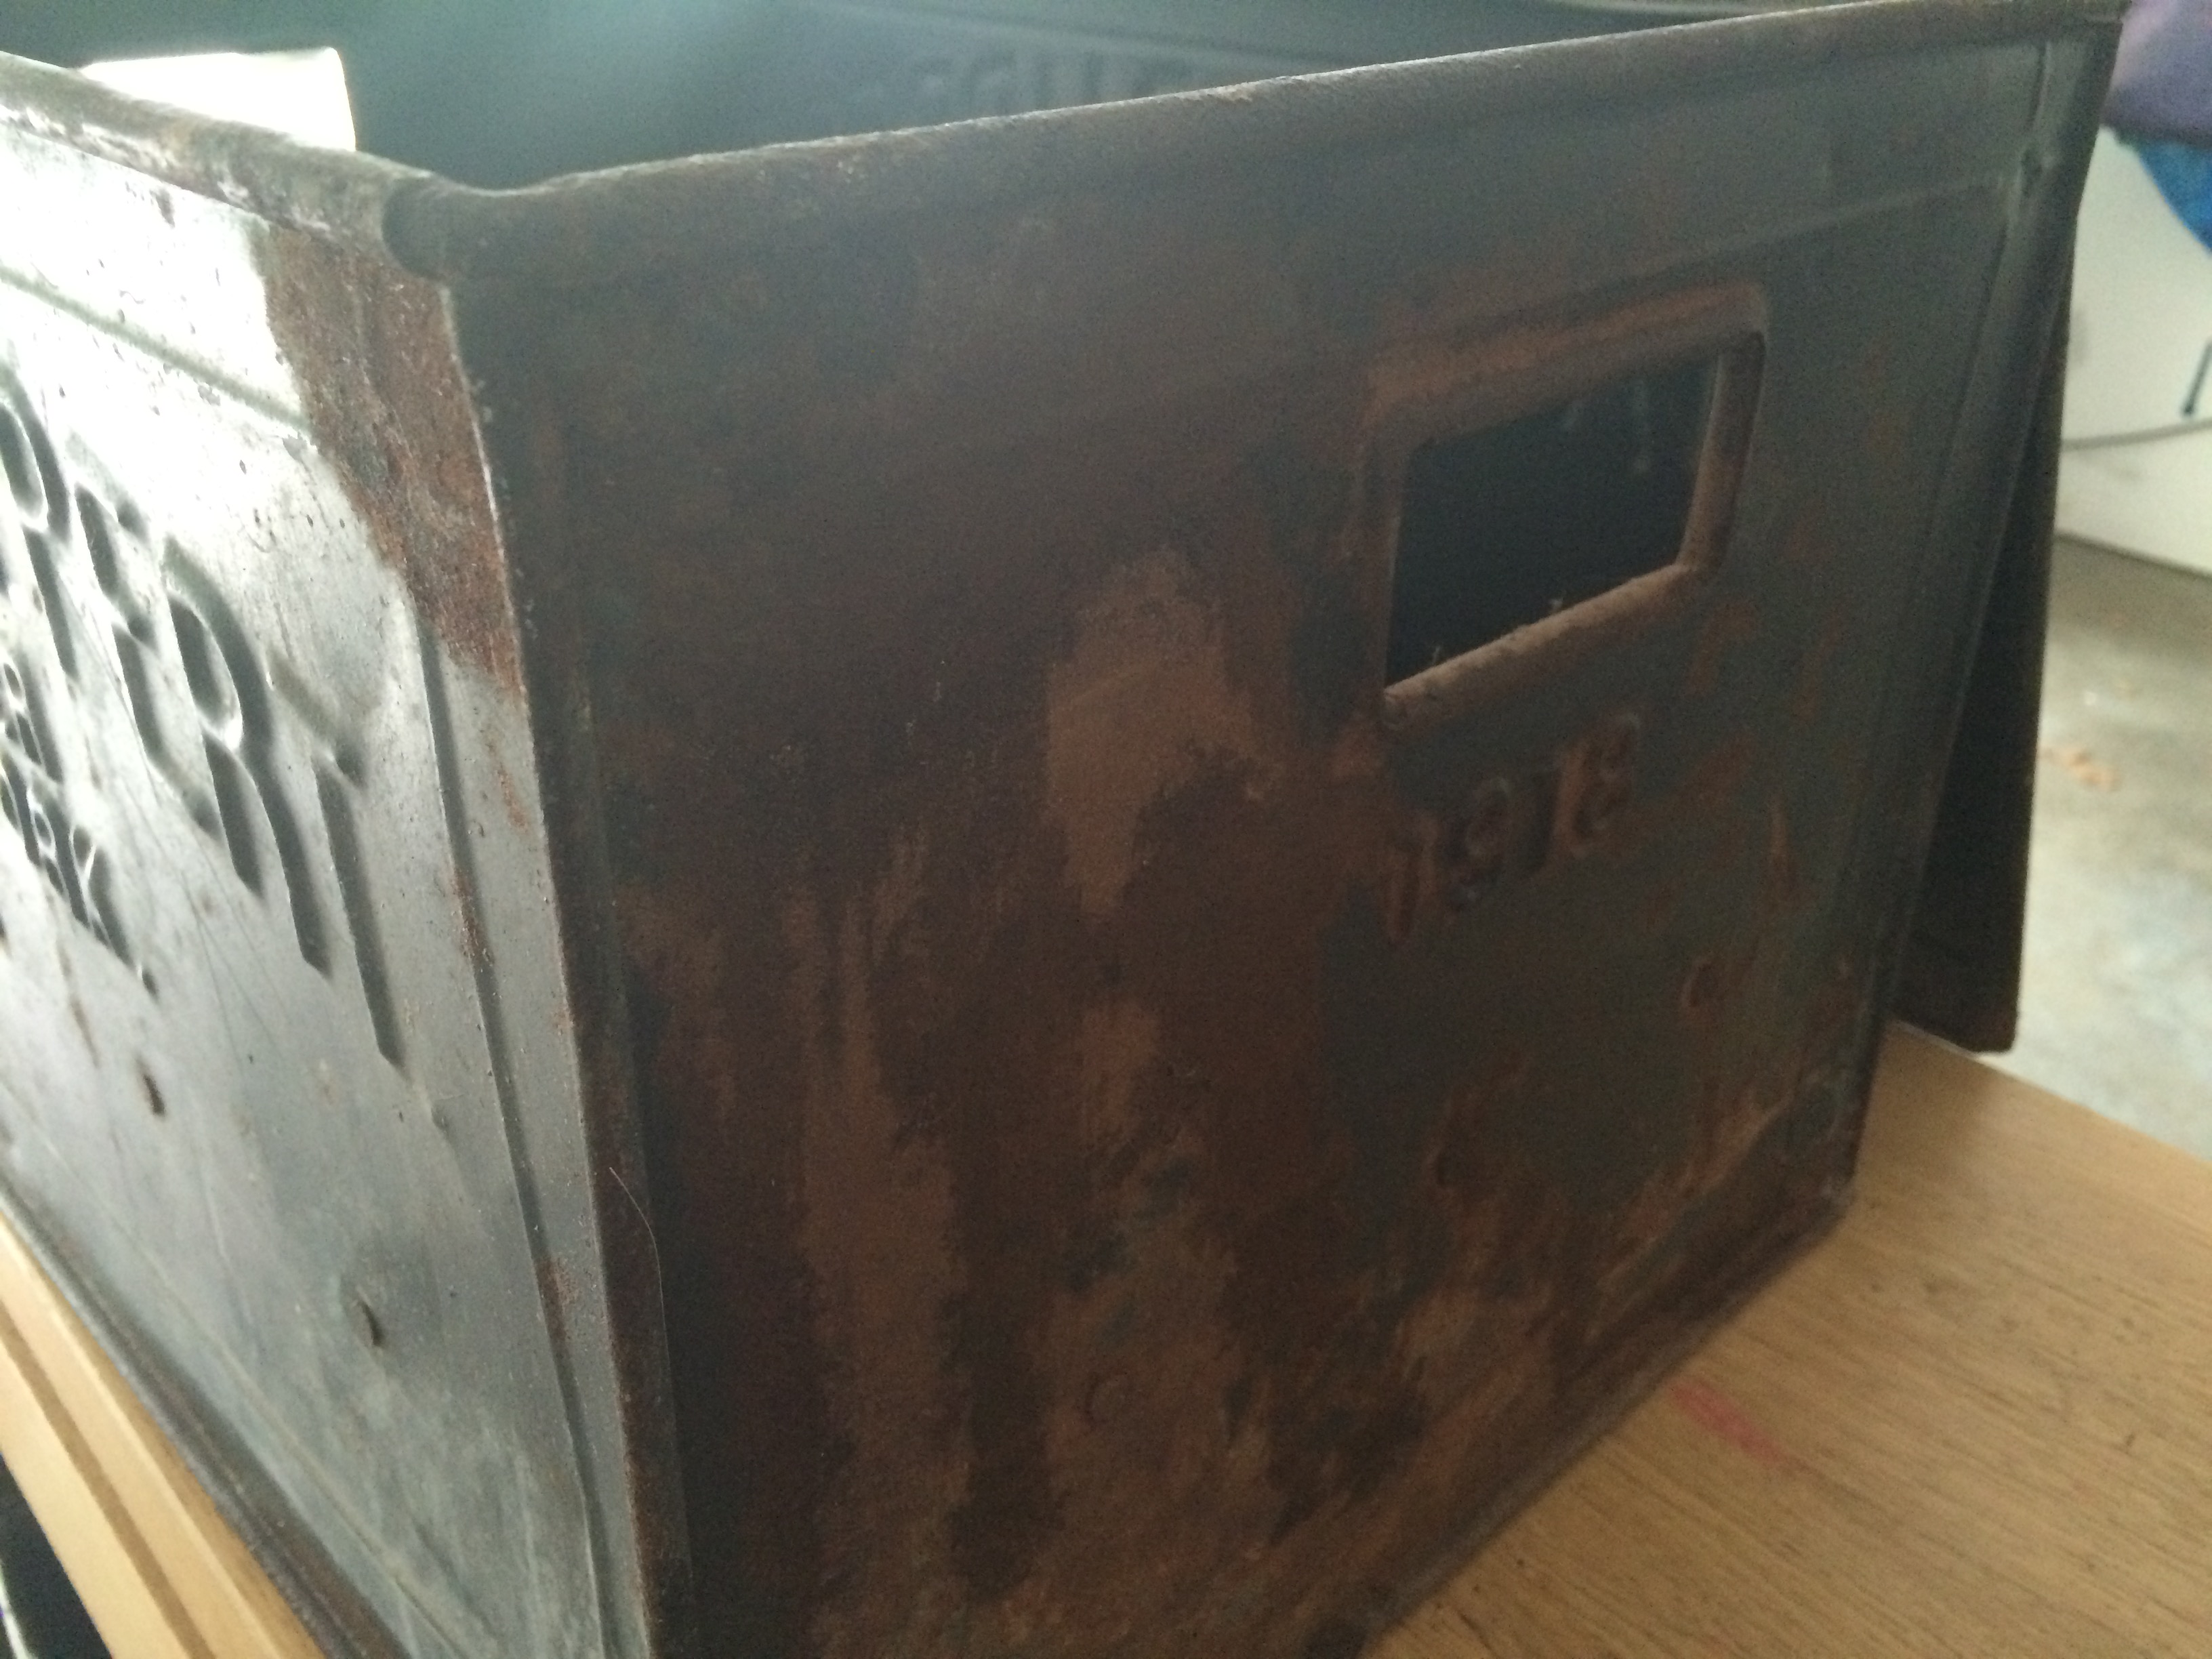

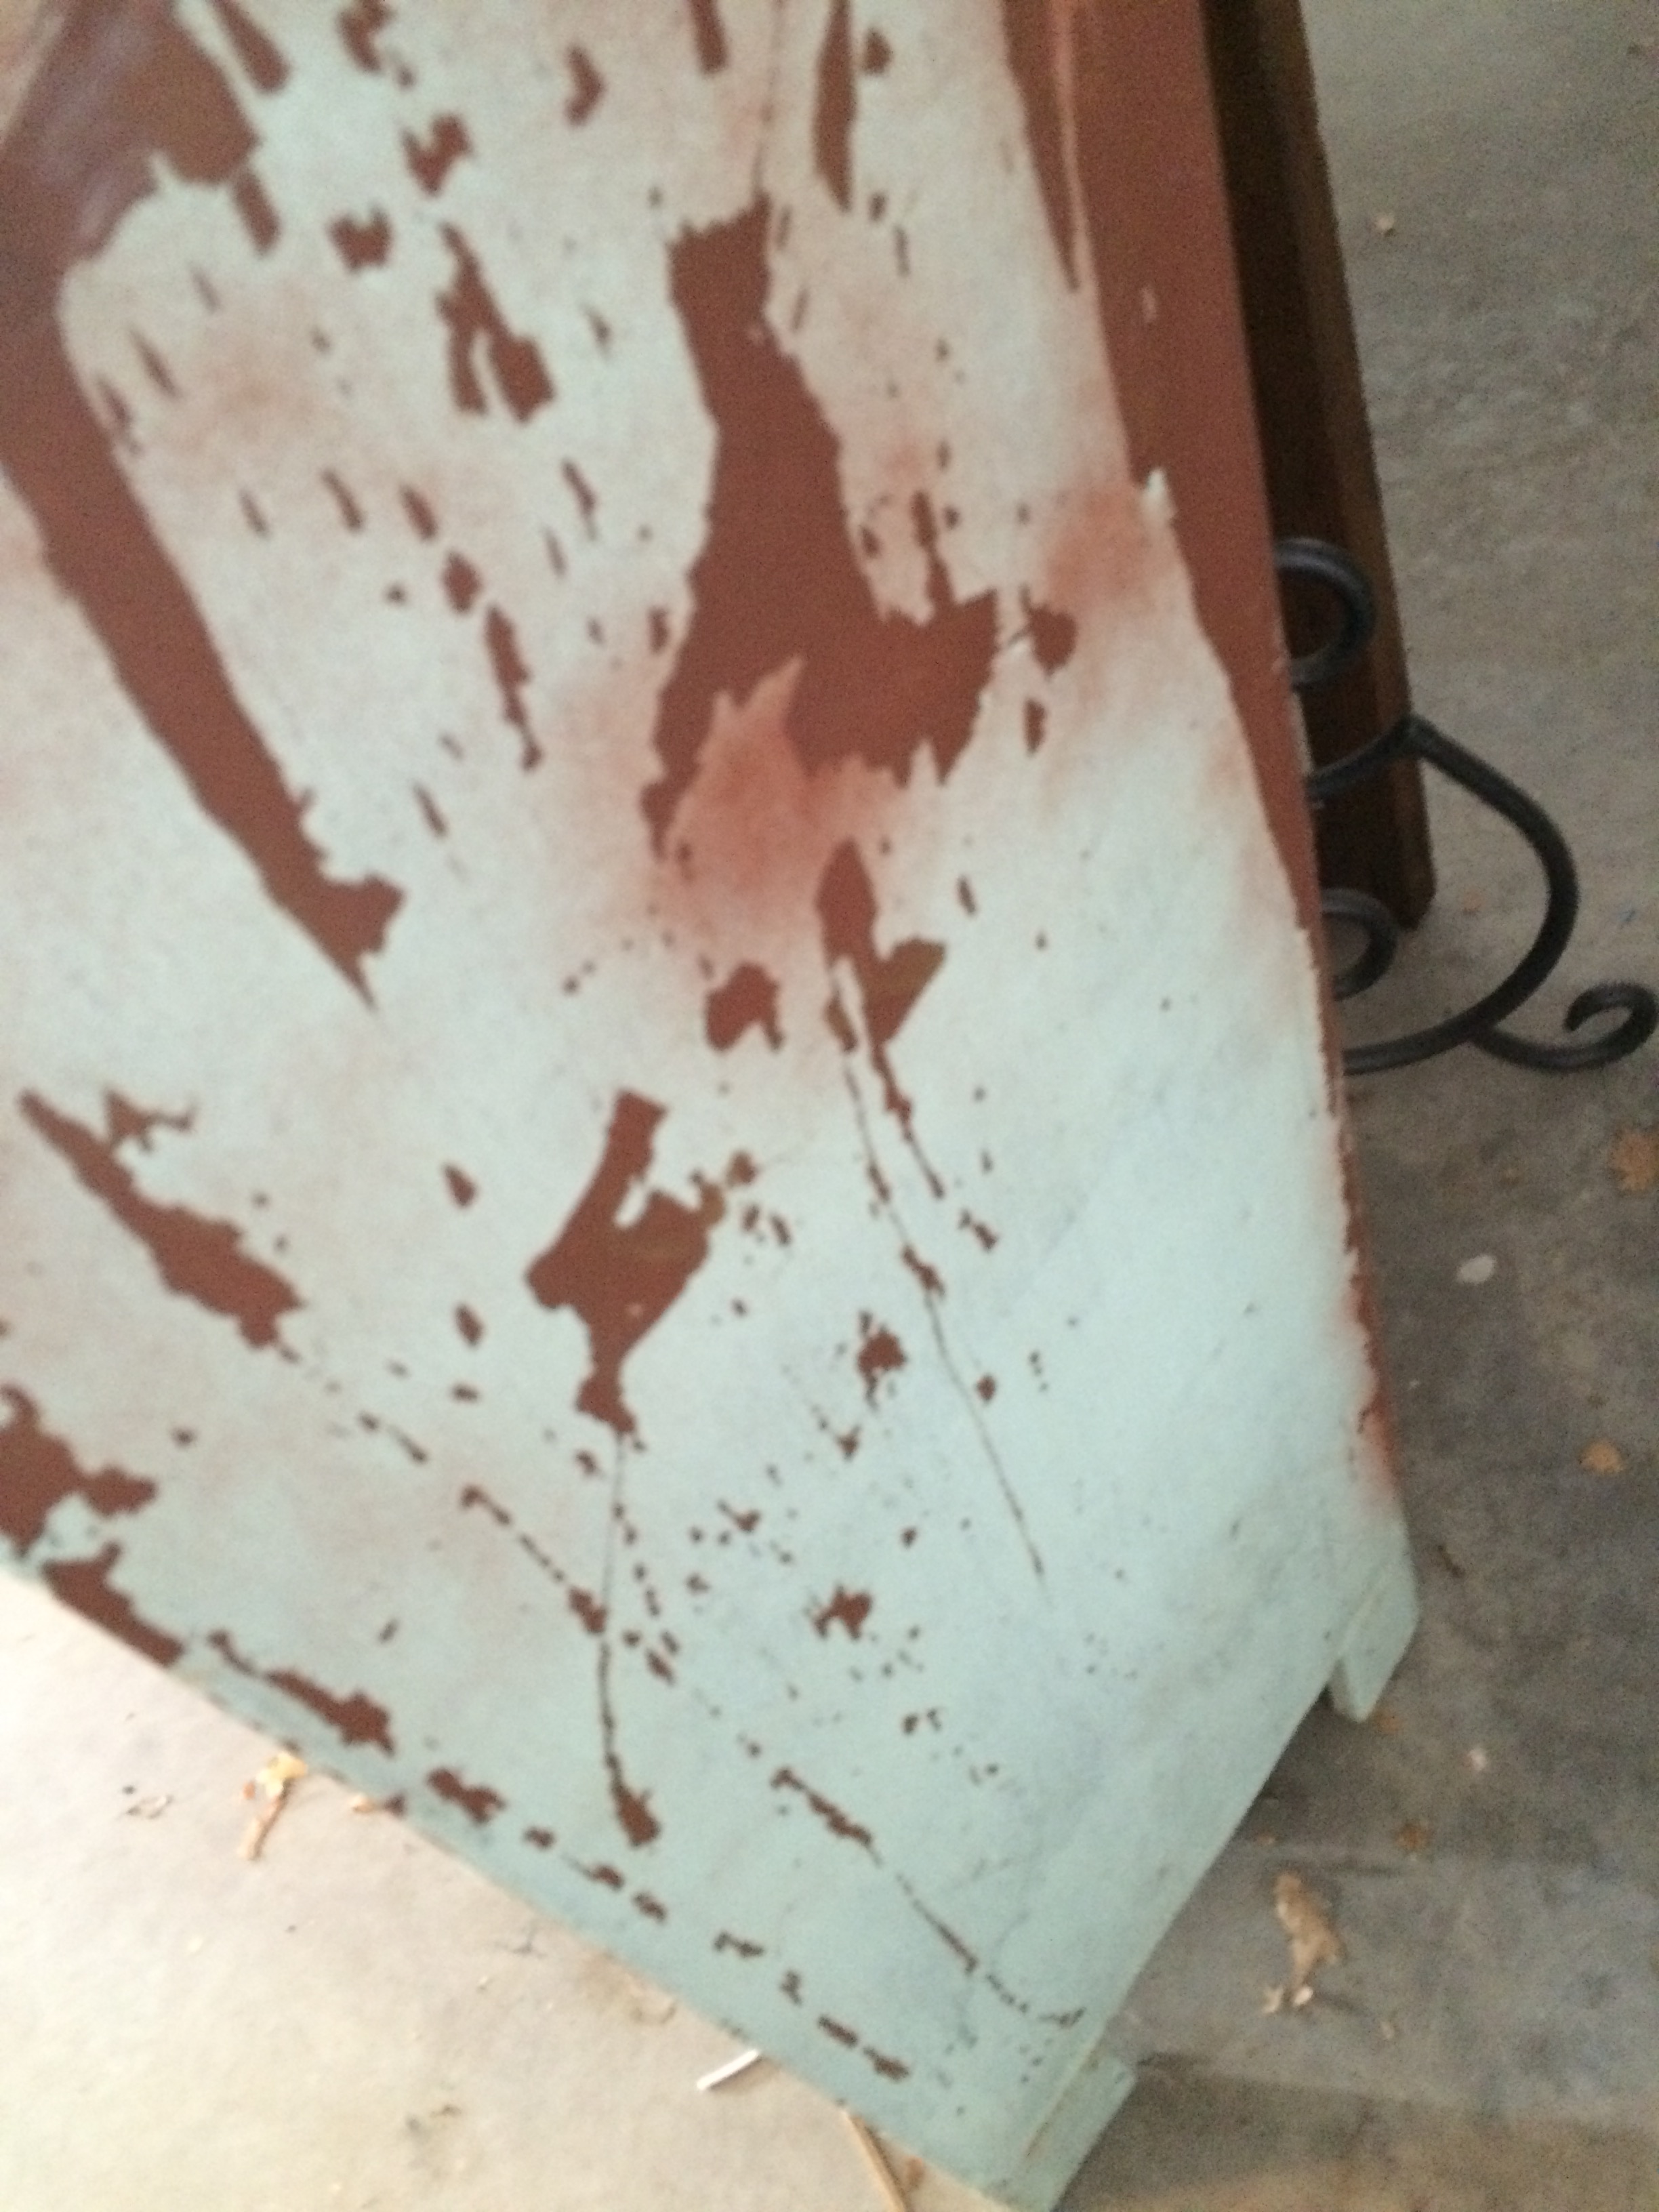
The box was a bit rusted on one side and dirty. I first cleaned it with soap and water. Then I used Rust-oleum Rust Reformer to spray over the rusted areas before spray painting.

I wanted to keep the original look to the box, but it was hard to find a gray metallic color. I finally found Rust-oleum Metallic Primer and Paint. When I first sprayed it on, I wasn’t so sure I liked it because there was kind of a shimmer to it, but once it dried I actually really liked it. The box came back to life.

AFTER:


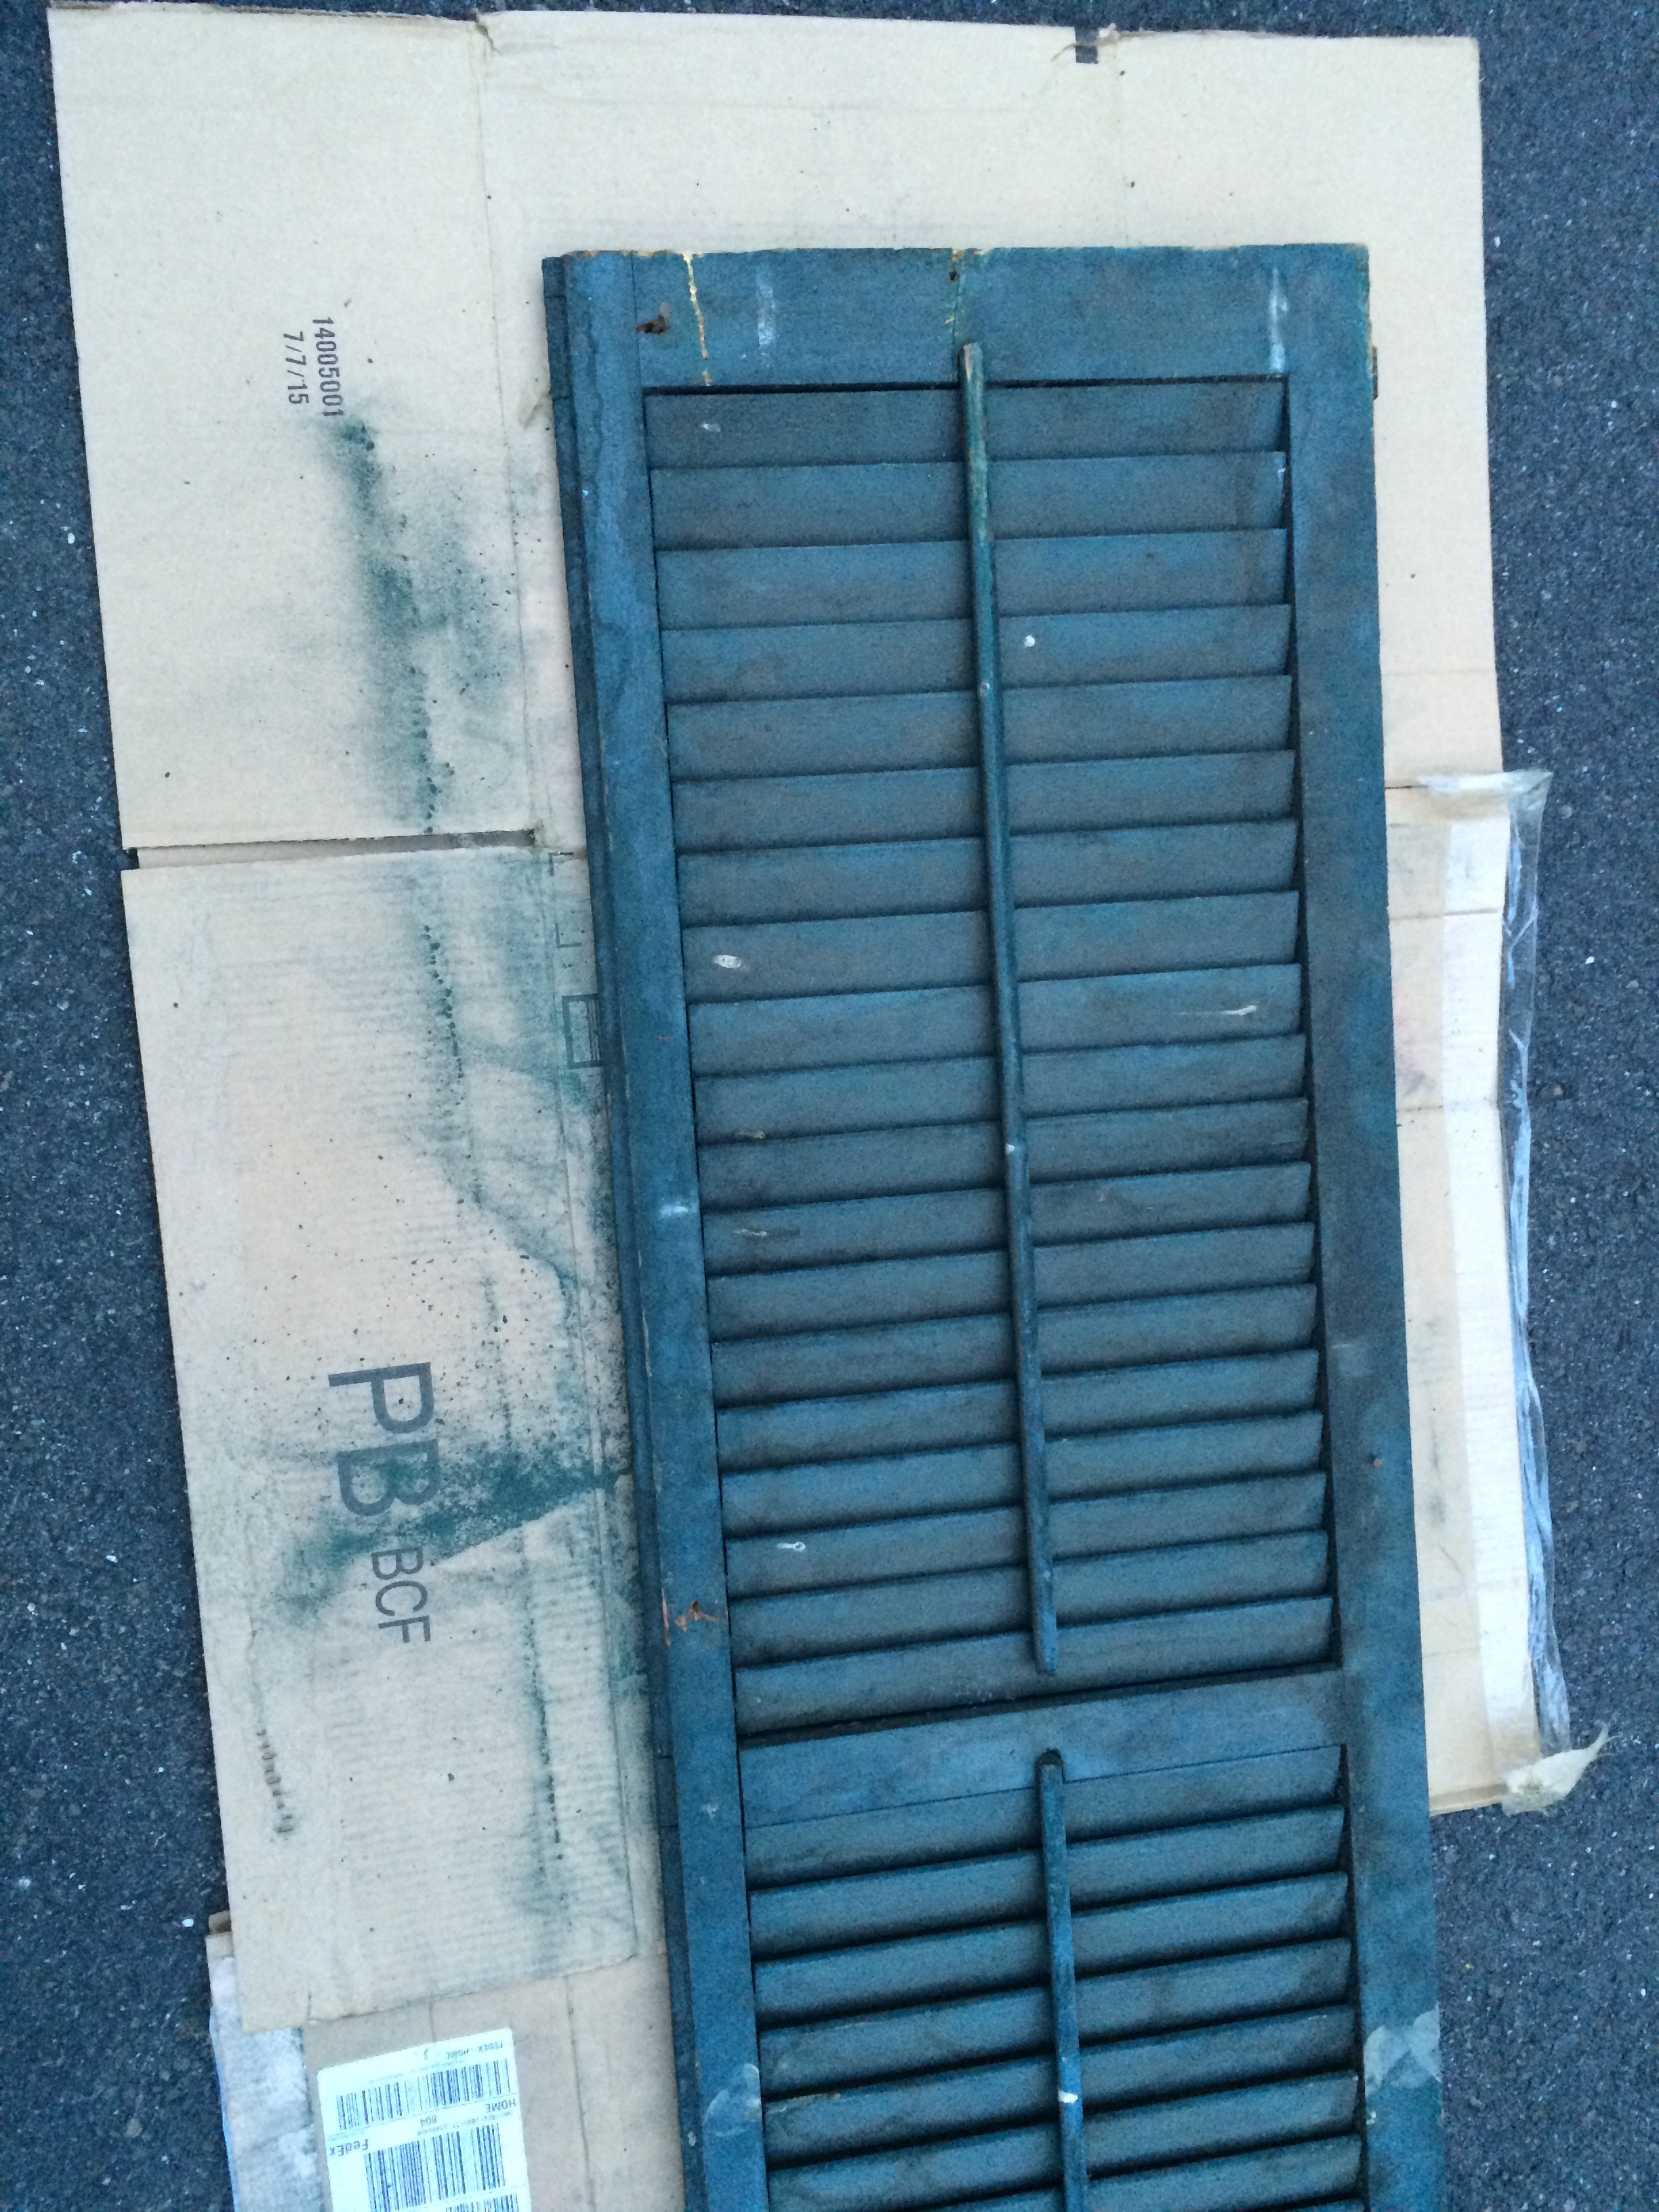
Finally, while walking through, literally a junk yard, I saw this metal shelf. It was a bit dented and the owner had sprayed a rust colored rust preventative paint on some of it and it had a live bee hive inside. But, I liked it. You could see the some of the original color on it and that really appealed to me. I didn’t really know what I would do with this, but I liked it enough to buy it and figure it out. Unfortunately, I forgot to take a picture of it before I painted it, but wouldn’t you know searching through my photos I found one I must have taken by accident and you can get the idea of what it looked like.
BEFORE:
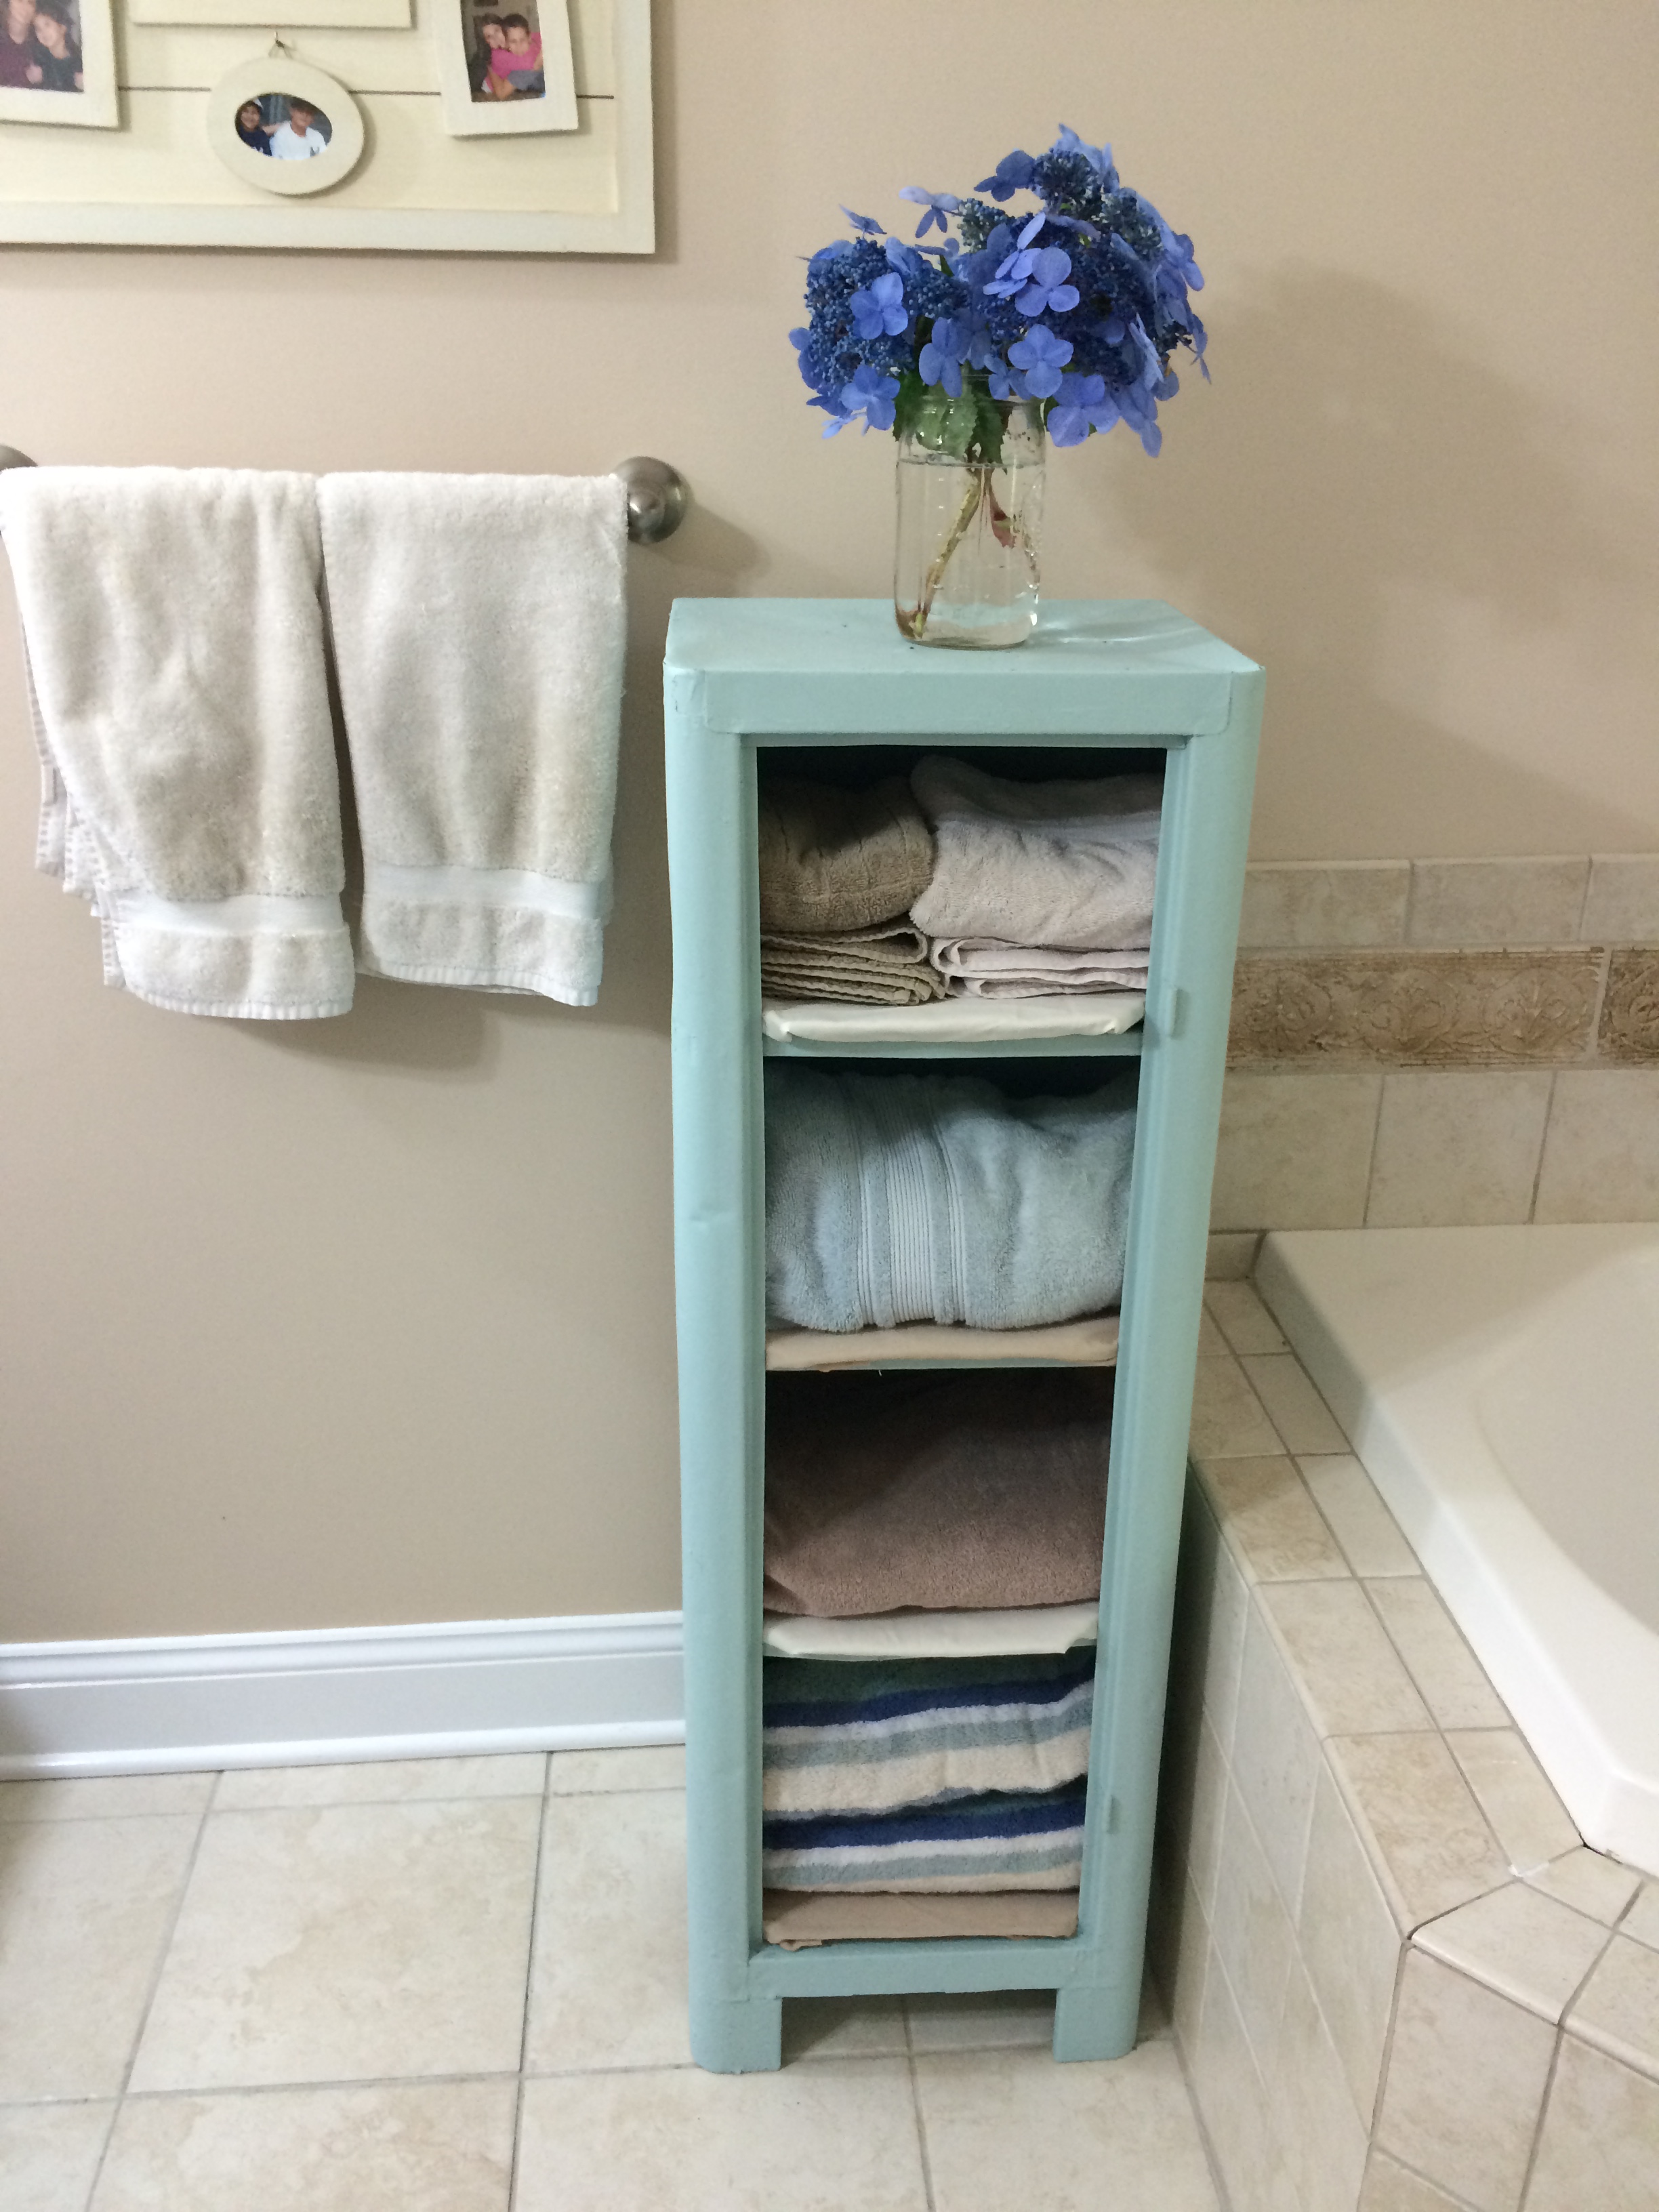
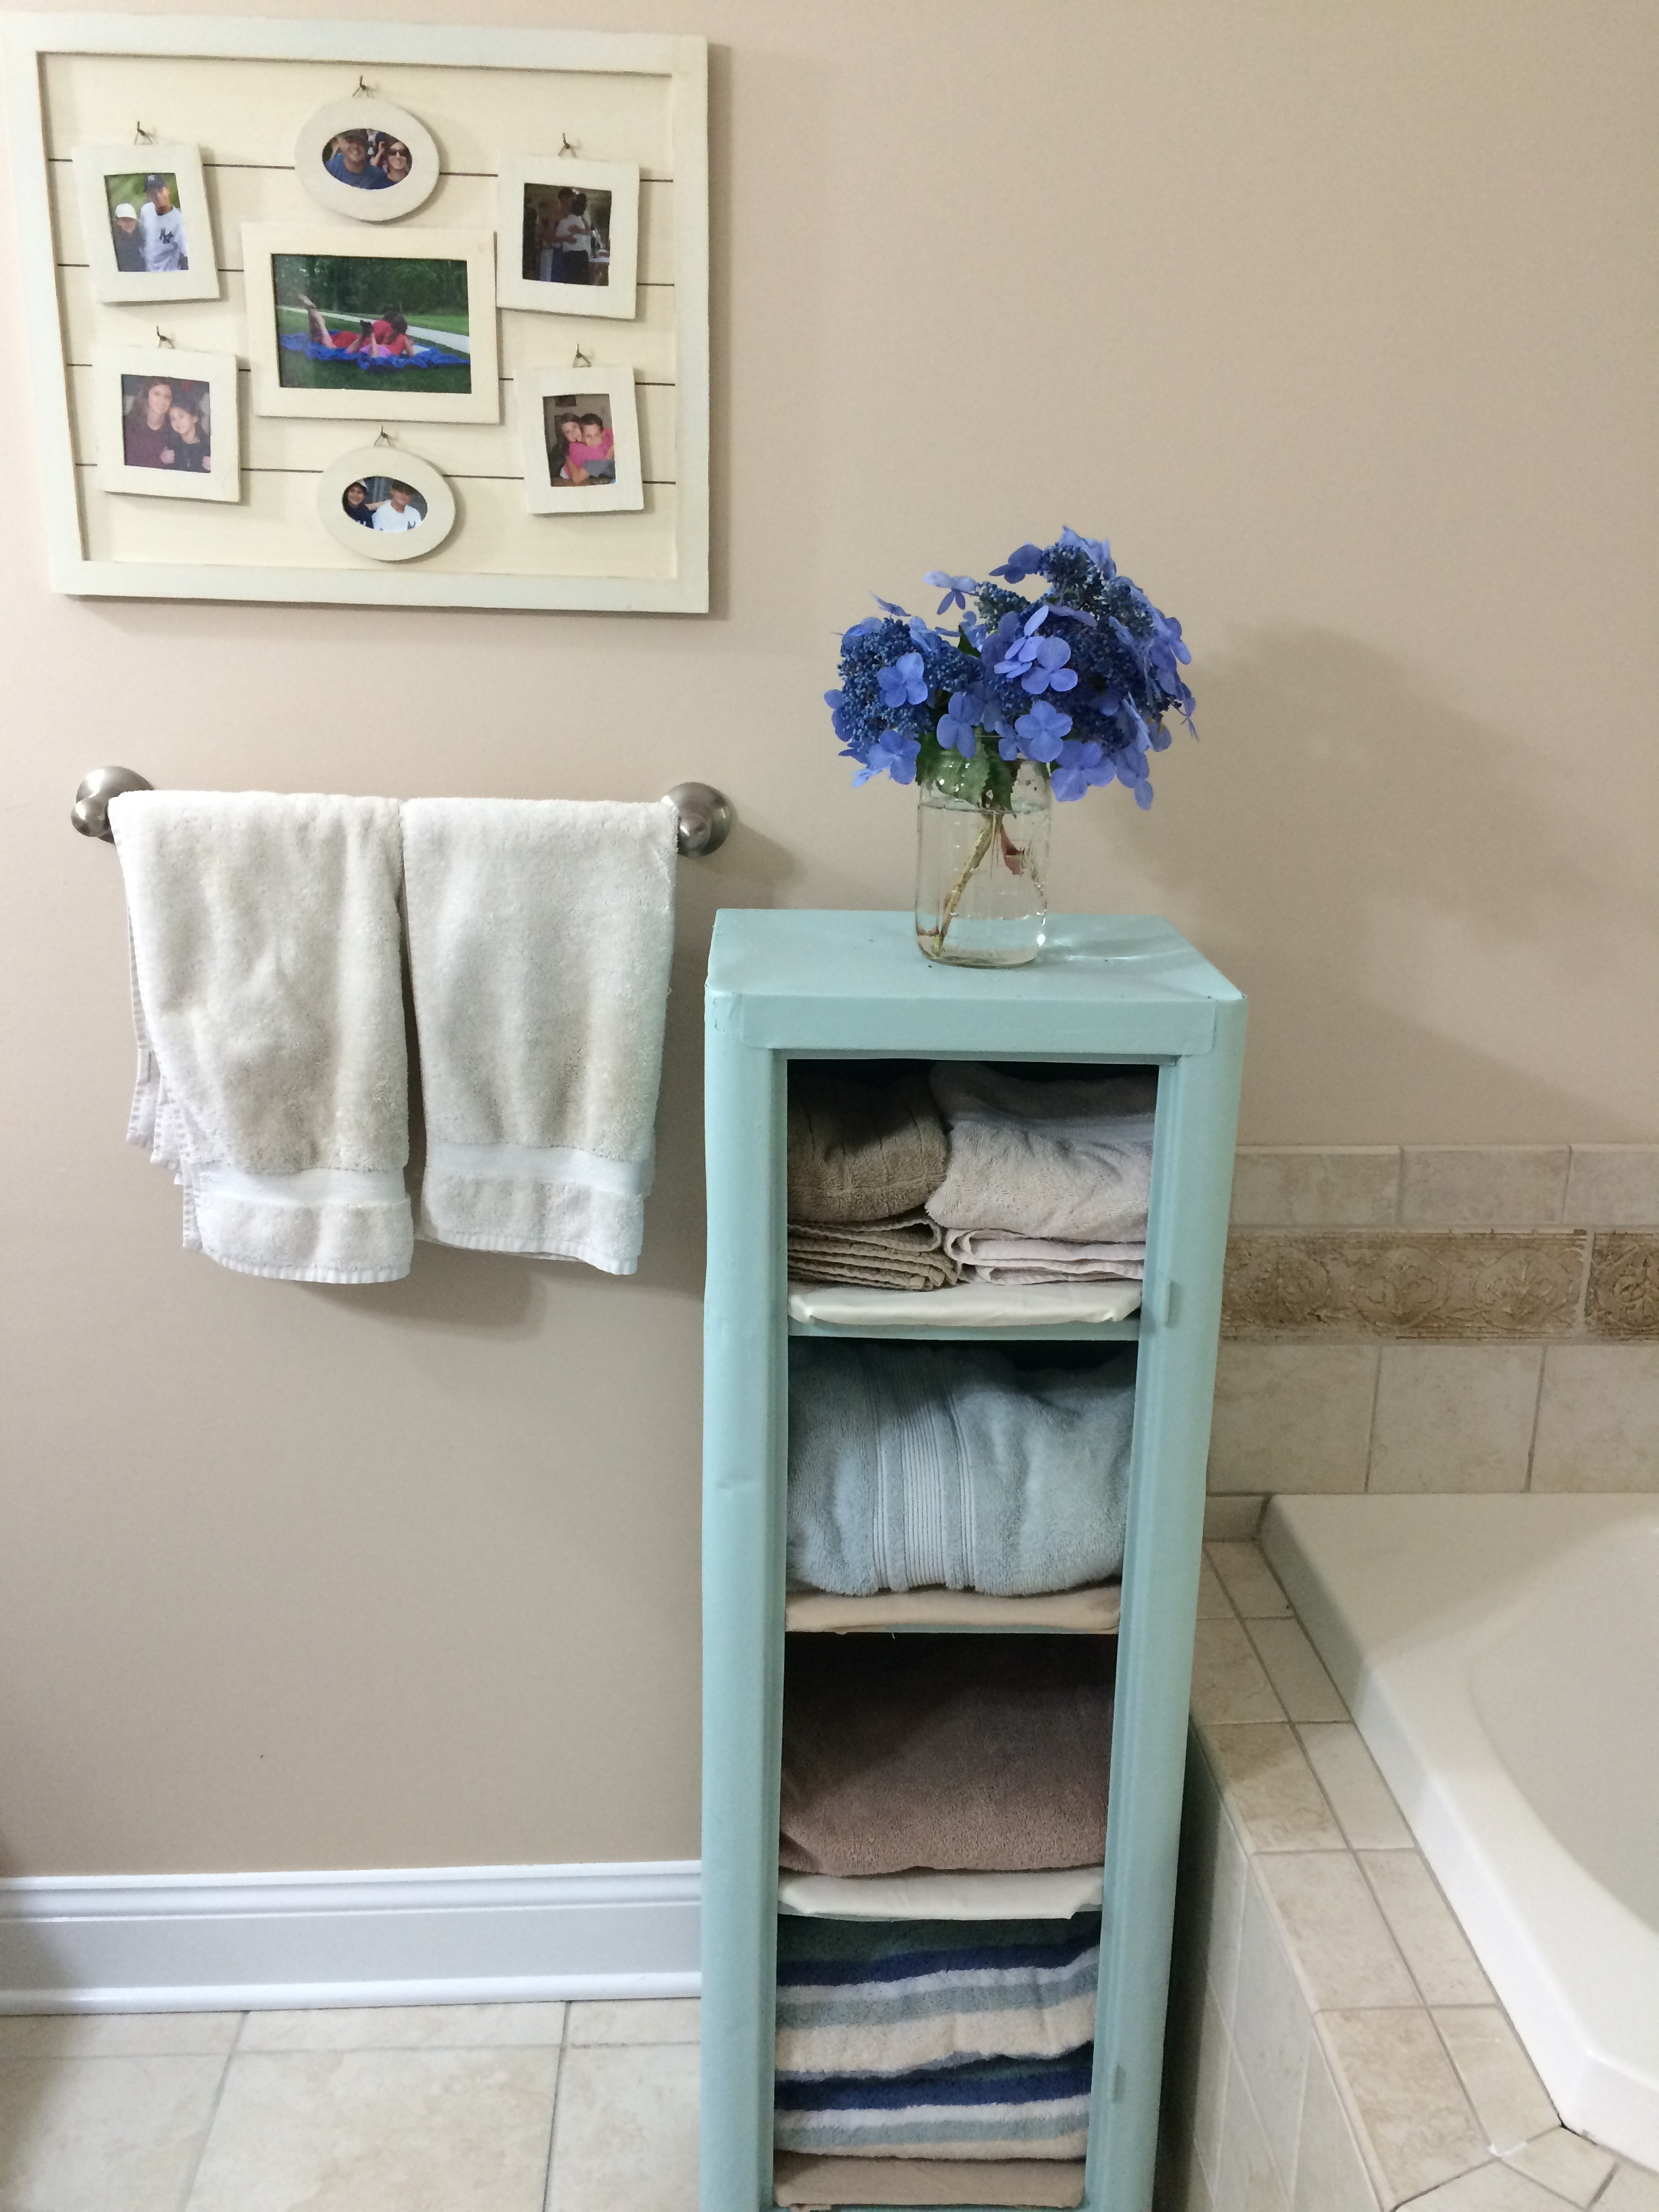
I hosed it down numerous times and cleaned out the years of outside “stuff” it had collected, including spiders and apparently most of the bee hive- I thought the owner took it out- thank goodness there were no bees in there. I liked the way the Rust-Oleum product I used on the metal box sprayed on, the trigger was easy to use and the paint sprayed very evenly. So I went to Home Depot and bought that spray paint in the color of “robin’s egg”. After using four cans of spray paint and multiple coats, it looked really good! I made shelf liners by covering and hot gluing fabric to pieces of cardboard I cut out to fit the shelves. There are hinges on the side, so I would like to put a glass door on it one day. I decided to use it in my bathroom to hold towels and because I have a lot of this color in my bathroom anyway, it fit well!
AFTER:


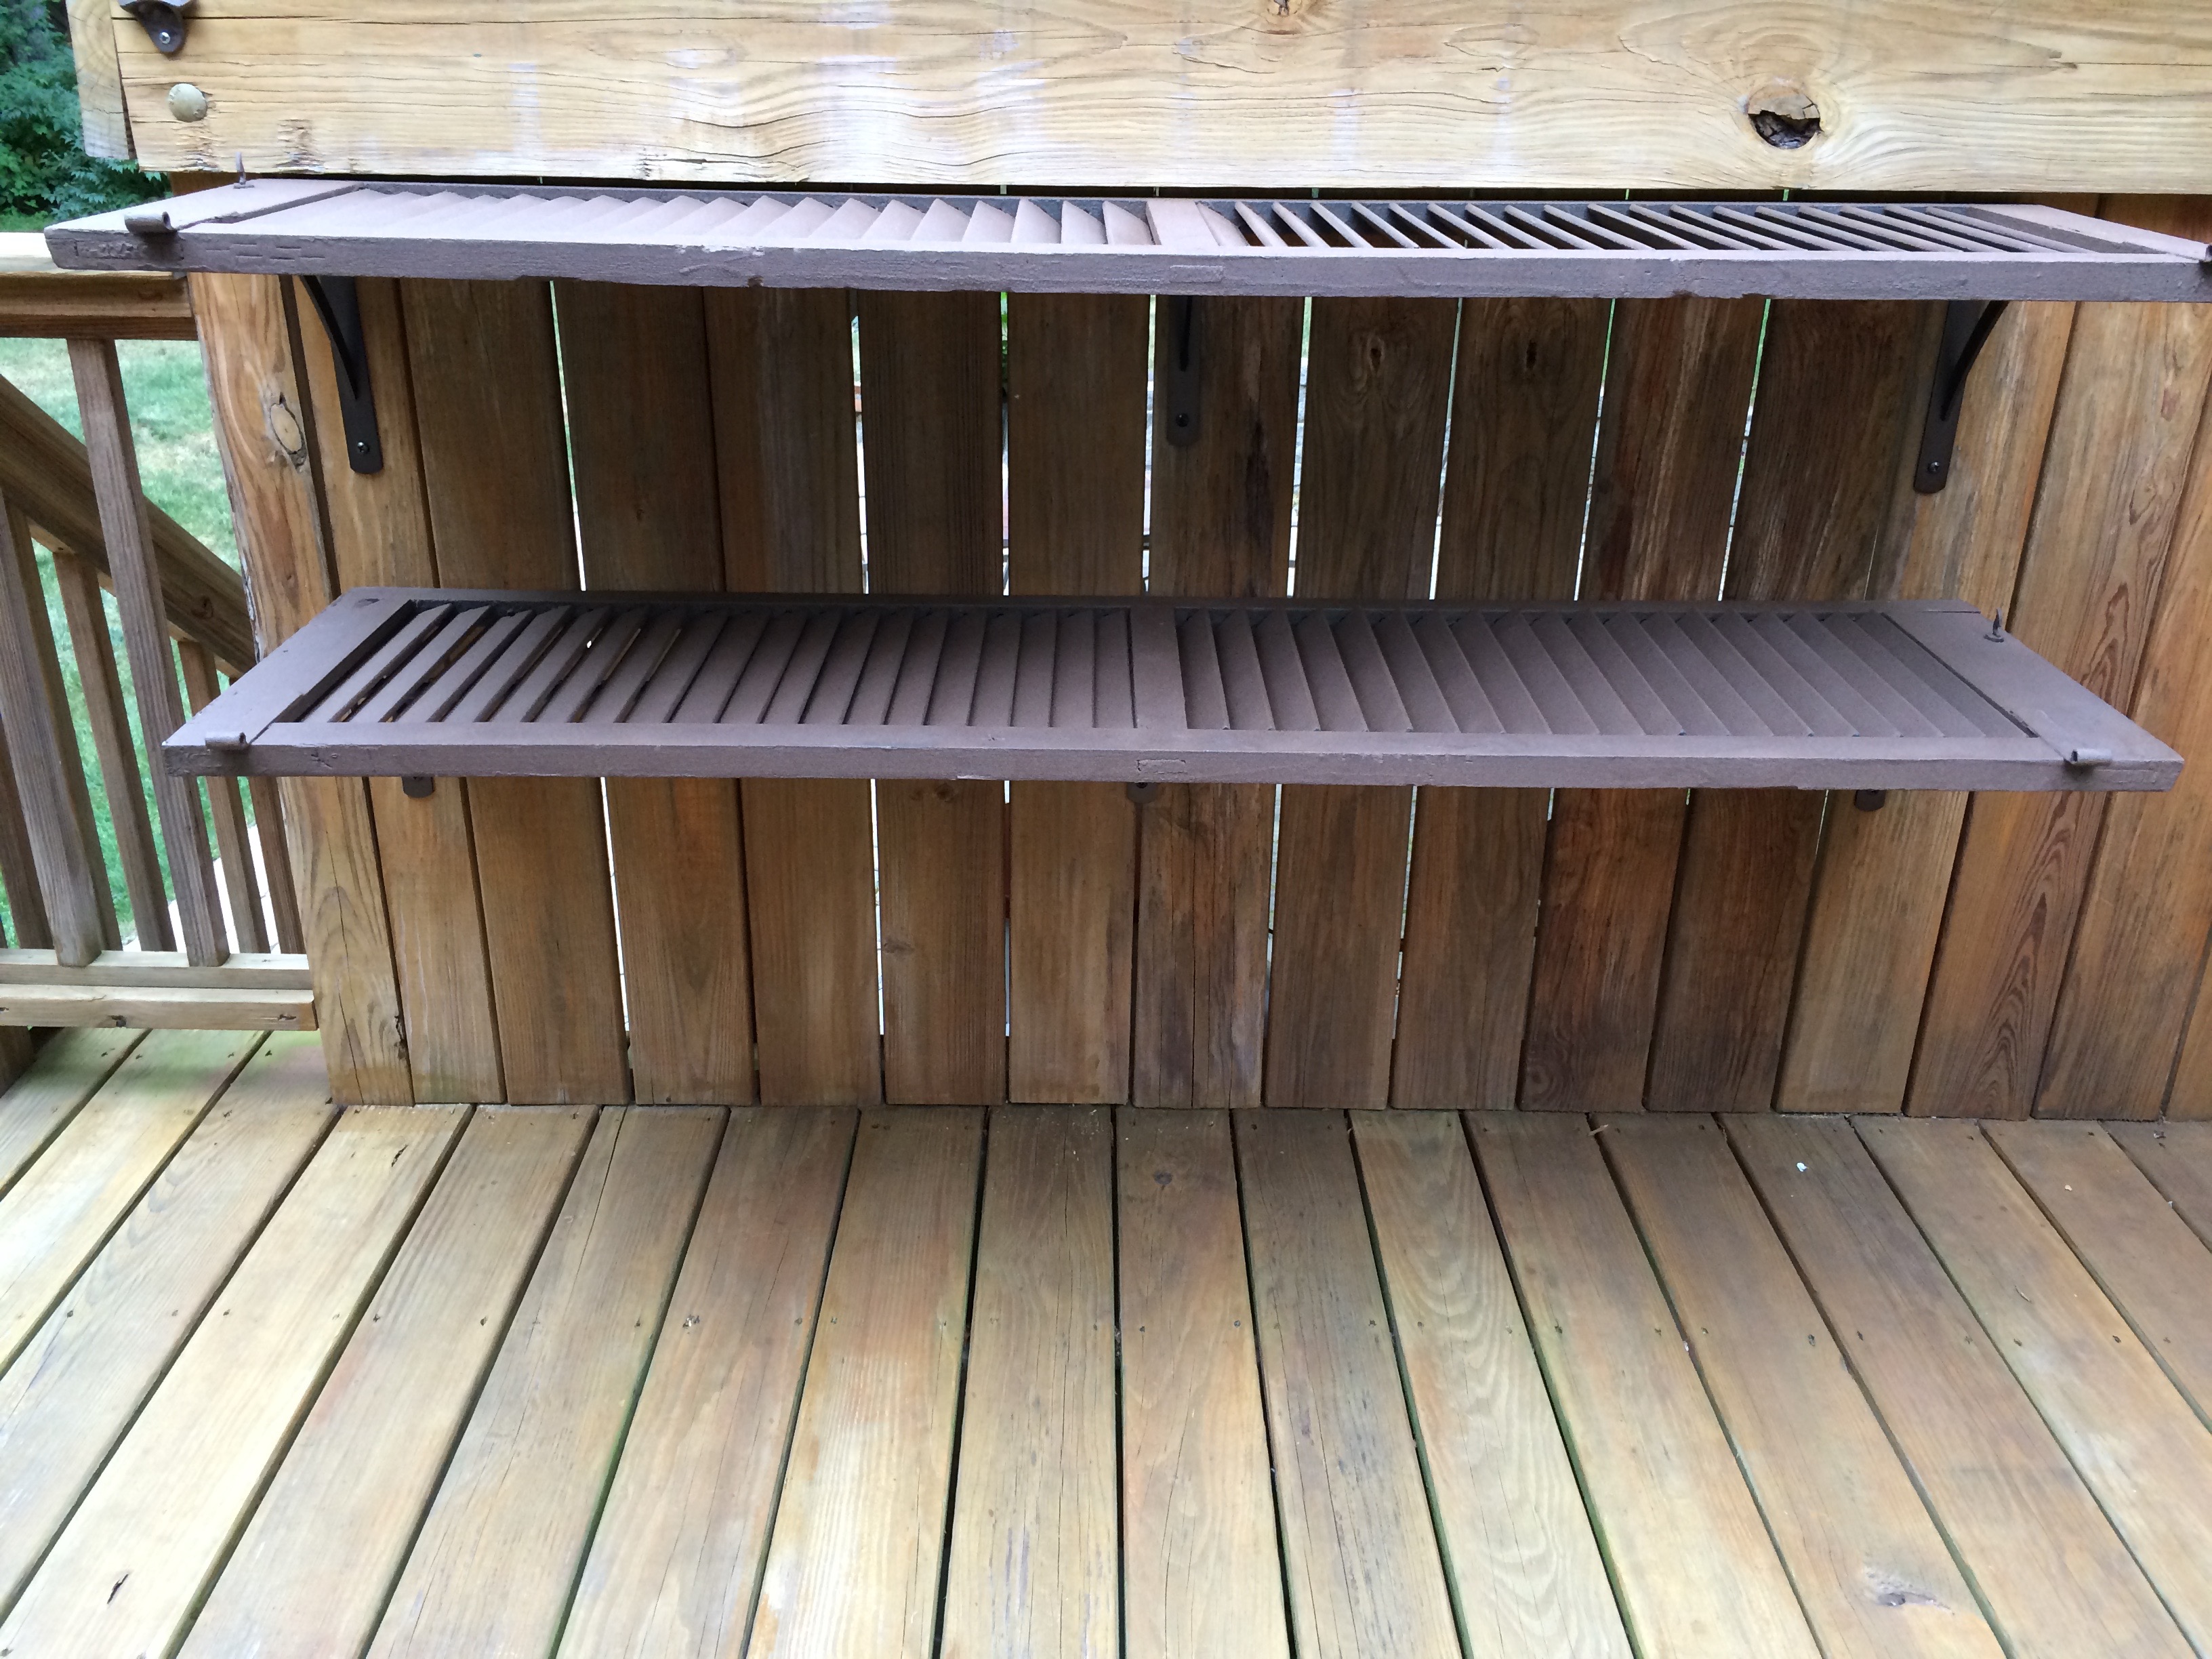
Shutter Shelves- DIY
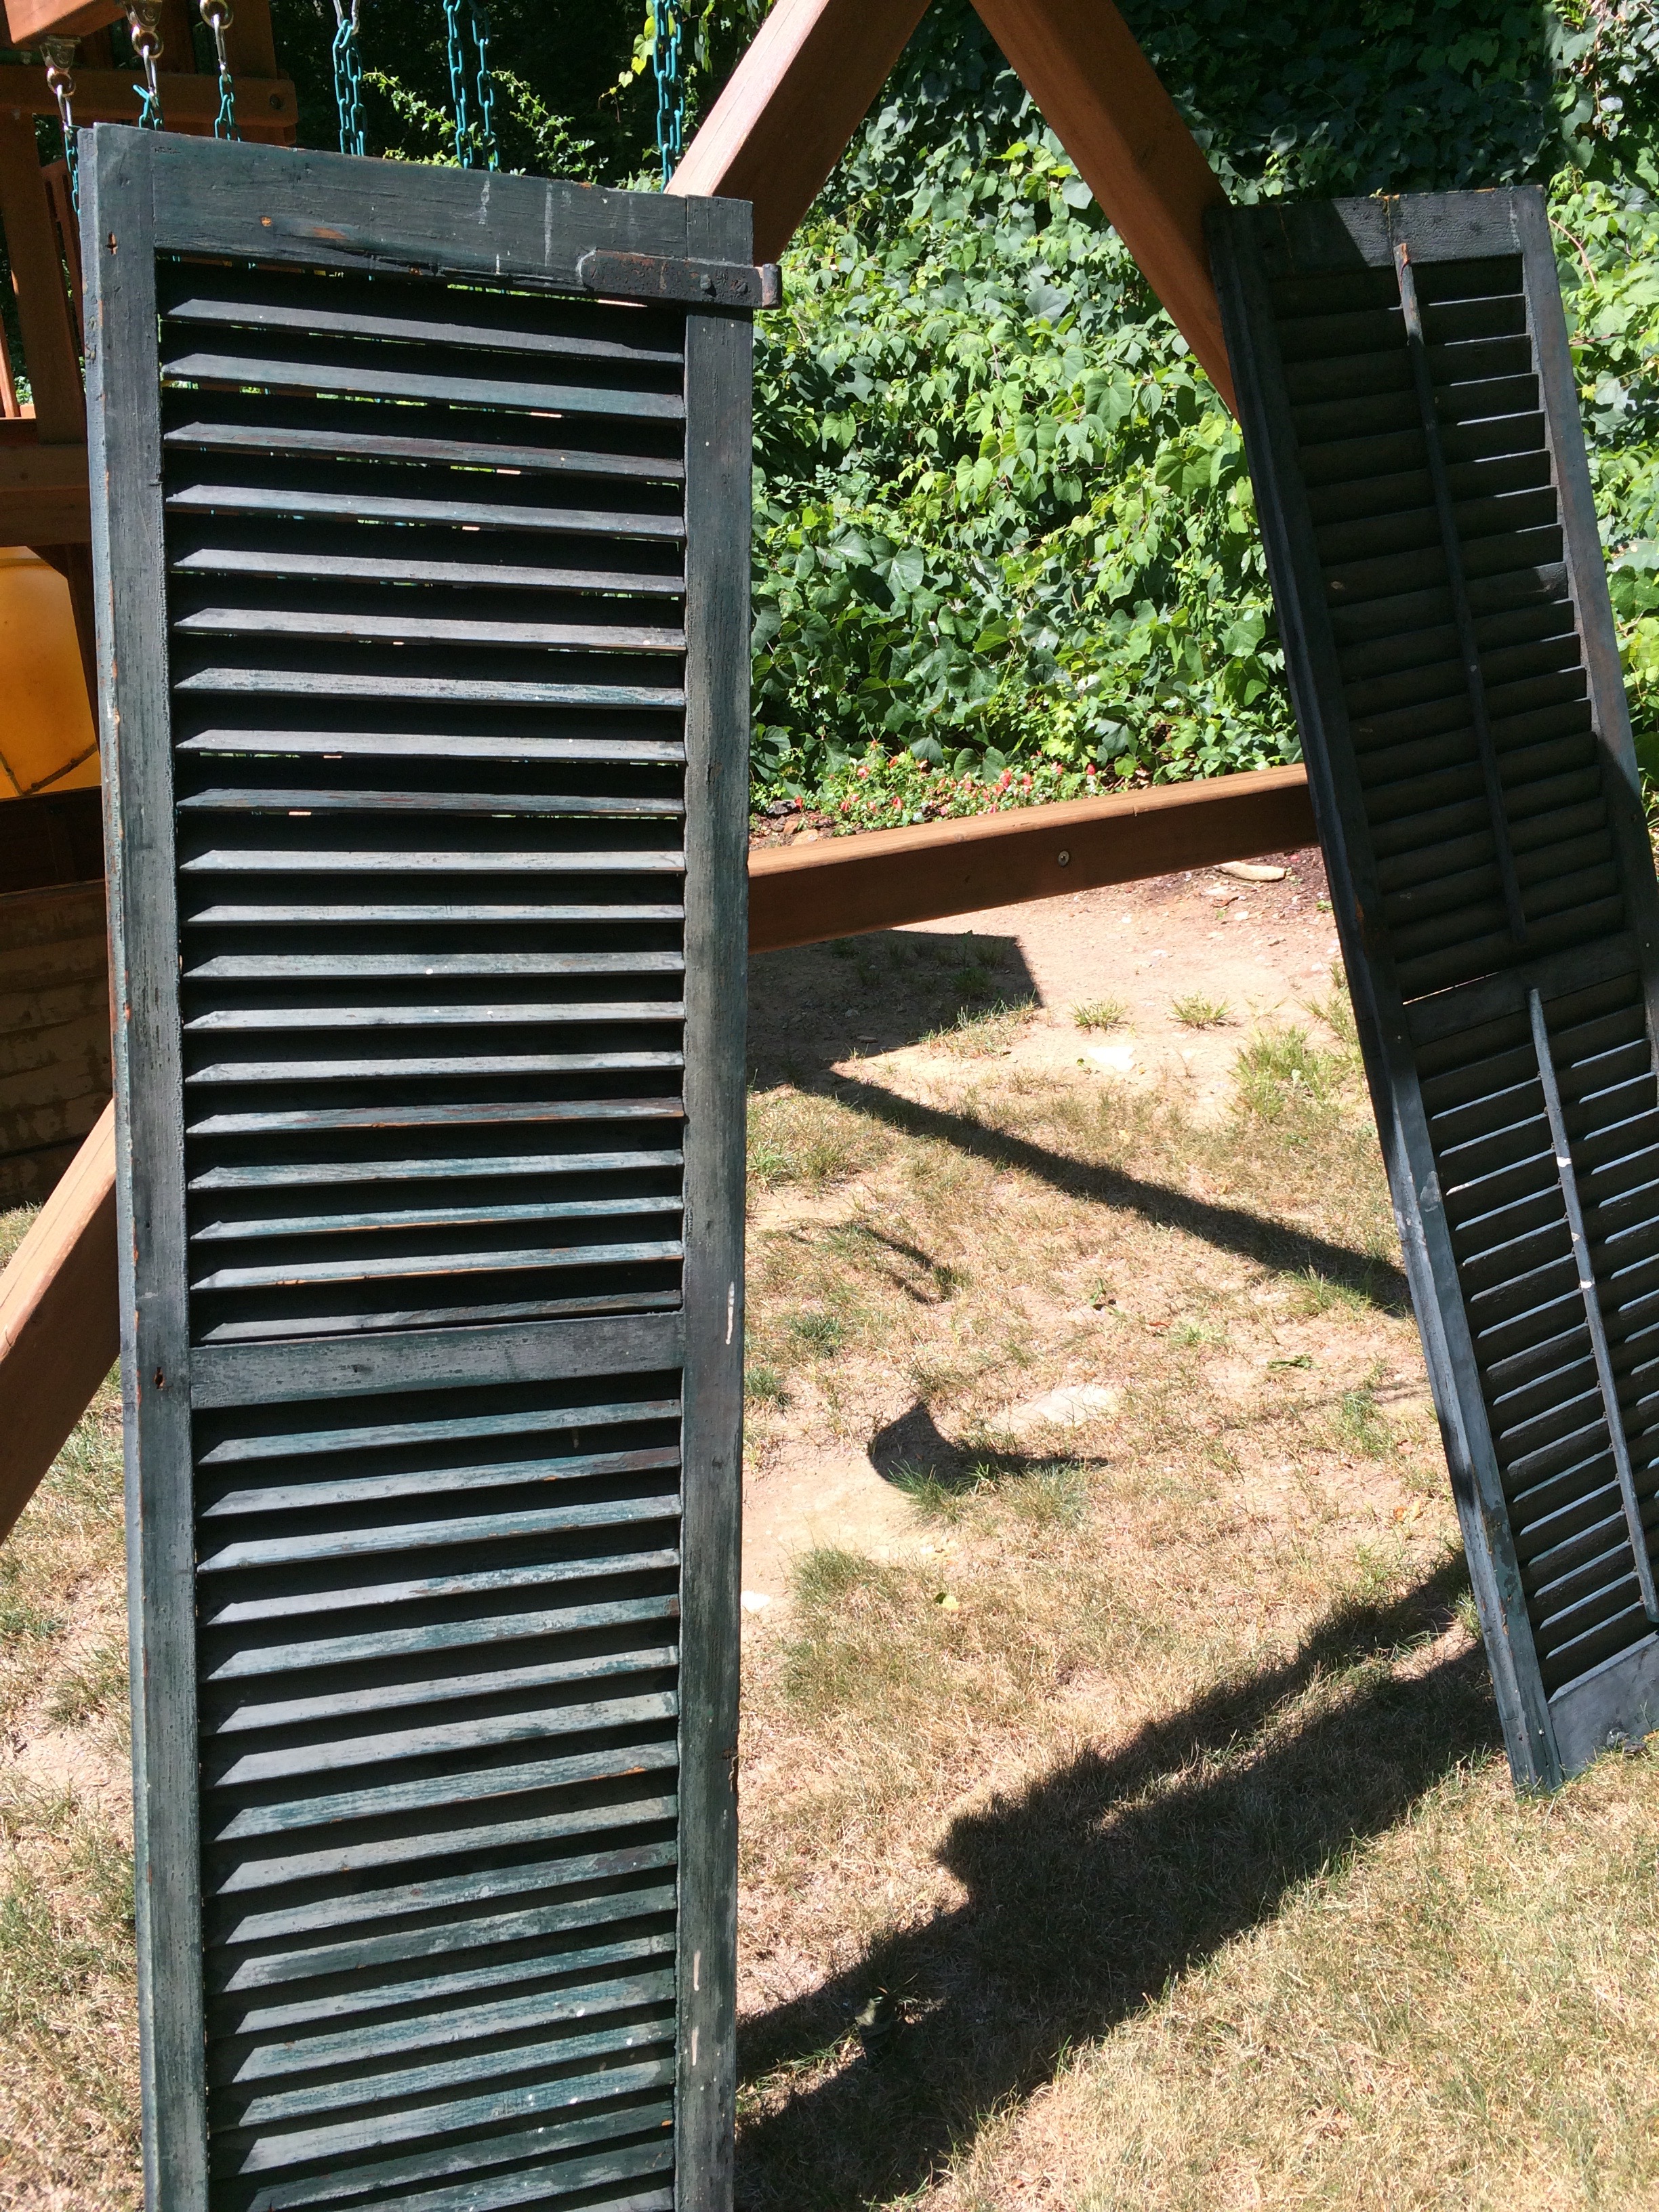
I was at a tag sale and saw old green wooden barn shutters for sale. I bought them all at a relatively cheap price with nothing specific in mind, but knew I could do something with them. At first I was going to build a picnic table using two as the top base and one each as the bench base. But then when I wasn’t convinced that would work (or I could pull it off), I decided to use two of them as shelves on our deck where we have a dead space. We took a trip to Home Depot and bought sand paper, spray paint, brackets and screws. I started by sanding them down on the front only, thinking I wouldn’t need to paint the backs. I did end up spraying the back so in hindsight I should have sanded both sides. Then I mixed some dish soap and water in a spray bottle and sprayed both sides and washed them down with the hose. They dried relatively fast in the sun.

Once dry, I applied Rustoleum spray paint. I used a lot more then I thought I would, almost 6 cans for two shutters. It was a little more than one can for each front and back and then I had to spray the sides, top and bottom and some touch up. The only issue I had with the spray paint was that in two spots it bubbled. I think because it was too humid the day I sprayed.


After the spray paint dried, we measured and attached the brackets to the wood that makes a sort of “wall” on the deck. Then laid the shutters on top and attached the brackets to the shutters. We had originally purchased two brackets, but went out and bought another to support the middle of each shelf. Once everything was in place, all screwed in and secure, we had two shelves that could be used to hold drinks, food, plates or almost anything! Despite the few mistakes along the way, all-in-all, being one of of first home DIY projects, it came out pretty well!


Wooden Box Repurposed Into Jewelry Holder
I love old wood. There’s something about it that immediately attracts me. I don’t know if it is the feeling that I might be holding old history and that it must contain a story or that I just find it intriguing. I have a lot of items in my home that I have purchased that feature repurposed old wood. I’ve picked up boxes, crates, benches, a framed chalkboard and others along the way (see some pics of items below).


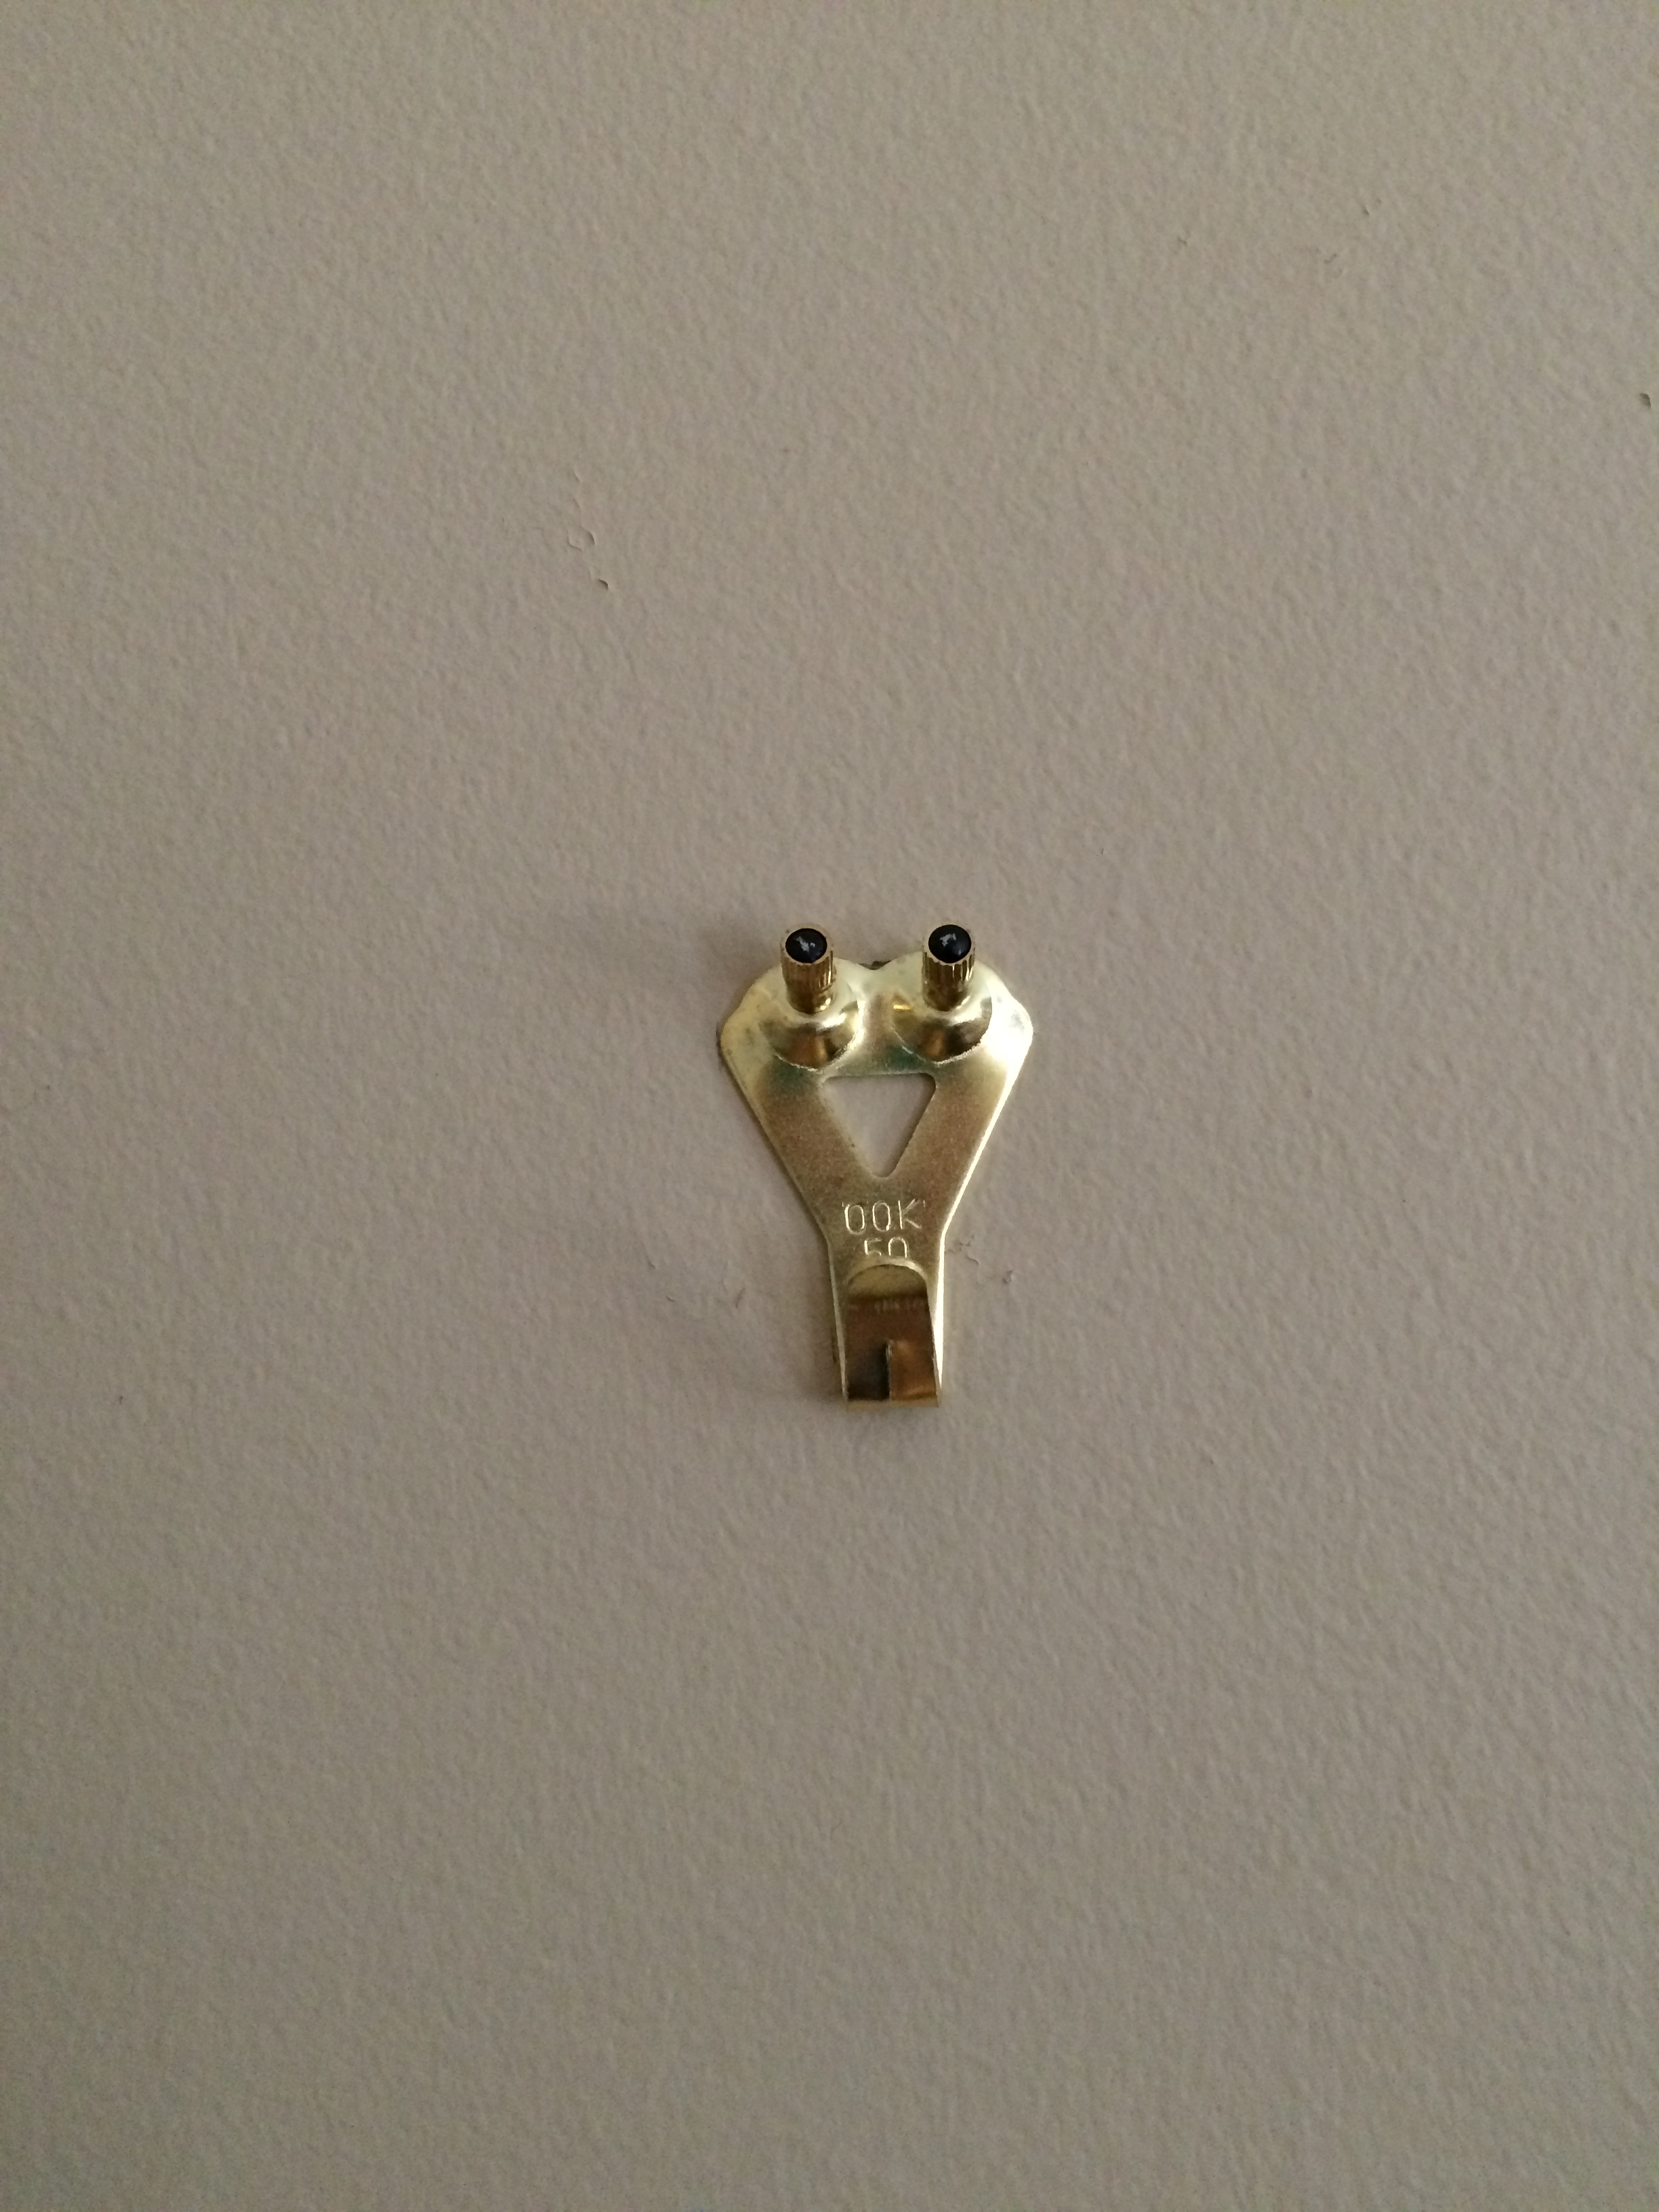
I found an old wooden box at a tag sale for $4, so without a plan bought it. I had it for a while and tried to think of uses. I used it as a purse holder and then a holder for unused picture frames, and then it just sat empty. Finally, I decided that it would make an awesome jewelry holder. I had necklaces hanging one on top of another always getting tangled, some jewelry in a jewelry box and some on a shelf. Now, this could be a place where it is all together and I can actually see it. So I went to Home Depot and got some small nails, a piece of chain and some hooks. This is where the “imperfect” part of my crafting comes in. Home Depot had the chain in silver, but not the nails and hooks, those were only in gold. I didn’t prefer them in gold, but was anxious to get the project done because it was, after all in my mind. I screwed two eye hooks on the back in the center, but towards the end of the box and attached some picture hanging wire. Then hammered two picture hooks in the wall so the box would hang evenly on two sides providing more stability than just a center hook. Then I counted my necklaces and bracelets and screwed in the screw eye hooks and tapped in the nails. I used the screw eye hooks for the necklaces and the nails for the bracelets and then hung my dangling earrings in pairs from the chain. You will see more imperfection if you look closely, I didn’t take time to measure out evenly so some don’t line up, but you can’t even tell with all the jewelry on because the necklaces and bracelets are different lengths. And there you have it….a new jewelry holder and it only cost me $13.00 to make!


